background image

Page 49

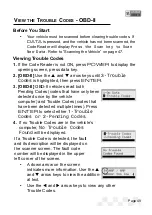
Before You Start

Your vehicle must be scanned before clearing trouble codes. If

DATA

is pressed, and the vehicle has not been scanned, the

Code Reader will display 

Press the Scan key to Scan

New Data

. Refer to “Scanning the Vehicle” on page 47.

Viewing Trouble Codes

1. 

If the Code Reader is not ON, press 

POWER

to display the

opening screen, press data key.

2. [OBD-II]

Use the 

p

and 

q

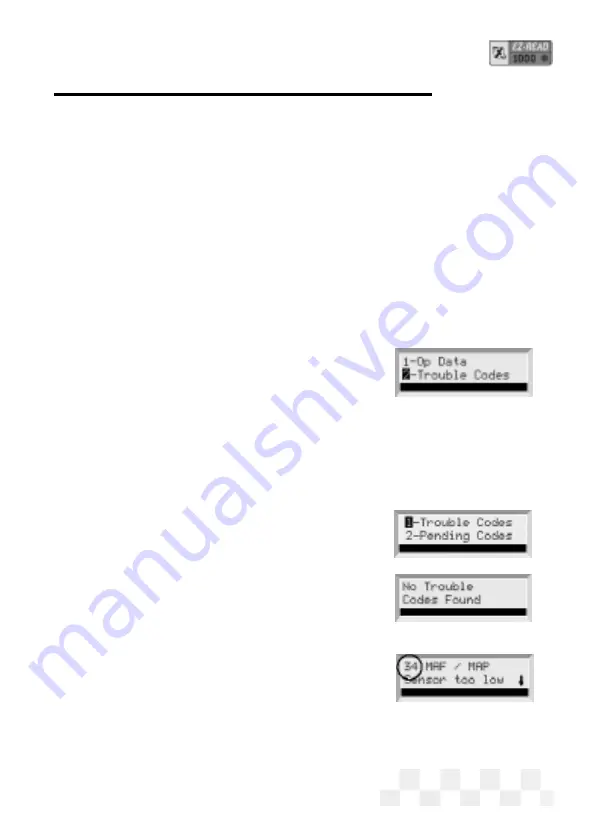
arrow keys until 

3-Trouble

Codes

is highlighted, then press 

ENTER

.

3. [OBD-II]

OBD-II vehicles read both

Pending Codes (codes that have only been

detected once by the vehicle 

computer) and Trouble Codes (codes that

have been detected multiple times). Press

ENTER

to select either 

1-Trouble

Codes or 2-Pending Codes

.

4. 

If no Trouble Codes are in the vehicle’s

computer, 

No Trouble Codes

Found

will be displayed.

If a Trouble Code is detected, the fault 

and its description will be displayed on 

the scanner screen. The fault code 

number will be displayed in the upper 

left corner of the screen.

• A down arrow on the screen 

indicates more information. Use the 

p

and 

q

arrow keys to view the addition-

al text.

• Use the 

t

and 

u

arrow keys to view any other 

Trouble Codes.

V

IEW THE

T

ROUBLE

C

ODES

- OBD-II

Summary of Contents for EZ-READ

Page 1: ...USERS MANUAL EZ READ REVISION 2 1...

Page 2: ...n regarding available recycling and or disposal options Use and Care Stay alert pay attention to what you are doing and use common sense when operating the EZ Read Several operational tests require th...

Page 3: ...Data Ford 21 View the Memory Trouble Codes Ford 22 Clear Ford Memory Trouble Codes 23 Troubleshooting What to do When the EZ Read Displays a Fault Trouble Code 24 What to do for a Vehicle Is Not Respo...

Page 4: ...oXray designed this elegant EZ Scan tool with capabilities that are the best value on the market today The compact design has received proprietary patents and makes these Code Readers so simple and ea...

Page 5: ...pliant vehicles Freeze Frame Indicate Display Readiness Test Status Show Current Trouble Codes Show Pending Trouble Codes Text Styles Used In This Manual POWER text in this font is used to designate a...

Page 6: ...e right side of the screen to indicate text above and or below the current screen Use the p and q arrow keys to view the text NOTE During the procedures in this manual display all the available menu o...

Page 7: ...Make sure the batteries are put in according to the dia gram on the bottom of the battery compartment Refer to the illustration below Figure 2 Battery Compartment If the screen becomes too dim to vie...

Page 8: ...must be configured for your specific vehicle Don t worry it only takes a few steps 1 Press POWER to turn the unit ON then press CONFIG 2 Make sure 1 Config Unit is displayed on the screen then press E...

Page 9: ...djustment 6 Press the CONFIG or ENTER key to save settings and return to the Opening screen NOTE If scanner is left in direct sunlight the Display can turn completely black Should this happen put the...

Page 10: ...cturer Specific Connector Blue For 1994 1995 GM OBD I vehicles with a 16 pin connector as well as for future OBD II functions to be released at a later date OBD II Generic Connector Yellow This standa...

Page 11: ...cated behind the kick panels ashtray or radio Ford Chrysler 83 95 The connector on Ford and Chrysler vehicles is usually located in the engine compartment along the outside perimeter of the engine com...

Page 12: ...he scanner cable connector NOTE Make sure the scanner cable and vehicle connectors are always properly seated during all test procedures 4 Insert the EZ Read cable connector into the top of the scanne...

Page 13: ...canned the vehicle computer and the EZ Read EZ Read will initialize do a protocol check then do Readiness Tests to make sure the vehicle emission control system is working correctly VPW PWM ISO 9141 a...

Page 14: ...iness Test will be displayed followed by its status Status is either Completed Not Completed or Not Supported A down arrow on the screen indicates other test results Use the p and q arrow keys to view...

Page 15: ...Trouble Codes 3 OBD II OBD II vehicles read both Pending Codes codes that have only been detected once by the vehicle computer and Trouble Codes codes that have been detected multiple times Press ENT...

Page 16: ...y Press the Scan key to Scan New Data Refer to Scanning the Vehicle on page 12 Clearing Trouble Codes 1 Make sure the EZ Read EZ Read cable is correctly connected to the EZ Read and to the vehicle the...

Page 17: ...operat ing temperature 2 Make sure ALL electrical loads air condi tioning radio blower fan etc are OFF 3 Connect the EZ Read scanner cable to the scanner and to the vehicle EEC IV computer connector t...

Page 18: ...re to read these instructions completely before the KOER test is started Several user interactions may be required during the scan If these steps are not completed correctly the engine computer will s...

Page 19: ...highlighted then press ENTER 5 When the scanner is ready to scan the vehicle ENTER to Scan will be displayed on the screen Press ENTER to start scanning the vehicle computer sensors Pressing SCAN aga...

Page 20: ...ompleted the KOER scan the Scan Successful message will be displayed on the screen followed by the opening screen If these steps are not completed correctly the engine computer will store a Trouble Co...

Page 21: ...load the data into a computer 1 Press POWER to display the EZ Read scanner opening screen 2 Press DATA to display the Data menu Make sure 1 KOEO Codes is highlighted then press ENTER 3 If no faults a...

Page 22: ...A to display the Data menu Use the p and q arrow keys until 2 Memory Codes is highlighted then press ENTER 3 If no Memory Codes are in the vehicle s computer code 11 or code 111 System Pass will be di...

Page 23: ...can on page 18 Clearing Trouble Codes 1 Make sure the EZ Read scanner cable is correctly connected to the scanner and to the vehicle Turn the vehicle ignition key OFF for at least 10 seconds turn the...

Page 24: ...k the connection to the sensor 2 Look for obvious damage to any wires or vacuum hoses 3 Locate a service or repair manual to look up the troubleshooting tree for that fault code 4 Follow the tree to d...

Page 25: ...this prob lem run your EZ Read for approximately 2 hours to run off the high voltage causing the problem It will be necessary to press a key occasionally to override the EZ Read EZ Read power miser f...

Page 26: ...D II Isuzu OBD II Kia OBD II Mazda OBD II Mitsubishi OBD II Nissan OBD II Subaru OBD II Suzuki OBD II Toyota OBD II 2 System Config 1 SAE Metric 2 Capture Time 3 User Upgrade Serial Number Select Upgr...

Page 27: ...for Upgrade 2 Oxygen Tests 1 Contact AutoXray for Upgrade 3 Readiness Tests 4 Test Results 1 Contact AutoXray for Upgrade DATA OBD II 1 Operation Data 2 Freeze Frame Data 3 Trouble Codes 1 Trouble Co...

Page 28: ...mer Service Representatives will step you through the process see our web site or contact AutoXray for current prices Do the following to UPGRADE your EZ Read 1 Press CONFIG from the initial screen 2...

Page 29: ...more benefits Free 2 year extended warranty coverage Free 3 year extended warranty coverage Free unlimited technical support Free unlimited technical support Free minor software updates over the Inter...

Page 30: ...ystem Information NOTE Press CONFIG at any time during the following steps to display the initial screen 1 Press CONFIG from the initial screen 2 Use the p and q keys to display 5 System Info on the s...

Page 31: ...s usually amber or red in color Each OEM manufacturer may call it by a different name The computer must have the capability to store Diagnostic Trouble Codes DTCs When a fault occurs the MIL will illu...

Page 32: ...d specifies its location in the vehicle Generic scan tool Generic emission related Diagnostic Trouble Codes DTC and a very specific Malfunction Indicator Light MIL illumination protocol One very impor...

Page 33: ...reasons for return the circumstances under which the defect became apparent and the date the defect occurred or if not known the date the defect was discovered 9 If a returned Product is found not to...

Page 34: ...1995 Ford EEC IV vehicles Chrysler OBD I Scanner for 1983 1995 Chrysler SCI vehicles and 1991 1995 Jeep vehicles ACCESSORIES UPGRADES PC Link Kit enables your EZ Read to interface directly with your P...

Page 35: ...in for a new EZ Read EZ Read Internet Access Visit our Internet web site at www autoxray com for the latest products accessories upgrades and available updates Contact us by email at support autoxray...

Page 36: ...Page 36 NOTES...

Page 37: ...Page 37 NOTES...

Page 38: ...uthority for information regarding available recycling and or disposal options Use and Care Stay alert pay attention to what you are doing and use common sense when operating the Code Reader Several o...

Page 39: ...ode 51 What to do for a Vehicle Is Not Responding Message 51 Screen Contrast Problems 52 How to Reset the Code Reader 52 Code Reader Screen Menu Trees 53 Upgrade Update Specifications Code Reader Upgr...

Page 40: ...AutoXray designed this elegant EZ Read tool with capabilities that are the best value on the market today The compact design has received proprietary patents and makes these Code Readers so simple and...

Page 41: ...ons of modes 1 7 of the OBD II J1978 scan tool specification including Freeze Frame of data status Display Monitoring Tests and Results Show Pending Trouble Codes Text Styles Used In This Manual POWER...

Page 42: ...the right side of the screen to indicate text above and or below the current screen Use the p and q arrow keys to view the text NOTE During the procedures in this manual display all the available menu...

Page 43: ...the diagram on the bottom of the battery compartment Refer to the illustration below Figure 2 Battery Compartment If the screen becomes too dim to view the batteries need to be replaced Replace all f...

Page 44: ...ss CONFIG 2 Make sure 1 Config Unit is displayed on the screen then press ENTER 3 Use the p and q arrow keys until the correct vehicle manufacturer name is highlighted then press ENTER to select it se...

Page 45: ...ric The EZ Read Code Reader can be set up to display in SAE or Metric units The default setting is SAE Go to Section 4 if you do not need to change the display units 1 To change the unit of measure pr...

Page 46: ...w autoxray com 2 Make sure that all the pins are straight and that the connecting surfaces are free of oils grease and moisture CAUTION Do not force the cable connector into the Code Reader or into th...

Page 47: ...o make sure the vehicle emission control system is working correctly VPW PWM ISO 9141 and Keyword 2000 protocols are all supported 4 The Code Reader will indicate the MIL sta tus Malfunction Indicator...

Page 48: ...st will be displayed followed by its status Status is either Completed Not Completed or Not Supported A down arrow on the screen indicates other test results Use the p and q arrow keys to view these o...

Page 49: ...th Pending Codes codes that have only been detected once by the vehicle computer and Trouble Codes codes that have been detected multiple times Press ENTER to select either 1 Trouble Codes or 2 Pendin...

Page 50: ...earing Trouble Codes 1 Make sure the EZ Read Code Reader cable is correctly connected to the Code Reader and to the vehicle the engine is OFF and the vehicle ignition key is ON then press POWER press...

Page 51: ...k store or library 1 Check the connection to the sensor 2 Look for obvious damage to any wires or vacuum hoses 3 Locate a service or repair manual to look up the troubleshooting tree for that fault co...

Page 52: ...encounter this problem run your Code Reader for approximately 2 hours to run off the high voltage causing the problem It will be necessary to press a key occasionally to override the EZ Read Code Rea...

Page 53: ...Mazda OBD II Mitsubishi OBD II Nissan OBD II Subaru OBD II Suzuki OBD II Toyota OBD II 2 System Config 1 SAE Metric 2 Capture Time 3 User Upgrade Serial Number Select Upgrade Seed 4 Download Connect...

Page 54: ...act AutoXray for Upgrade 3 Readiness Tests 4 Test Results 1 Contact AutoXray for Upgrade DATA OBD II 1 Operation Data 2 Freeze Frame Data 3 Trouble Codes 1 Trouble Codes 2 Pending Codes 4 Clear Data 5...

Page 55: ...to UPGRADE your Code Reader 1 Press CONFIG from the initial screen 2 Use the p and q keys to display 3 User Upgrade on the screen then press ENTER 3 Write down the Serial Number for your Code Reader...

Page 56: ...e unlimited technical support Free minor software updates over the Internet Free minor software updates over the Internet Receive information about new products Receive information about new products...

Page 57: ...ress ENTER 3 Software Version information will be displayed on the screen Press ENTER to view the next screen 4 The Code Reader Serial Number will be displayed on the screen Press ENTER to view the ne...

Page 58: ...change Capture Time to the desired number between 500 and 5000 ms then press ENTER to select the choice or press the CONFIG Key to Cancel and return to the initial screen NOTE 500 milliseconds is one...

Page 59: ...name The computer must have the capability to store Diagnostic Trouble Codes DTCs When a fault occurs the MIL will illuminate and a DTC is stored in the computer s memory OBD I requires monitoring of...

Page 60: ...icator Light MIL illumination protocol One very important part of the OBD II requirements is that technical service information for emissions related components and systems which could affect the vehi...

Page 61: ...ccurred or if not known the date the defect was discovered 9 If a returned Product is found not to be defective AutoXray shall return the product and invoice for the costs of testing and return shipme...

Page 62: ...C Link Kit enables your Code Reader to interface directly with your PC and AutoXray through the Internet Includes Serial Interface cable and CD ROM software Carrying Case a rugged impact resistant nyl...

Page 63: ...t our Internet web site at www autoxray com for the latest products accessories upgrades and available updates Contact us by email at support autoxray com Page 63 ADDITIONAL PRODUCTS AND ACCESSORIES C...

Page 64: ...Page 64...

Reviews: