


Help: 888-426-5001
F I G u R e 12 - a
F I G u R e 12 - B
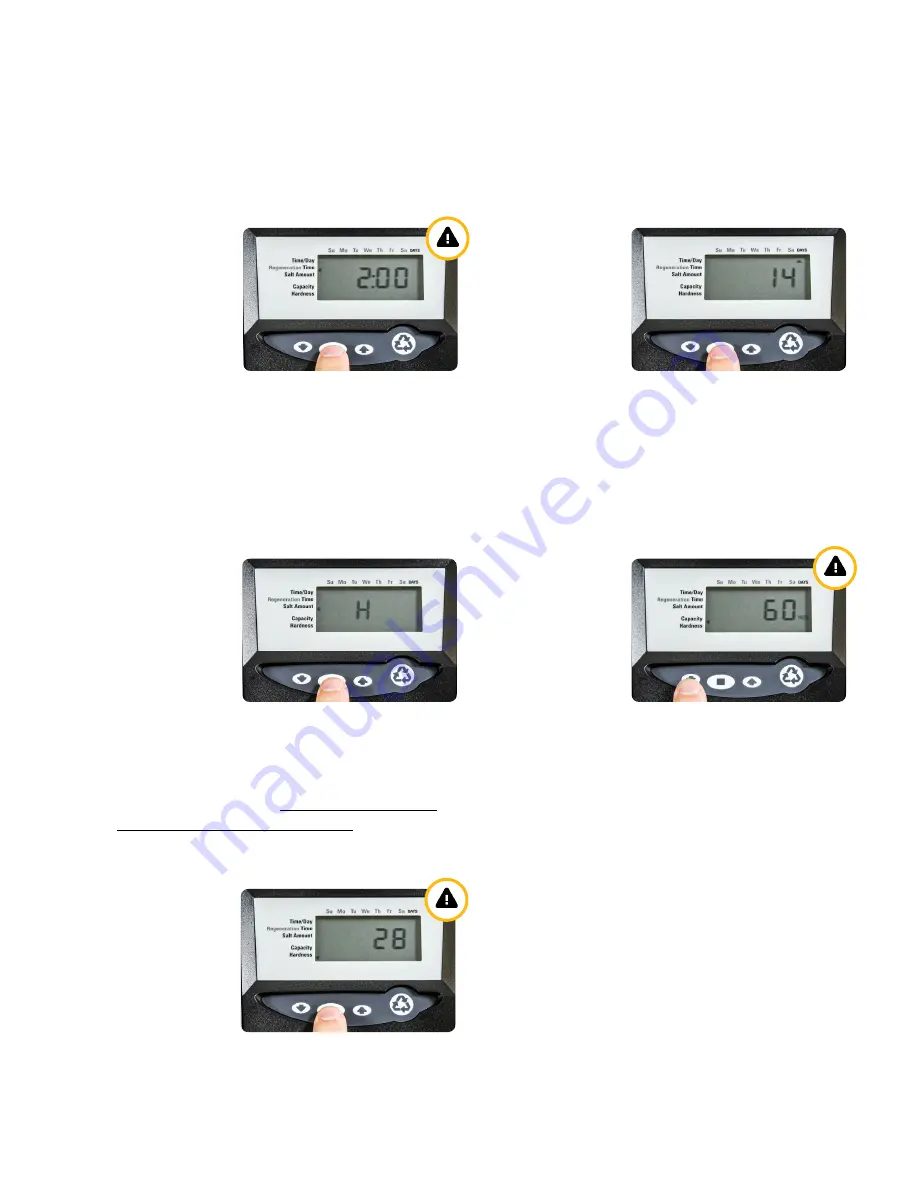
7) Now you will see the
Regeneration Time
. Press
the SET to enter edit mode and use the UP or
DOWN buttons to change to 2:00 AM.
i
note
that there is a difference between “AM” and
”PM.”
Then press the SET button to make this
setting active as shown in Figure 12-A
8) Next is the
Calendar Override
. This overrides the
meter triggered regeneration by initiating a regen-
eration after a set number of days if the water
usage alone does not first initiate it. Press the SET
button to enter edit mode, use the UP button to
change to 14 days, and press the SET button to
make this setting active as shown in Figure 12-B
F I G u R e 12 - C
F I G u R e 12 - d
9) You will next see the
Salt Setting
. Press the SET
button to begin editing, choose L for 0 - 10 gpg,
S for 10 - 20 gpg, and H for 20+ gpg. Use the UP
or DOWN buttons to make the appropriate chang-
es to the salt setting and press the SET button to
make this setting active (Figure 12-C)
10) You will next see the
Capacity
on the screen.
i
dO nOT ChAnGe ThIS VALUe.
This
number is based on your salt setting chosen
above and should not be changed.
Press the
dOWn button
to advance to the next setting
(Figure 12-D)
11) Next is the hardness level.
i
Press the SET
button to enter edit mode, use the UP or DOWN
buttons to adjust to the
on page 2/calculated on Page 4
, and press the
SET button to make this setting active as shown
in Figure 12-E
12) The display should now show the time of day
and the amount of gallons remaining. This display
will switch between these valves about every 10
seconds. Note that there is a “PM” light indicator
to differentiate between “AM” and “PM” times.
F I G u R e 12 - e


