background image

A 5 8 0 0

7

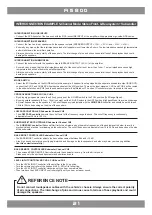
ANSCHLUSSBEISPIEL 5-Kanal-Modus: Stereo Front- & Rear Subwoofer

FL/FR

Stereo Cinch-Audiokabel (FL / FR und RL / RR) vom Steuergerät mit

LINE INPUT CH1 / CH2 und CH3 / CH4 des Verstärkers verbinden

Stereo Cinch-Audiokabel (SUB OUT) vom Steuergerät mit dem LINE INPUT CH5 verbinden

Lautsprecher

vorne / links

2 – 8 Ohm

Lautsprecher
hinten / links
2 – 8 Ohm

RR/RL

Schalterstellung CH1/2 = HP oder FULL

und CH3/4 = HP oder FULL

MODE = 5 CH

SUB-OUT

Subwoofer

1 – 8 Ohm

Verbinden Sie keine Lautsprecher-Kabel mit der Fahrzeugkarosserie. Achten Sie zudem stets auf

die korrekte Polung der Anschlüsse. Das Vertauschen von Plus und Minus hat einen Totalverlust

der Basswiedergabe zur Folge und kann unter Umständen die Lautsprecher beschädigen.

HINWEIS!

Lautsprecher

vorne / rechts

2 – 8 Ohm

Lautsprecher
hinten / rechts
2 – 8 Ohm

Bass-Fernbedienung mittels beiliegendem
Kabel mit dem Anschluss am Verstärker
verbinden (REMOTE)

SIGNALEINGÄNGE & BASS REMOTE

LAUTSPRECHERANSCHLÜSSE

Summary of Contents for A5800

Page 1: ......

Page 2: ...zalisten durchf hren am besten von einer Service Werkstatt die auf die Wartung und Reparatur Ihres Fahrzeugs spezialisiert und mit der Technik des Fahrzeugs vertraut ist Nach der Installation sollte u...

Page 3: ...E I S E 3 BITTE BEACHTEN SIE DIE FOLGENDEN HINWEISE VOR INBETRIEBNAHME DAS GER T NICHT AN STELLEN EINBAUEN AN DENEN ES HOHER FEUCHTIGKEIT ODER STAUB AUSGESETZT IST Bauen Sie das Ger t so ein dass es v...

Page 4: ...4 3 Suchen Sie zun chst einen geeigneten Einbauort f r den Verst rker Achten Sie darauf dass ausreichend Platz f r die Installation der Kabel vorhanden ist und diese nicht geknickt werden sowie eine...

Page 5: ...nstallationsarbeiten ein EINSCHALTLEITUNG REM Verbinden Sie den Schaltausgang z B f r automatische Antenne oder die Steuerleitung REM des Steuerger tes Autoradio mit dem Remote Anschluss des Verst rke...

Page 6: ...gssignal vom LINE INPUT CH1 2 und CH3 4 auch auf den Subwooferkanal 5CH geleitet Das Subwoofer Signal wird hierbei entsprechend herausgefiltert Somit sind nur zwei Stereo Cinch Kabel n tig Auf die Ver...

Page 7: ...g CH1 2 HP oder FULL und CH3 4 HP oder FULL MODE 5 CH SUB OUT Subwoofer 1 8 Ohm Verbinden Sie keine Lautsprecher Kabel mit der Fahrzeugkarosserie Achten Sie zudem stets auf die korrekte Polung der Ans...

Page 8: ...nnfrequenz sollte bei 10Hz 150Hz je nach Gr e des Systems liegen und ist ber den HIGH PASS Regler Hochpassfilter einstellbar TIEFPASSFILTER Subwooferkanal CH5 Der LOW PASS Regler Tiefpassfilter bestim...

Page 9: ...CH3 4 HP oder FULL MODE 4 CH Subwoofer 1 8 Ohm Verbinden Sie keine Lautsprecher Kabel mit der Fahrzeugkarosserie Achten Sie zudem stets auf die korrekte Polung der Anschl sse Das Vertauschen von Plus...

Page 10: ...br ckter Kanal Rechts Bei gr eren Lautsprechersystemen ab 20cm k nnen Sie die Vollbereichs Stellung FULL w hlen Bei kleineren Lautsprechersystemen 8 7cm 16cm sollten Sie die Hochpass Stellung HPF w hl...

Page 11: ...S 13 8 V Watt an 4 2 Ohm CH 1 2 3 4 Watt an 4 Ohm gebr ckt CH1 2 und CH 3 4 Watt an 4 2 1 Ohm Subwooferkanal CH5 AUSGANGSLEISTUNG MAX 13 8 V Watt an 4 2 Ohm CH 1 2 3 4 Watt an 4 Ohm gebr ckt CH1 2 und...

Page 12: ...ker ist falsch eingestellt Einstellungen pr fen Fehler Verzerrungen aus Lautsprecher Ursache L sung 1 Die Lautsprecher sind berlastet Pegel niedriger einstellen Pegel am Steuerger t niedriger einstell...

Page 13: ...ellungen 1 Benutzen Sie nur mehrfach abgeschirmte hochwertige Cinch Audiokabel f r die Anschl sse zwischen Verst rker und Steuerger t Eine brauchbare Alternative sind im Zubeh rhandel erh ltliche Ents...

Page 14: ...1 4...

Page 15: ...operate the amplifier in a vehicle like described above please follow these instructions Admit the installation only by a skilled specialist best by a service company which is specialized on maintenan...

Page 16: ...ble are storage spaces behind the side coverings or under the car seats S A F E T Y I N S T R U C T I O N S 1 6 PLEASE ATTEND THE FOLLOWING ADVICES BEFORE THE FIRST OPERATION DO NOT INSTALL THE DEVICE...

Page 17: ...ferences 2 1 4 3 At first you need to find a suitable location to install the amplifier into the vehicle Attend that there remains enough space for the installation of the cables and ensure that they...

Page 18: ...c antenna or the turn on remote signal of your headunit with the REM terminal of the amplifier Use therefor a suitable cable with a sufficient cross section 0 5 mm2 Thereby the amplifier will turn on...

Page 19: ...l of LINE INPUT CH1 2 and CH3 4 will be routed to the subwoofer channel CH5 The subwoofer signal will be filtered out of the incoming signal Due to this only two RCA stereo audio cables are required a...

Page 20: ...A output FL FR and RL RR of the headunit with LINE INPUT CH1 CH2 and CH3 CH4 of the amplifier Connect stereo RCA output SUB OUT of the headunit with LINE INPUT CH5 of the amplifier Speaker front left...

Page 21: ...n Highpass Mode to avoid any damage by lower frequencies on the speakers The cut off frequency is adjustable with the HIGH PASS controller and should be set between 10Hz to 150Hz depending on the size...

Page 22: ...witch position CH1 2 und CH3 4 HP oder FULL MODE 4 CH Subwoofer 1 8 Ohms Connect the bass remote controller and the remote terminal on the amplifier with the enclosed cable LINE INPUTS BASS REMOTE SPE...

Page 23: ...R SETTINGS CH1 2 bridged channel left and CH3 4 bridged channel right By using bigger speakers more than 20cm you can set the X OVER switch to the FULL position Full Range Signal By using smaller spea...

Page 24: ...on 4 2 Ohm CH 1 2 3 4 Watts on 4 Ohms bridged CH 1 2 and CH 3 4 Watts on 4 2 1 Ohm Subwoofer Channel CH5 OUTPUTPOWER MAX 13 8 V Watts on 4 2 Ohm CH 1 2 3 4 Watts on 4 Ohms bridged CH 1 2 and CH 3 4 W...

Page 25: ...ettings on the amplifier are wrong Check settings Malfunction distortions on the loudspeaker s signal Reason Remedy 1 The loudspeakers are overloaded Turn down the level Turn down the level on the hea...

Page 26: ...e connection between the amplifier and headunit A useful alternative are represented by anti noise devices or additional ancillary equipment like Balanced Line Transimtters which you can purchase at y...

Page 27: ...2 7...

Page 28: ...AUTOTEK DISTRIBUTION Audio Design GmbH www audiodesign de Am Breilingsweg 3 D 76709 Kronau Germany Tel 49 0 7253 9465 0 Fax 49 0 7253 946510...

Reviews: