Chapter 2
Quick Start to Stitcher Projects
16
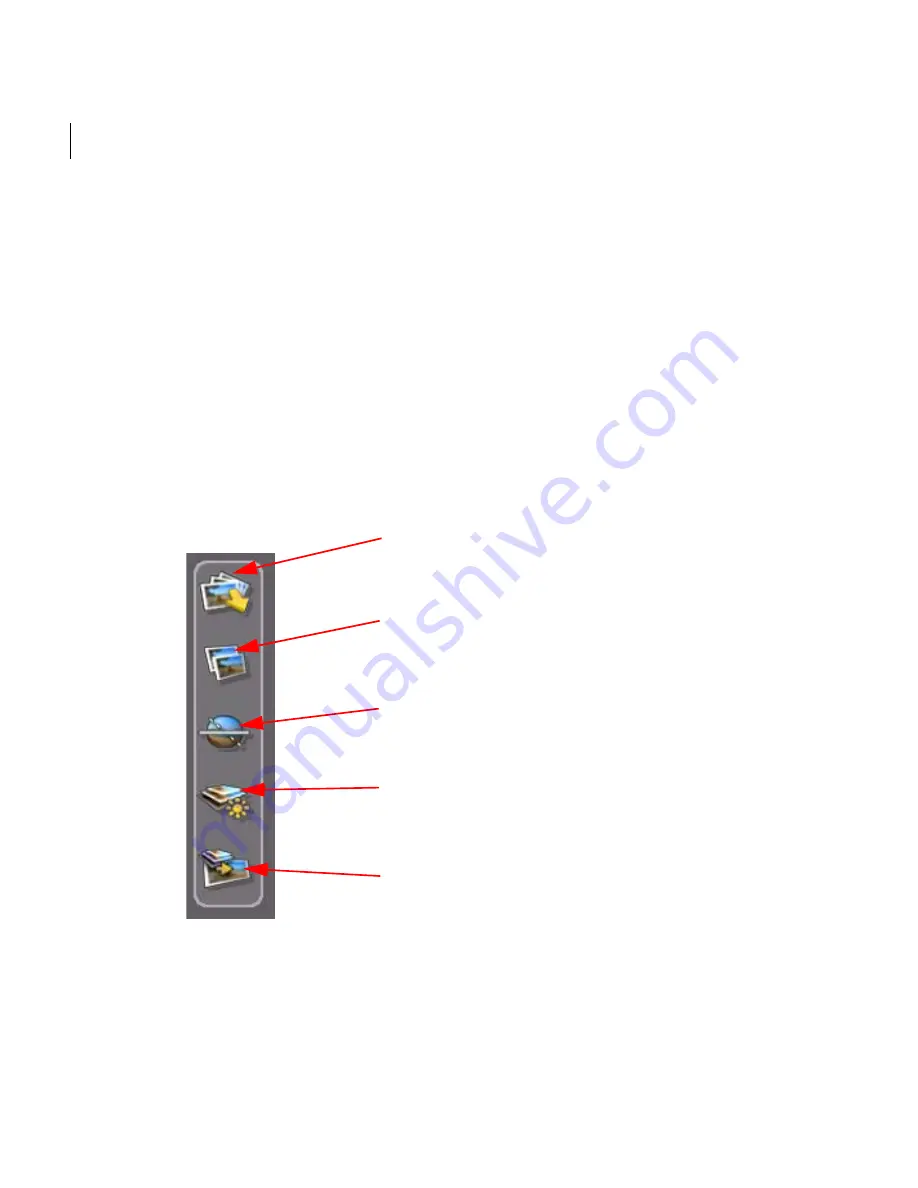
The 5-phase Stitcher Workflow
1
Load your image files (see “Phase 1: Loading images” on page 17 for the complete
list of the supported file formats).
2
Stitch your images using the automatic stitch function. If there are inconsistencies in
your shots for which you will need to compensate, you can manually stitch or force-
stitch your images.
3
Align the viewing horizon. Sticher can center the panorama automatically, or flip it
upside down (or the right way up, depending on how your images were loaded
before the auto-stitch command was executed).
4
Equalize the brightness of your panorama. Stitcher can compensate for contrast in
the lighting between the stitched images and automatically make the lighting in the
panorama more uniform.
5
Render your panorama into a variety of formats for external publication.
Phase 1.
Load images into the project
(for detailed information, see “The
interface” on page 71).
Phase 2.
Automatically stitch the images
(see “Stitching images” on page 105).
Phase 3.
Automatically align the viewing
horizon (see “Setting the horizon in the
Align Panorama mode” on page 133).
Phase 4.
Equalize the lighting or
brightness (see “Equalizing images” on
page 139).
Phase 5.
Render and export the final
panorama (see “Rendering Your Project”
on page 149).
Summary of Contents for 551A1-05B111-1001 - Stitcher Unlimited 2009
Page 1: ...User Guide Autodesk Stitcher Unlimited 2009 ...
Page 11: ...1 Introduction ...
Page 12: ......
Page 23: ...2 Quick Start to Stitcher Projects ...
Page 24: ......
Page 52: ...Chapter 2 Quick Start to Stitcher Projects 42 ...
Page 53: ...3 User Guide ...
Page 54: ......
Page 135: ...StitcherTM User Guide 125 Cylindrical preview Spherical preview Cubical preview ...
Page 147: ...StitcherTM User Guide 137 TIP Press G Windows or Command G Mac to toggle the grid ...
Page 162: ...Chapter 3 User Guide 152 snapshot cylindrical spherical cubical ...
Page 210: ...Chapter 3 User Guide 200 ...


