- 3 -
Setting the alarm (2 alarm times)
Briefly press MODE. Now press and hold MODE.
The hour indicator of the first alarm time (A1) will
blink on the display.
Press "+" or "-" to set the hours and confirm your
setting by pressing MODE.
Set the minutes in the same way and confirm your
setting by pressing MODE.
Briefly press MODE 2x. Now press and hold
MODE.
The hours display of the second alarm time (A2)
will now blink on the display.
Press "+" or "-" to set the hours and confirm your
setting by pressing MODE.
Set the minutes in the same way and confirm your
setting by pressing MODE.
Pressing MODE allows you to switch between A1,
A2 and the normal time display.
Activating the alarms and the snooze
feature
Briefly press "+" while viewing A1 or A2 to
activate or deactivate the currently viewed alarm
time.
If the alarm is activated the
symbol will appear.
The alarm will sound for 2 minutes when the set
time is reached.
The alarm can be interrupted by pressing
LIGHT/SNZ. The snooze symbol
will appear
on the display. The alarm will sound again after 5
minutes.
Press MODE to deactivate snooze and the alarm
sound.
Moon phase indicator
The weather station has a moon phase indicator
which automatically displays the current moon
phase.
Weather forecast
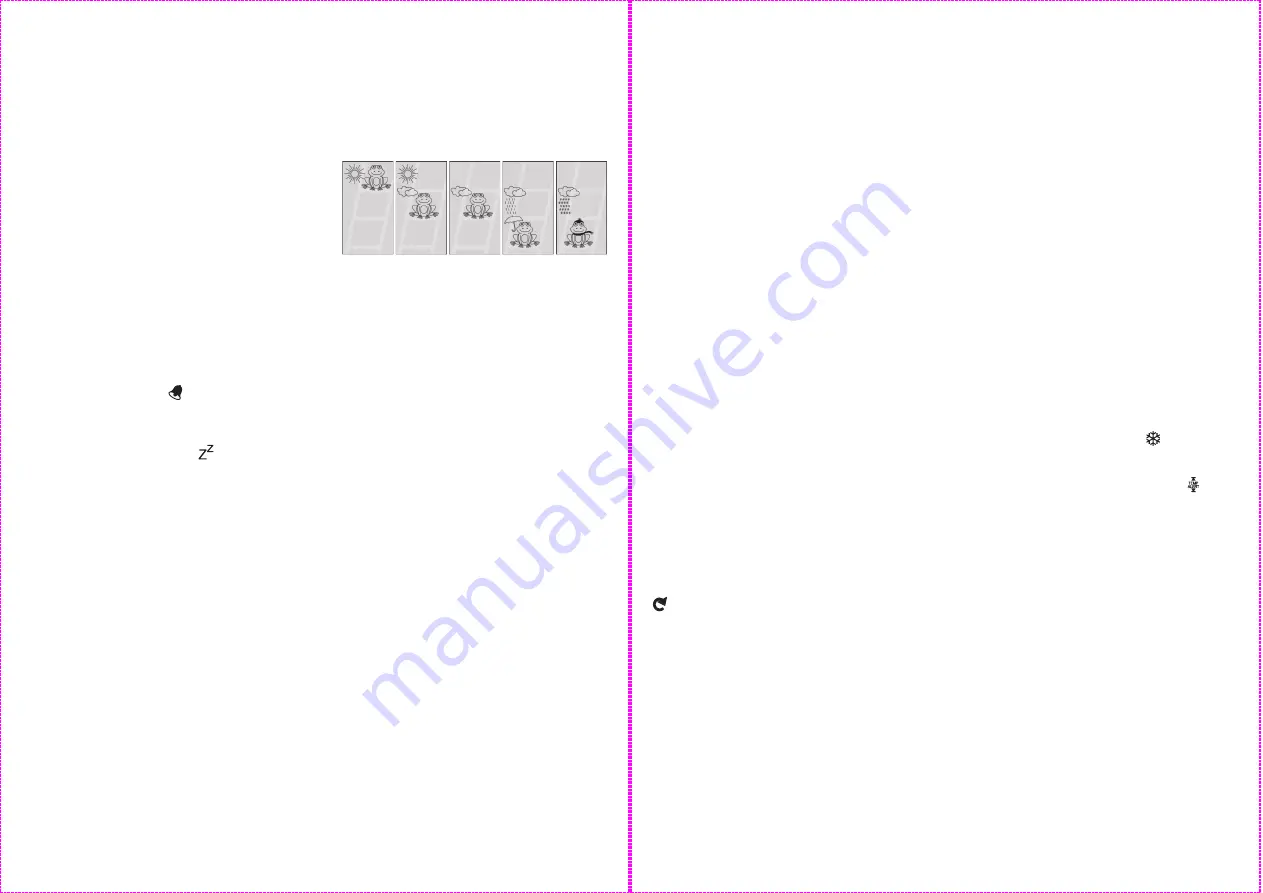
The weather symbols show the weather tendency
(sunny, slightly cloudy, cloudy, rain, snow) for the
next hour and not the current weather.
The weather forecast is calculated by evaluating
the fluctuations in air pressure and can deviate
from actual weather changes.
sunny
slightly
cloudy
cloudy
rain
snow
Barometer
The graphical barometer display shows the air
pressure during the last 12 hours. Press and hold
HISTORY to show the air pressure in mb/hPA or
in HG. Press HISTORY briefly to show the air
pressure values for the last 12 hours. After each
press of the history button the air pressure will
advance one hour into the past. After hour 12 the
current air pressure will be shown (hour 0).
Calibrating the barometer
The barometer can be calibrated to show the
relative air pressure at your location. The air
pressure for your location can be found on
different sites on the internet. Press and hold
MODE and HISTORY. The air pressure will blink
on the display. Now immediately press "+" or "-" to
set the air pressure. After a few seconds with no
button pressed, the set value will be saved and
the weather station will exit setting mode.
Maximum and minimum values
The maximum and minimum values of
temperature and hygrometer are stored
automatically.
Repeatedly press "+" to view the maximum and
minimum values. Press and hold "+" to reset the
stored values.
- 4 -
Selecting your location
Press CITY- the city display will blink and the
latitude and longitude will be displayed. Press "+"
or "-" to select your location. Press CITY to
confirm your selection. If the abbreviation for you
city does not appear, your location can be set
manually (See "Manually setting your location").
After a short calculation period the weather station
will show the sunrise and sunset times, the moon
phase and neap tide (TIDE LO), medium water
level (TIDE MID) or spring tide (TIDE HI).
Manually setting your location
Press and hold CITY. The cities display shows
"-- -- --". Press "+" or "-" to select the first letters
of your location. Press CITY to confirm your
selection. Set letters 2 and 3 of your location in
the same way.
On the display GMT appears and the time zone
indicator flashes. Set the difference of your time
zone to GMT (Greenwich Mean Time) by pressing
UP and DOWN (For the UK set 0:00).
Press CITY to confirm your selection. Now set the
longitude and latitude of your location in the same
way.
A table with the longitudes and latitudes for some
cities can be found at the end of these operating
instructions.
After a short calculation time the weather station
displays the times for sunrise and sunset and the
moon phase as well as neap tide (TIDE LO),
mean water level (TIDE MID) or spring tide (TIDE
HI).
Outdoor sensor channel selection
Press "CH" on the back side of the weather
station to select channel 1, 2 or 3. If the symbol
appears, the temperature and humidity of the
3 outdoor sensors will alternate on the display.
Press and hold "CH" to restart the outdoor
temperature and humidity reception process.
Additional information for the
outside sensor
Please position your sensor in a covered location
and make sure that the sensor does not get wet
and is not exposed to direct sunlight. To
guarantee optimal radio transmission, position the
station and sensor so that as few obstacles as
possible (walls, metallic components) interfere
with reception.
Sources of electrical interference can also be
detrimental to reception.
Temperature and frost alarms
Setting the temperature alarm
Press "CH" to select the outdoor sensor. Press
and hold "-" to set the alarm temperature. The
outdoor temperature will blink.
Press "+" or "-" to set the maximum value for the
temperature alarm. Confirm your setting by
pressing MODE. Press "+" or "-" to set the
minimum value for the temperature alarm.
Confirm your setting by pressing MODE.
Activating/deactivating the temperature and
frost alarms
The temperature and frost alarms can be
activated or deactivated by repeatedly
pressing "-".
If the frost alarm is activated the
symbol will
appear next to the outdoor temperature. The
alarm will sound at the set temperature.
If the temperature alarm is activated the
symbol will appear next to the outdoor
temperature. The alarm will sound at the set
temperature.
If both frost and temperature alarms are activated
then both symbols will appear.


