background image

15

COPY PHOTO INTO INTERNAL MEMORY

: Press the Up Arrow in

Pause mode and follow the on-screen instructions.

Note:

 Function is only available for copying a photo into the internal

memory, not for AUDIO.

DELETE  PHOTOS  FROM  INTERNAL  MEMORY:

  Press  the  Up

Arrow in Pause mode and follow the on-screen instructions.

Note:

 Function is only available for deleting photos from the internal

memory. Before deleting, detach the memory card and USB flash from
the player.

ZOOM IN: 

In the pause mode of the photo, press ZOOM button to

enlarge the photo by 133%, 150% or 200% times of the normal size.
When the image is enlarged, you can use the Arrow keys to view the
blocked parts of the photo.

ROTATE PHOTO:

 Rotates the photo 90 degrees to the right each

time the Down Arrow is pressed.

Note:

 The ZOOM and ROTATE function are invalid for internal memory

s

photo.

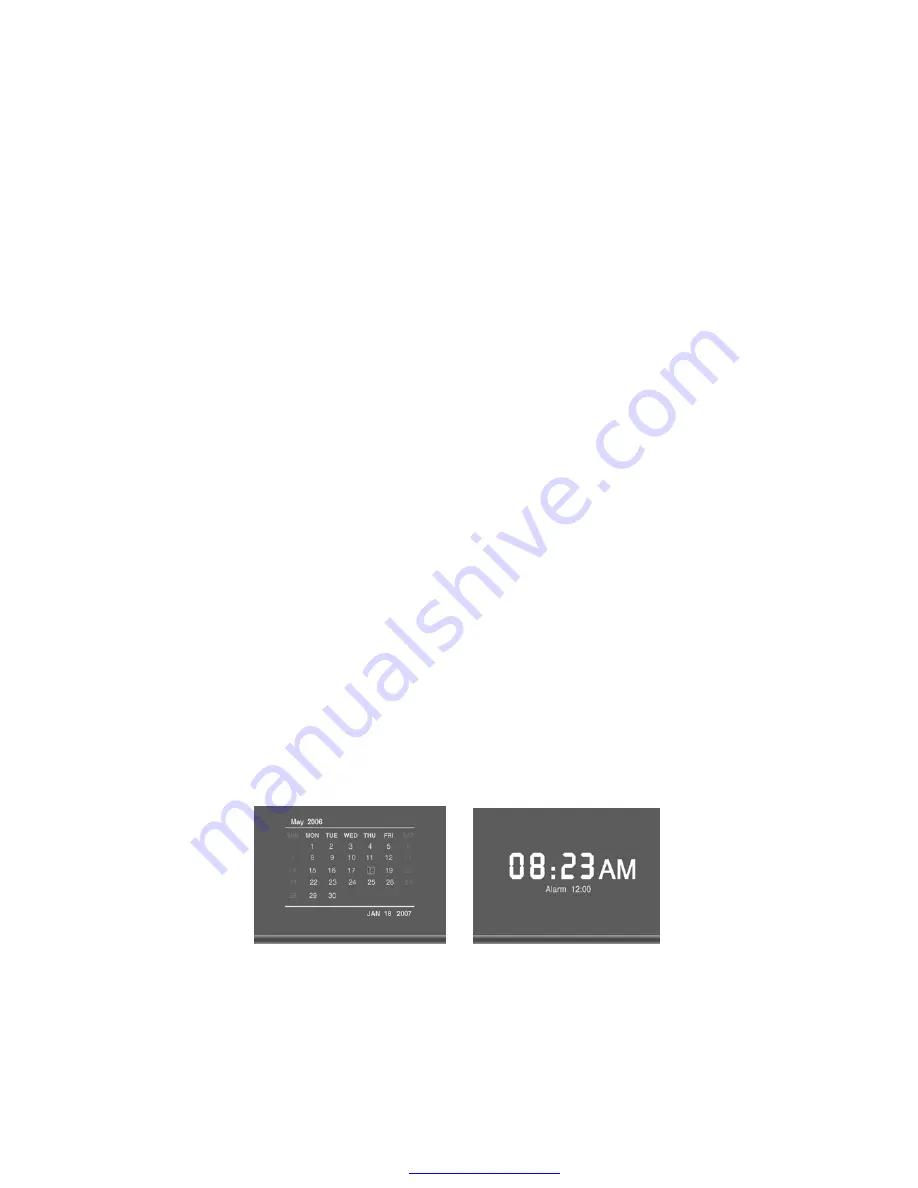
VIEWING CALENDAR/CLOCK

This option provides the operator with the capability of selecting whether
the Calendar or Clock will be displayed on the screen. At the Menu
screen use the arrow keys to highlight the CALENDAR or the CLOCK
icon and then press the SELECT button. The Screen will display the
operator

s selection.

In Side show mode if the SLIDE WITH MP3 function is set to on and a
external device that contains MP3 songs is connected then when the
slide show begins the first MP3 song found on the device will start
playing.

PDF created with pdfFactory Pro trial version 

www.pdffactory.com

Summary of Contents for DPF702 - Digital Photo Frame

Page 1: ...OWNER S MANUAL DPF702 Digital Photo Frame PDF created with pdfFactory Pro trial version www pdffactory com...

Page 2: ...for your safety If the provided plug does not fit into your outlet consult an electrician for replacement of the obsolete outlet l Protect the power cord from being walked on or pinched particu larly...

Page 3: ...e lighted candles cigarettes cigars etc on the product l Connect power cord only to AC power source as marked on the product l Care should be taken so that objects do not fall into the product l Do no...

Page 4: ...otection against harmful interference in a residential installation This equipment generates uses and can radiate radio frequency energy and if not installed and used in accordance with the instructio...

Page 5: ...and the serial number In the space below record the date and place of purchase and the serial number ModelNo Date of Purchase Place of Purchase Serial No Connect the equipment into an outlet on a cir...

Page 6: ...to the USB port Note If no memory card is available there are some demo images preloaded in the internal memory To delete preloaded images please refer to the Delete Photos from Internal Memory sectio...

Page 7: ...LECT button UP COPY DELETE button POWER button MENUbutton DOWN ROTATE button NEXT button PREV button POWER LED Left View Right View Volume Control CF Memory Slot SD MMC xD MS Card Slot USB Port Power...

Page 8: ...ess to copy delete picture in Pause mode LEFT PREV Press to move left when setting options or return to previous screen in slideshow mode PLAY PAUSE OR SELECT Press to play or pause photo or music fil...

Page 9: ...GE shown below BRIGHTNESS Press the SELECT button to enter the adjustment mode The BRIGHTNESS setting will now be highlighted as shown below Press the SELECT button to select the BRIGHTNESS adjustment...

Page 10: ...be displayed Use the UP or DOWN ARROW keys to position the highlight over OSD LANGUAGE Press the SELECT button to enter the selection mode Use the UP or DOWN ARROW keys to select the de sired languag...

Page 11: ...the LEFT ARROW key to exit the PHOTO MODE selection menu and return to the GENERAL SETUP MENU MATTING This feature lets you place a decorative border around the photo displayed during slideshow Use t...

Page 12: ...our selection use the arrow keys to position the highlight over CLOCK MODE and press the SELECT key Follow by using the arrow keys to select the desired setting and then press the SELECT key to exit a...

Page 13: ...e AUTO POWER OFF function When the unit turns on it will be at the Menu screen ALARM SETTING Use the arrow keys to set the Alarm Mode ON Then highlight ALARM SETTING and enter desired alarm turn on ti...

Page 14: ...to enter the adjustment mode Use the Up Down arrow keys to set the date Use the Left Right arrow keys to select which parameter you will adjust Once complete press the SELECT key to exit and save you...

Page 15: ...the Arrow keys to view the blocked parts of the photo ROTATE PHOTO Rotates the photo 90 degrees to the right each time the Down Arrow is pressed Note The ZOOMand ROTATE function are invalid for intern...

Page 16: ...PEAT OFF Play until the end of last track and stop and RANDOM Play tracks in a shuffle mode TIPS FOR CLEANING AND CARE Please power off the Digital Photo Frame before cleaning Do not spray or pour liq...

Page 17: ...ed Photo file formats Audio file formats User Interface Control Buttons at the Top of digital photo frame Remote control Calendar Clock 7 16 9 480 234 Pixels 9v 1A Support 100 240Vac Stereo 15 photos...

Page 18: ...can try to format it first Note Some digital cameras save images in formats other than JPEG Refer to your camera s manual if your photos are not JPEG files The frame displays some pictures slower and...

Page 19: ...through alteration improper installation mishan dling misuse neglect accident or by removal or defacement of the factory serial number bar codelabel s THE EXTENT OF THE COMPANY S LIABILITYUNDER THIS W...

Page 20: ...Audiovox Electronics Corporation 150 Marcus Boulevard Hauppauge NY 11788 www audiovox com 128 8596 V 1 0 Printed in China PDF created with pdfFactory Pro trial version www pdffactory com...

Reviews: