background image

88

OK

TTY
Mode

F73

Off

On

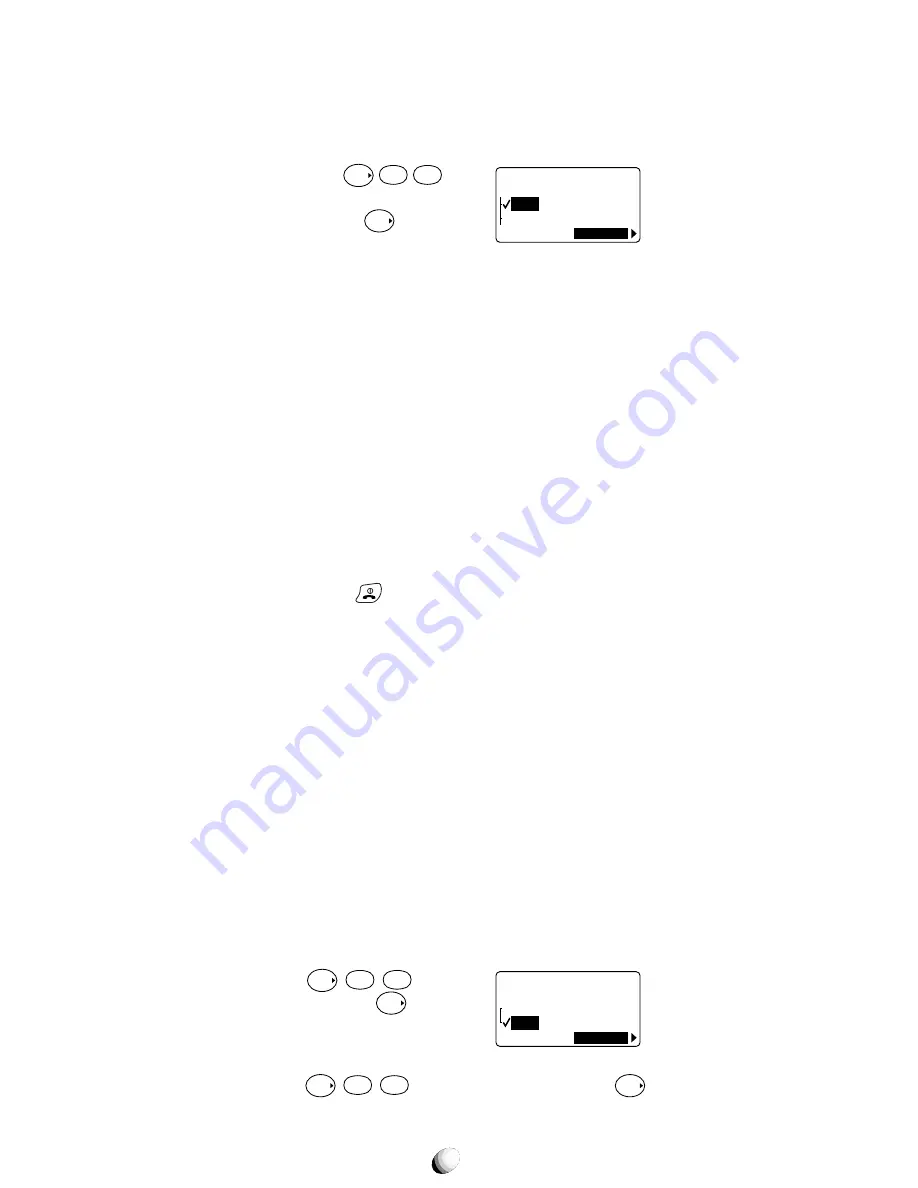
Data/Fax Mode (F72)

This feature allows you to set the mode for receiving
data or fax calls.

To set the Data/Fax Mode

1. Press 

F


7

PQRS


2

ABC

.

2. Select the desired mode by

pressing 

F

.

Off: No data or fax calls can be received.
Data: Can receive data.
Fax: Can receive fax.
Data Once: Data can be received for one call.
Fax Once: Fax can be received for one call.

Notes: 1. “Data Once” and “Fax Once” will be reset to “Off

automatically after receiving a data or fax once or

after 10 minutes.

2. Voice calls can not be received when Data or Fax

modes are set.

3. Data Service Mode (F71) is automatically set to

Circuit” when the Data/Fax Mode (F72) is set to

Data or Fax.

4. When your phone is to Data or fax, you can only

use 

.

5. Data/Fax mode (F72) can not be set if TTY mode

is active.

6. To send data or fax, the Data/Fax mode (F72) set-

ting is not necessary.  Service Mode (F71) must

be set to “Circuit” to send data or fax.

TTY Mode (F73)

Your phone is able to operate with a TTY (Teletypewriter)
device on 45.5 baud in both analog and digital modes.

Connect a TTY device to the phone at the earphone-
microphone jack, activate the TTY mode and you will
place or receive calls in the same manner as ordinary
calls. This feature is network dependent in the digital

mode, and may not be available in all areas.

Activating TTY Mode

Press 

F


7

PQRS


3

DEF

, scroll to

On” and press 

F

. “TTY” will

appear on the display.

Deactivating TTY Mode

Press 

F


7

PQRS


3

DEF

, scroll to “Off” and press 

F

.

TTY” will disappear.

OK

Data/Fax
Mode

F72 

Off

Data

Summary of Contents for 91155-GPX

Page 1: ...555 Wireless Boulevard Hauppauge New York 11788 800 229 1235 www audiovox com LTCLOM227 Rev 1 4 2002 Audiovox Communications Corp Printed in Japan 07 02 ...

Page 2: ...aling and two way speakerphone are great for enhancing hands free use of this phone T9 Text In put vibrating alert and a 7 line LCD Display with ad justable text size make 9155 GPX easier to use The 9155 GPX also has user changeable faceplates en abling you to express your individuality through your wireless handset Several optional accessories are available for the 9155 GPX including hands free d...

Page 3: ...Terminating a Call 25 Last Number Redial 25 Dialing the Last Incoming Call 25 Phonebook Dialing 25 Speed Dialing 26 Quick Dialing 26 Emergency Call 26 One Touch Emergency Call 27 Emergency Call Mode 27 Receiving Calls 27 Receiving a Call 27 Any Key Answering 27 Caller ID with Name 28 Automatic Calls in Absence Indicator 28 Ringing Tone with Melody 28 Distinctive Ringing Audible Caller ID 28 During...

Page 4: ...45 Locating E mail Addresses 45 Prepending Dialing 45 Phonebook Edit 46 Modifying Numbers and Names 46 Moving Numbers and Names 47 Changing Priority of Dual Numbers 48 Erasing Numbers and Names 48 Secret Memory 49 Storing a Secret Number 49 Recalling a Secret Number 50 Link Dialing 50 Storing Linked Numbers 50 Placing Calls Using Linked Numbers 51 Voice Activated Dialing VAD 52 Voice Registration ...

Page 5: ... Menu Tree 70 Lock Features 71 Security Code and Unlock Code 71 Keypad Lock F11 71 Phone Lock F12 72 Automatic Phone Lock F13 72 Unlocking the Phone 72 Changing the Unlock Code F14 72 Display Features 73 Own Telephone Number Display F21 73 Backlight Control Standby F22 1 73 Backlight Control In Use F22 2 73 Auto Hyphenation F23 74 Language Selection F24 74 Contrast Control F25 74 Software Version ...

Page 6: ...ction F61 84 Changing Emergency Numbers F62 85 Turning On Off One Touch Emergency Call Feature F63 85 Changing Security Code F64 85 Call Timer Reset F65 1 85 Phonebook All Clear F65 2 86 Call History All Clear F65 3 86 Text Message Voice Mail All Clear F65 4 86 Function Reset F65 5 86 Data Communications 87 Service Mode F71 87 Data Fax Mode F72 88 TTY Mode F73 88 Vibrator 89 Vibrating Alert F8 89 ...

Page 7: ...ng indicates the existence of a hazard that could result in serious bodily injury if the safety instruction is not observed CAUTION Caution indicates the existence of a hazard that could result in minor bodily injury or property damage if the safety instruction is not observed NOTICE Notice contains general information that relates to the safe operation of the telephone SAFETY INSTRUCTIONS WARNING...

Page 8: ...ection of Children Never allow children to play with your phone as they might hurt themselves or others e g by poking themselves or others in the eye with the antenna Always keep all accessories and components out of the reach of small children Small parts in particu lar might present a choking hazard to children Use in Vehicles Never store or transport flammable liquids gases or explosive materia...

Page 9: ...en the phone warms up to its normal operating temperature moisture can form inside the phone which may dam age the phone s electronic circuit board Never use harsh chemicals cleaning solvents or strong detergents to clean this phone Always clean it with a soft cloth that has been slightly dampened in a mild soap and water solution Never paint this phone This can clog the moving parts Before connec...

Page 10: ... and never attempt to disassemble the battery pack as that could cause leakage of the caus tic electrolyte If the battery is accidentally broken avoid skin contact with the contents In the event of skin contact wash the affected area immediately and obtain prompt medical attention Never attempt to dispose of a battery pack by throw ing it into a fire That can cause the battery pack to explode Neve...

Page 11: ...isposal of household toxic wastes Always cover the metal terminals with insulating tape first to prevent accidental short circuiting Always turn your phone OFF before removing the battery pack and always use the battery pack for its intended purpose only Always use the battery pack supplied by Audiovox or an approved replacement battery pack to avoid any risk of damage to your cellular phone Safe ...

Page 12: ...n it is connected to an AC power source There is a risk of fire or electric shock Always use the authorized Audiovox AC adapter or desktop charger to avoid any risk of fire or damage to your cellular phone or battery Bodily injury or prop erty damage may occur as a result of the use of an unauthorized and incompatible AC adapter or desk top charger Never use an AC adapter or desktop charger if it ...

Page 13: ...have different specifica tions they may be incompatible with your phone CAUTION Always confirm that the power cord for any acces sory is located so that it will not be stepped on tripped over or otherwise subjected to damage or stress Never place heavy objects on a power cord as this could result in damage to the cord Never bend or twist a power cord and never pull on a power cord in a attempt to ...

Page 14: ...The design of this phone complies with the FCC guidelines and these international stan dards Use only the supplied or an approved antenna Unau thorized antennas damaged antennas modifications or attachments could impair call quality damage the phone or result in violation of FCC regulations Please contact your local dealer for replacement antenna Body worn Operation This device was tested for typi...

Page 15: ...ot be shielded against the RF signals from your wireless phone Pacemakers The Health Industry Manufacturers Association recom mends that a minimum separation of six 6 inches be maintained between a handheld wireless phone and a pacemaker to avoid potential interference with the pace maker These recommendations are consistent with the independent research by and recommendations of Wire less Technol...

Page 16: ...ring with blasting operations turn your phone OFF when in a Blasting area or in areas posted Turn off two way radio Obey all signs and instructions POTENTIALLY EXPLOSIVE ATMOSPHERES Turn your phone OFF when in any area with a poten tially explosive atmosphere and obey all signs and in structions Sparks in such areas could cause an explo sion or fire resulting in bodily injury or even death Areas w...

Page 17: ...le operating can be well below the maximum value This is because the phone is designed to operate at multiple power levels so as to use only the power required to reach the network In general the closer you are to a wireless base station antenna the lower the power output Before a phone model is available for sale to the public it must be tested and certified to the FCC that it does not ex ceed th...

Page 18: ...FIGURATION List of Equipment Name of the Equipment Handheld Portable Telephone Lithium Ion Battery Pack BTR 9100 AC Adapter CNR 9100 No 1 2 3 Retractable Whip Antenna Handheld Portable Telephone Lithium Ion Battery Pack AC Adapter 1 2 3 ...

Page 19: ...move it 2 Place the BTR 9100 bat tery pack in the battery cavity so that it fits over the connector 3 Slide the cover back to snap it on Connector Removing Battery Pack 1 Press and hold key to turn the phone off Then press and slide the bat tery cover to remove it 2 Lift the battery pack up to take it out ...

Page 20: ...ng In dicator at the top of the phone will light green 6 Fully Charged displays when charging is com plete 7 Disconnect the AC Adapter from the outlet 8 Press and hold in the buttons on the flat connec tor of the AC Adapter and pull the connector away from the phone The recharging time from empty to full depends on the environmental temperature 0 to 35 C Now Charging Recharging Time 1 5 to 2 h Bat...

Page 21: ...H 9100 Option AC Adapter CNR 9100 AC120V 9155 GPX Battery Information Temperature extremes affect the Battery Pack s ability to charge always allow it to completely cool down or warm up first Subjecting the Battery Pack to extremely high or low temperatures will reduce its capacity and its life ex pectancy Always try to keep the Battery Pack be tween 59 F and 77 F 15 C and 25 C if possible ...

Page 22: ...Key with Power On Off Clear Key Soft Key 2 Multi Function Key Up arrow Recall Function Down arrow Microphone Voice Activated Dialing Space Key Power Indicator Receiving Signal Strength Indicator Digital Mode Indicator IN USE Indicator Roaming Indicator Message Indicator Battery Level Indicator Send Key Voice Mail Speakerphone One Touch Emergency Key Digit Keys Vibrating Shift Key Vibrating Indicat...

Page 23: ... re views Text Messages see page 57 Clears digits from the display or from a memory location 2 1 3 ABC DEF 5 4 6 JKL GHI PQRS MNO 8 7 9 TUV WXYZ 0 ABCDEFGHIJKL MNOPQRSTUVWX YZ1234567890 Items Descriptions Receiving Signal Strength Indicator Indicates Signal Strength and is also a POWER ON indicator Digital Mode Indicator Phone is operat ing in digital mode Call in progress Out of Service Area Out ...

Page 24: ...ing Four lines indicate maximum signal strength Line total may change as you move with the phone to represent the changing signal strength If the signal is not strong enough to place a call will ap pear on the display Battery Level Indicator Monitor the battery charge condition with the level indi cator The number of blocks indicates the battery con ditions as follows Full charge Low charge Flashi...

Page 25: ...edial 1 Press the key under Redial or press Rcl to recall the last number dialed 2 Press to place the call See Call History on page 54 for details See also Re dial Soft Key F04 on page 90 Dialing the Last Incoming Call To recall the last incoming Caller ID call press Rcl then press See Call History on page 54 for details Phonebook Dialing Press Rcl and enter an address 01 to 99 to recall a number ...

Page 26: ...aled The phone number will be displayed The indicator will light Note The key 1 is not for Quick Dialing but for One Touch Emergency Call page 27 Emergency Call This feature permits you to place an emergency call even if your telephone is in Phone Lock Keypad Lock or Restrict mode Up to 3 numbers can be programmed as Emergency numbers The emergency numbers 911 and 911 are already preprogrammed See...

Page 27: ...s dialed the phone enters Emergency Call Mode and will attempt to complete the emergency call using any available cellular system it can find After the call is placed the phone will stay in the Emergency Call Mode and attempt to continue to receive service from the cellular system used to complete the call Emer gency Call Mode END to exit will display and the phone will automatically exit the Emer...

Page 28: ...o view Incoming Call History Depressing any key will clear the display See Redial Soft Key F04 on page 90 Ringing Tone with Melody The 9155 GPX offers 15 different ringer tones and melo dies See Ringer Type Selection F32 on page 75 and Ringer Volume Control F31 on page 75 and Vibrat ing Alert F8 on page 89 for more information Distinctive Ringing Audible Caller ID Different ringer styles can be as...

Page 29: ... feature in a noisy environment Automatic Talk Timer The talk time of the current call will be automatically displayed For example 1H 23M 45S Scratch Pad Dialing When you enter a telephone number during a call the number will be stored in the Scratch Pad memory and can be dialed by pressing after terminating the call Note You can deactivate Sending DTMF so that keypad tones will not be transmitted...

Page 30: ... page 90 Phone Lock is active See page 72 Keypad Lock is active See page 71 Countdown Timer is active See page 80 Clock Alarm is active See page 79 Redial See Last Number Redial on page 25 Web See Accessing Internet on page 65 Note For displaying date and time see Clock Indicator F42 on page 78 and Clock Adjustment F43 on page 79 Vibrating Alert To activate Vibrating Alert press and hold The indic...

Page 31: ...ignals during a call as you press digit keys When Sending DTMF mode is off you can send Touch Tone signals in the following manner 1 Enter the number 2 Press F and scroll to Tone 3 Press F The number in the display will be sent in Touch Tone signals Touch Tone from Memory Touch Tone signals can be sent from memory during a call 1 Press Rcl and recall the number you want to send in Touch Tone signa...

Page 32: ...l cap and T9 caps lock The Next key 0 displays the next choice The Space key decides a word and adds a space Press F to select a word Press 1 to insert punctuation Press CLR to delete a character Press and hold CLR to delete a word Press Rcl or F to move the cursor Press and hold the key 0 to 9WXYZ to enter digits Note For more information visit www T9 com Alpha Mode abc abc The Alpha mode allows ...

Page 33: ...wser Scroll the screens Sym1 Sym2 Sym3 and Sym4 with or Press the digit key 1 to 9WXYZ to select a symbol and return to the previous mode Shortcut Press and hold the key under T9 or abc to turn to Sym except Web Browser Key 1 2ABC 3DEF 4 GHI 5 JKL 6MNO 7PQRS 8TUV 9WXYZ 0 English Spanish 1 A B C 2 A Á B C 2 D E F 3 D E É F 3 G H I 4 G H I Í 4 J K L 5 J K L 5 M N O 6 M N Ñ O Ó 6 P Q R S 7 P Q R S 7 ...

Page 34: ...ling Phonebook Entry Basic Sequence To program your phonebook enter the information in the following order You may skip name e mail ad dress and or voice 1 Enter the phone number s See page 35 and 37 2 Enter the name See page 38 3 Enter the e mail address See page 39 4 Enter the phonebook ad dress See page 35 5 Enter the name using your voice See page 52 Note When shifted from Text Messages the se...

Page 35: ... Phonebook This feature automatically stores a number into the first available phonebook memory address indicating the location in the display This prevents the possible over writing of a previously stored number 1 Enter the phone number 2 Press the key under STO four times and press F Example To store the phone number 1 2 3 4 5 6 7 8 9 0 into a vacant memory address 01 1 Press and hold CLR 2 Ente...

Page 36: ...not work for that particular number Manual Hyphenation You can manually insert a hyphen at any place when you enter a telephone number The maximum number is 32 digits long including hyphens Example To insert a hyphen in the number 1 2 3 4 5 6 7 to display it as 123 4567 1 Enter 1 2ABC 3DEF 2 Press F and scroll to Manual Hyphen 3 Press F 4 Enter 4 GHI 5 JKL 6MNO 7PQRS Tip The screen may display dua...

Page 37: ...umbers in one phonebook ad dress enter the first number select the Dual Mark by using the menu then enter the second number Example To store the primary number 1 2 3 4 5 6 7 8 9 0 and the secondary number 9 8 7 6 5 4 3 2 1 0 in address 08 1 Enter 1 2ABC 3DEF 4 GHI 5 JKL 6MNO 7PQRS 8TUV 9WXYZ 0 2 Press F and scroll to Dual Entry 3 Press F The Dual Mark is in serted 4 Enter 9WXYZ 8TUV 7PQRS 6MNO 5 J...

Page 38: ...o store the number with the name into memory Example To store the phone number 1 2 3 4 5 6 7 8 9 0 with the name Jill into memory address 11 1 Enter the phone number 1 2ABC 3DEF 4 GHI 5 JKL 6MNO 7PQRS 8TUV 9WXYZ 0 2 Press the key under STO 3 Enter the Name 5 JKL for J 4 GHI 4 GHI 4 GHI for i 5 JKL 5 JKL 5 JKL F for l and 5 JKL 5 JKL 5 JKL for l 4 Press the key under STO twice 5 Enter the address 1...

Page 39: ...ss the key under STO and press F to store it Note To add an e mail address after storing numbers see Modify menu on page 46 Marking Numbers with Icons Before storing numbers can be marked with icons from the Option menu Example 1 Enter phone number s and e mail address 2 Press the key under Option 3 Press F and scroll to a number to be marked 4 Press F and scroll icons with Rcl F 5 Press the key u...

Page 40: ...bers you want to set 4 Press F and scroll to sample the different ringer types 5 Press F to set the new ringer type 6 Press the key under OK 7 Press the key under STO and press F Note The Common shown in the step 4 is the ringer type you selected with the Function Menu See Ringer Type Selection F32 on page 75 STO Option Address Auto 04 Icon Ringer Type Secret Option Ringer Type 123 456 7890 987 65...

Page 41: ...7 8 9 0 is already stored 1 Enter 9WXYZ 8TUV 7PQRS 6MNO 5 JKL 4 GHI 3DEF 2ABC 1 0 2 Press the key under STO three times 3 Enter 0 7PQRS The currently stored num ber flashes 4 Two seconds later 5 If you accept to overwrite scroll to Yes and press F 6 If you do not want to overwrite scroll to No and press F The screen returns to the step 2 again 987 654 3210 STO Menu STO Option Address Auto 05 123 4...

Page 42: ...History Scratch Pad Phone book Outgoing Incoming Scratch Pad View Number View Name View E mail Replay Modify Move Priority Erase View Number View Name Save Erase Outgoing History Incoming History View Number View Name Save Erase View Number Save Erase Main Menu Sub menu Address Search History Recall Note The sub menus marked with will be available on the screen if the corresponding items are store...

Page 43: ...e will skip any vacant memory address es Phonebook Sort Scroll Mode Alphabetically sorts and displays stored telephone num bers Example To display the numbers stored in the memory alphabetically from J 1 Press Rcl and press 5 JKL for J 2 Press F 3 Press 4 Press Note This mode will sort and display names disregarding the initial spaces if applied Address Search History Recall ABC Address Search J H...

Page 44: ...The key word can be searched regardless of upper or lower case letters Tip In the three recall modes long names and phone num bers are displayed in the short form the first 12 char acters of a name and the last 12 digits of a number ABC Address Search A History Recall Search Key Word AN ABC 777 777 7777 Albany E mail Menu 37 888 888 8888 555 555 5555 LOUISIANA E mail Menu 32 o 999 999 9999 San Fra...

Page 45: ...scribed phonebook search modes to recall a number 2 Press the key under E mail 3 Press or to scroll e mail addresses 4 To view long e mail ad dress press F and scroll to View E mail Press F again Prepending Dialing This feature will be convenient when you need to add an area code to the number in the phonebook Example To add 1 2 3 to a number 4 5 6 7 8 9 0 1 Recall the number 2 Enter 1 2ABC 3DEF 3...

Page 46: ...ess the key under STO and the Name Tag will ap pear by itself Press CLR to clear the letter s and en ter the new Name Modifying Phonebook Addresses After modifying a number name press the key under STO without entering a new address and press F This overwrites the current phonebook address If you enter a new address the modified number name will be saved to the new address and the original ad dres...

Page 47: ...ew location erasing the original address Example To move information stored in address 20 to address 15 1 Recall the number stored in address 20 2 Press F and scroll to Move 3 Press F 4 Enter the new address 1 5 JKL OK Menu Link Mark Dual Entry Manual Hyphen 23 456 7890 1 STO Primary Menu 987 654 3210 STO Secondary Menu STO Option Address Original 12 Stored 90 Empty 9 Used 12 Audiovox 123 456 7890...

Page 48: ...mber will be dialed when you use Speed Dialing and Quick Dialing features Erasing Numbers and Names Example 1 Recall the number 2 Press F and scroll to Erase 3 Press F The number is shown again Press F 4 Two seconds later the screen is changed 5 To erase the number scroll to Yes otherwise No and press F 123 456 7890 987 654 3210 E mail Menu 08 OK Menu Modify Move Priority 987 654 3210 123 456 7890...

Page 49: ...QRS 8TUV 9WXYZ 0 2 Press the key under STO three times 3 Press F and scroll to Secret 4 Press F Scroll to a num ber to be secret for two numbers or more 5 Press F The number turns Secret 6 Press the key under OK 7 Enter the address 3DEF 0 and press F Note Each of the phone numbers and e mail address can be marked secret by repeating steps 4 and 5 123 456 7890 STO Menu STO Option Address Auto 10 Ic...

Page 50: ...ring Linked Numbers You can store Linked Numbers with Link Marks up to 40 digits for the address 01 to 90 and up to 80 digits for the address 91 to 99 in the phonebook The example on the next page shows how to store a Linked number at a specific memory address 1 Enter the first number 2 Press F F A link mark will be added at the end of the number 3 Enter the second number If you wish to link addi ...

Page 51: ... linked numbers you have just entered will be dis played one by one each time you press F Placing Calls Using Linked Numbers 1 Press Rcl and select the linked number you want to call See Phonebook Recall on page 43 2 Press The indicator will light as the first number is dialed 3 Press The second linked number will be sent in Touch Tone signals Succeeding numbers can be sent sequentially by pressin...

Page 52: ...lease speak Katie into the mi crophone of the handset You will hear back Katie repeated from the handset 5 After you hear the voice prompt Again repeat the name Katie You will hear Katie repeated from the handset again 6 If the registration is successful you will hear the prompt Entry Completed 7 Your voice registration sta tus is displayed 8 And your phonebook sta tus is displayed Notes 1 Registe...

Page 53: ...id you say Katie answer Yes or No 2 If using this feature through a car kit option speak slightly louder for better recognition Adding Voice to Stored Numbers 1 Press Rcl to recall the number 2 Press F scroll to Modify and press F again 3 Press the key under STO four times 4 When Voice Data Entry appears on screen press F and go to step 4 of Voice Registra tion on page 52 Note With stored dual or ...

Page 54: ...r missed calls Addresses 01 to 10 3 previously written numbers Ad dresses 01 to 03 You can access the memory in two ways Scroll and Shortcut By Scrolling 1 Press Rcl and scroll to History 2 Press F and scroll to the menu item you want 3 Press F to select 4 To review the numbers in memory scroll with or 5 Press to dial displayed number Shortcut Press Rcl to display the latest number in the outgoing...

Page 55: ... Caller ID from Memory Stack 1 Press Rcl The most recent call is dis played 2 Press 3 Press A name is shown if avail able in your phonebook 4 Press to dial displayed number In the incoming call history numbers marked with represent missed calls and numbers marked with represent answered calls When duplicate numbers are received only the latest call is stored in the call history 123 456 7890 May 21...

Page 56: ... Memory can be stored in your phonebook Example To save a received Caller ID to your phonebook 1 Recall a number 2 Press F and scroll to Save 3 Press F 4 Press the key under STO three times 5 Enter 4 GHI 0 as the ad dress and press F See Modifying Numbers and Names on page 46 to add a name 123 456 7890 Menu 01 123 456 7890 May 21 10 45 am Menu 01 Next OK Menu View Number Erase Save 123 456 7890 ST...

Page 57: ... screen Flashing Steady off New Urgent Text Messages or Voice Mail Notifications New Text Messages or Voice Mail Notifica tions No New Text Messages nor Voice Mail Notifications Message Menu The Message main menu ap pears by pressing Send Message Creates and sends messages Inbox Checks received messages Outbox Reviews sent messages Voice Mail Displays Voice Mail Notification Settings Customizes me...

Page 58: ...o return to the list press the key under OK Notes 1 The sender name appears the same as it does in the phonebook 2 The following icons mean New Text not yet viewed Old Text already viewed Urgent new text Urgent old text 3 To dial a callback number press the key under Send when the number appears 4 This feature receives only English letters Inbox Option Reply Shifts to Send Message mode to reply to...

Page 59: ...e the indicator is on 6 Sending Mail appears with animation 7 Depending on the settings the message may be saved in the Outbox Notes 1 To specify two or more recipients press after step 2 and repeat the same step 2 To enter your text see Entering Letters and Sym bols on page 32 3 The maximum message length is 160 characters and that includes the text message and the e mail address It may be shorte...

Page 60: ...sages Example 3 Scroll the list and press F 4 Each time you press the screen displays the time stamp recipient call back number if avail able and message 5 To view Outbox Option press the key under Option 6 To return to the list press the key under OK Notes 1 The list displays the first 12 characters of each message 2 The following icons mean icon descriptions are fine Message sent already Message...

Page 61: ...ail Msg with animation Depending on the settings the phone may also sound a short beep tone 2 To see how many messages are in your voice mailbox see To Display Number of Voice Mail Messages below 3 To listen to your voice mail messages see Voice Mail Dialing on the following page To Display Number of Voice Mail Messages 1 Press scroll to Voice Mail and press F 2 The screen displays the number of m...

Page 62: ...long can be added to your voice mail number See Storing a Name with a Phone Number on page 38 Calling Your Voice Mail 1 Press and hold V The first number will be dis played and dialed 2 Press V The second number will be displayed and sent in Touch Tone signal 3 The succeeding numbers can be sent sequentially by pressing V Reviewing the Voice Mail Access Number 1 Press Rcl to select the Phonebook A...

Page 63: ...e ceived the phone displays Delivered with the time stamp and recipient and it also turns the icon sent into delivered in the Outbox Normal Ack When the acknowledgment is re ceived the phone turns the icon sent into delivered in the Outbox No Ack No acknowledgment is requested Note The Delivered is displayed for the messages that have been saved in the Outbox New Message Alert Select one of the se...

Page 64: ...he text messages displayed in 4 or 6 lines for the Inbox and Outbox SMS Memory Management Selects Inbox Memory Management Auto Delete If the Inbox is full it deletes the old est text message to save a new text message Warning Msg If the Inbox is full it will not save any new text message and Memory Full New Text Rejected will display Note The Outbox always functions in Auto Delete mode Reply with ...

Page 65: ...the key under Web on standby to enter Web Menu 2 Scroll to Internet and press F 3 The Web Browser will start The cached informa tion may be displayed 4 To access the Internet press and hold CLR while indicator is on Your phone will display your ser vice provider s home page with a flashing Example 5 Scroll the page by or 6 Press or to select the menu option in the bottom line of the display 7 To r...

Page 66: ...cache memory Encryption Use for security Note Altering Homepage and Set WAP Proxy settings may disable web access E mailing with Browser The Web Browser allows you to send and receive e mails directly through your phone Please contact your service provider for details of the service Receiving E mails When e mail arrives at your mailbox an alert is sent to your phone 1 The web browser will automati...

Page 67: ...ge 32 Note English letters are always used when sending mes sages Web Browser Settings Your cellular telephone is already programmed for Internet service that may be available from your Ser vice Provider You can customize your browser with the following four menus only Web Lock Prevents unauthorized Internet access by locking the browser Your four digit Security Code unlocks the browser Web Backli...

Page 68: ...s in Web Link B Scroll to Web Link B and press F and follow the above steps 2 through 5 for Link B Notes 1 An IP address must be 12 digit long to enter If you have for example 123 45 67 8 then enter 1 2ABC 3DEF 0 4 GHI 5 JKL 0 6MNO 7PQRS 0 0 8TUV 2 Your phone may display the stored IP addresses or Port numbers in the above steps Then press F to keep them unchanged QNC Info The Username and Passwor...

Page 69: ... By Shortcut Each Function has its shortcut number for direct ac cess For example to enter the function Ringer Type F32 press F 3DEF 2ABC To Exit from Function Menu To return from a submenu to the main menu press Rcl To exit from Function Menu press Notes 1 to the right of a menu indicates more detailed items can be viewed by pressing F 2 shows the current function setting 3 The screen may display...

Page 70: ...ers F41 2 Clock F42 3 Adjust F43 4 Alarm F44 5 Count Down F45 Main Menu Submenu Branch 1 Key Tone 2 Beep Alert 3 Caller ID 4 Service 5 Voice Privacy 6 Minute 7 Low Battery 0 Other 1 Quick Dialing F01 2 Auto Answer F02 3 Absence F03 4 Redial Key F04 5 Location F05 5 Systems 1 A B Switch F51 2 NAM Change F52 3 Force Analog F53 4 Settings F54 1 NAM Name Tag 2 Auto NAM 3 Auto Retry 4 Voice Privacy 6 S...

Page 71: ...ode F14 on page 72 Keypad Lock F11 Prevents inadvertent pressing of keys e g when phone is in purse or pocket When activated the following functions are still avail able Incoming calls can be answered with Muting the ringer or stopping the vibrating with Programmed emergency numbers can be called Except for One Touch Emergency Call When activated the following functions are not avail able Automati...

Page 72: ...ked even if the power is turned off Automatic Phone Lock F13 When this feature is activated the phone automatically locks after it is turned off See Phone Lock F12 above To operate the four digit unlock code must be entered 1 Press F 1 3DEF 2 You can turn this feature on off by or 3 Press F to set Unlocking the Phone 1 Enter the four digit unlock code 2 The Phone Lock indicator will go out Changin...

Page 73: ...also lights automatically for an incoming call To change the duration press F enter a desired time 5 to 30 seconds and press F Off Mode Backlight is on momentarily when the power is first turned on but remains off thereafter Always On Mode Backlight is always on Note You can keep the backlight on while you are engaged in a conversation See Backlight Control In Use F22 2 below Backlight Control In ...

Page 74: ...ast Control F25 The LCD display contrast can be adjusted in 7 steps to suit your taste 1 Press F 2ABC 5 JKL 2 Adjust the contrast with or 3 Press F to set Software Version Display F26 To display the software version installed on the phone 1 Press F 2ABC 6MNO 2 Press F to exit Last Rescan SID Indicator F27 To display the System Identification Number SID the phone is currently using 1 Press F 2ABC 7...

Page 75: ...on F32 To select a ringer tone pattern from 15 options includ ing melodies 1 Press F 3DEF 2ABC 2 Press or to select the ringer tone 3 Press F to set Key Tone Volume Control F33 1 Press F 3DEF 3DEF 2 Keep pressing or until you achieve the de sired sound level or Si lent mode Note Key tone will be off in Silent mode but tone will be heard on the other side of the line Sending DTMF F34 To activate de...

Page 76: ...l an incoming call with only a single beep This feature can only be used with the Silent alert mode See Ringer Volume Control F31 on page 75 1 Press F 3DEF 5 JKL and 2ABC 2 Press or to turn this feature on off 3 Press F to set Caller ID Alert F35 3 To set an audible alert when a Caller ID call is received 1 Press F 3DEF 5 JKL and 3DEF 2 Press or to turn this feature on off 3 Press F to set Service...

Page 77: ...curs recharge the bat tery pack or replace it with a fully charged battery pack 1 Press F 3DEF 5 JKL and 7PQRS 2 Press or to turn this feature on off 3 Press F to set Call Timers To help manage your calls your phone is equipped with several Call Timers Last Call Timer F41 1 1 Press F 4 GHI 1 Talk time of the last call dis plays 2 Press F to exit Outgoing Call Timer F41 2 1 Press F 4 GHI 1 and 2ABC...

Page 78: ... Reset F65 1 on page 85 Lifetime Timer F41 4 1 Press F 4 GHI 1 and 4 GHI Cumulative life time talk time of all incom ing and outgoing calls dis plays This timer cannot be reset to zero 2 Press F to exit Web Total Timer F41 5 1 Press F 4 GHI 1 and 5 JKL Cumulative talk time of web access calls dis plays 2 Press F to exit Note This timer can be reset to zero by using Call Timer Reset F65 1 on page 8...

Page 79: ... GHI day 2ABC 1 time 0 9WXYZ 1 5 JKL and 1 for a m or 2ABC for p m 4 Press the key under STO to set Notes 1 In step 3 above a digit can be corrected by press ing or after moving the cursor Rcl or F 2 The clock works internally during power off and will display the time in the same mode when you turn the power on Clock Alarm F44 To set the alarm Example To set the alarm time to 7 30 a m 1 Press F 4...

Page 80: ...t from 1 99 minutes Starting the Countdown Timer 1 Press F 4 GHI 5 JKL 2 Enter the duration 1 to 99 minutes 3 Press F to start The indicator will be displayed 4 When the timer expires the alarm will ring for one minute with animation 5 Press any key to stop ring ing Canceling the Countdown Timer 1 Press F 4 GHI 5 JKL again after the timer has started 2 When Count Down Stop displays on screen with ...

Page 81: ...ng Cellular systems are identified by a number called Sys tem Identifier or SID Your phone is equipped with a Pre ferred Roaming List PRL which can be programmed by your Carrier to take advantage of the families of cel lular system SIDs that your Carrier owns or has spe cial billing arrangements with in different cities In your Home System Area both and Rm are not displayed on your phone Outside o...

Page 82: ...gistrations Changing NAMs 1 Press F 5 JKL 2ABC 2 Press or to change the current NAM 3 Press F to set Force Analog Call F53 Temporarily directs the phone to use the Analog Mode even if the Digital Mode has been previously selected 1 Press F 5 JKL 3DEF 2 Press F when scanning the Analog Mode Notes This feature automatically ends if 1 The phone is turned off 2 An outgoing call is made 3 An incoming c...

Page 83: ...tch to the appropriate NAM when the area changes 1 Press F 5 JKL 4 GHI and 2ABC 2 Press or to turn this feature on off 3 Press F to set Automatic Retry F54 3 When a call is not successfully completed this feature automatically retries the number up to seven times The indicator will stay on and the speaker will be muted Press to cancel the Automatic Retry 1 Press F 5 JKL 4 GHI and 3DEF 2 Press or t...

Page 84: ...rs can be placed even when this feature is on To Set Call Restriction Mode 1 Press F 6MNO 1 2 Enter the four digit security code and press F 3 Press or to select the mode 4 Press F to set The available Restriction modes are as follows 11 Digits Mode Only phone numbers of 11 digits or less are accepted Operator assisted dialing is prohibited 7 Digits Mode Only phone numbers of 7 digits or less are ...

Page 85: ...number in memory location 1 will be dialed when the One Touch Emergency Call feature is used Turning On Off One Touch Emergency Call Feature F63 1 Press F 6MNO 3DEF 2 Enter the four digit security code and press F 3 Press or to turn this feature on off 4 Press F to set Changing Security Code F64 1 Press F 6MNO 4 GHI 2 Enter the four digit security code and press F 3 The current security code is di...

Page 86: ... F 3 Press 3DEF 4 Press F to clear the his tory Text Message Voice Mail All Clear F65 4 To clear all Text Messages and Voice Mail Notification 1 Press F 6MNO 5 JKL 2 Enter the four digit security code and press F 3 Press 4 GHI 4 Press F to clear the message Function Reset F65 5 To reset the User Programmable functions 1 Press F 6MNO 5 JKL 2 Enter the four digit security code and press F 3 Press 5 ...

Page 87: ...ur service provider Service Mode F71 This feature allows you to select the data service set ting of your phone To set the Data Service Mode 1 Press F 7PQRS 1 2 Select the desired mode by pressing F Notes 1 Data Fax Mode F72 is set to Off automatically when you select Packet Middle or Packet High for the Data Service Mode 2 When your phone is in Packet Middle or Packet High you can only use 3 The c...

Page 88: ...set to Data or Fax 4 When your phone is to Data or fax you can only use 5 Data Fax mode F72 can not be set if TTY mode is active 6 To send data or fax the Data Fax mode F72 set ting is not necessary Service Mode F71 must be set to Circuit to send data or fax TTY Mode F73 Your phone is able to operate with a TTY Teletypewriter device on 45 5 baud in both analog and digital modes Connect a TTY devic...

Page 89: ...while in standby mode The Au dible alerts will be muted Incoming call received even in Silent mode New Text Message received even in Alert Off mode New Voice Mail Notification received even in Alert Off mode Caller ID Alert if activated Service Mode Alert if activated Clock Alarm Alert if activated Countdown Timer Alert if activated Activating Vibrating Alert Press F 8TUV scroll to On and press F ...

Page 90: ... tones Convenient when telephone is installed in the hands free car kit 1 Press F 0 2ABC 2 Scroll to On and press F 3 Enter duration 5 to 30 in seconds 4 Press F to set Note This feature will not function if the phone is in Phone Lock or Keypad Lock mode Redial Soft Key F04 Turns the Redial and Refer soft keys on or off 1 Press F 0 4 GHI 2 Scroll to On or Off 3 Press F to set Location F05 Allows y...

Page 91: ...Alert F35 3 Service Mode Alert F35 4 Voice Privacy Alert F35 5 One Minute Beep Tone F35 6 Low Battery Alarm F35 7 Clock Indicator F42 Clock Adjustment F43 Clock Alarm F44 Countdown Timer F45 A B System Selection F51 NAM Selection F52 Automatic NAM F54 2 Automatic Retry F54 3 Voice Privacy Service F54 4 Call Restriction F61 One Touch Emergency Call F63 Service Mode F71 Data Fax Mode F72 TTY Mode F7...

Page 92: ...ry Management Reply with Copy Reset Status Own phone number Enhanced Ack Alert On Alert On T9 Mode Auto Save 4 Lines Auto Delete No Functions Web Lock Web Backlight Web Idle Timer Connect Prompt Reset Status Off 30 seconds 30 seconds On Messaging Feature Settings See page 63 64 Function Reset Status continued Web Browser Settings See page 67 ...

Page 93: ... the screw with a size S Phillips head screwdriver The screw stays on the phone 3 Place a coin in the slot at the top of the phone and twist 4 To open pull the top of the faceplate forward 5 Hold the phone leaning on your hand Place the bottom of the faceplate against the bot tom of the phone so that the inner tabs fit the slots Close the faceplate and snap it shut Make sure that all seven hooks a...

Page 94: ...has urged the wireless phone industry to take a number of steps including the following Support needed research into possible biological effects of RF of the type emitted by wireless phones Design wireless phones in a way that minimizes any RF ex posure to the user that is not necessary for device function and Cooperate in providing users of wireless phones with the best possible information on po...

Page 95: ...000 Between them the studies investigated any possible association between the use of wireless phones and primary brain cancer glioma meningioma or acoustic neu roma tumors of the brain or salivary gland leukemia or other cancers None of the studies demonstrated the existence of any harmful health effects from wireless phone RF exposures However none of the studies can answer questions about long ...

Page 96: ...s known to have effects Manufacturers of wireless phones must report the RF expo sure level for each model of phone to the FCC The FCC website http www fcc gov oet rfsafety gives directions for locating the FCC identification number on your phone so you can find your phone s RF exposure level in the online listing 8 What has FDA done to measure the radiofrequency en ergy coming from wireless phone...

Page 97: ...diofrequency energy RF from wireless phones can inter act with some electronic devices For this reason FDA helped develop a detailed test method to measure electromagnetic interference EMI of implanted cardiac pacemakers and defibrillators from wireless telephones This test method is now part of a standard sponsored by the Association for the Ad vancement of Medical instrumentation AAMI The final ...

Page 98: ...the location of the caller in case of emergency Accuracy requirement for ALI information by FCC E911 rules is within 50 meters for 67 percent of calls and within 150 meters for 95 percent of calls FCC s ALI Requirements 9155 GPX s ALI Capability The Audiovox 9155 GPX is an ALI capable phone equipped with the GPS Global Positioning System Satellite assisted location information system receiver supp...

Page 99: ...e FCC when using your Cellular Phone Such violations are punishable by fine imprisonment or both Never use obscene indecent or profane lan guage Never use your Cellular Phone to send false dis tress calls Never wiretap or otherwise intercept a phone call unless you have first obtained the consent of the parties participating in the call Never make any anonymous calls to annoy ha rass or molest oth...

Page 100: ... Name Display 83 O Own Telephone Number 73 P Packet Mode 87 Phone Lock 72 Automatic 72 Unlock 72 Phonebook All Clear 86 Phonebook Edit Change Priority 48 Erase 48 Modify 46 Move 47 Phonebook Entry Automatic Storing 35 Dual Numbers 37 Name 38 Number 35 Overwrite 41 Ringer Type 40 Phonebook Recall Address Mode 43 Key Word Search Mode 44 Sort Scroll Mode 43 Prepending Dialing 45 PRL 74 81 Q Quick Dia...

Page 101: ...ho rized alteration misuse improper installation or repair or improper storage b Product whose mechanical serial number or electronic serial number has been removed al tered or defaced c Damage from exposure to moisture humidity excessive temperatures or extreme environmen tal conditions d Damage resulting from connection to or use of any accessory or other product not approved or authorized by th...

Page 102: ...E SHALL THE COMPANY BE LIABLE FOR ANY SPECIAL CON SEQUENTIAL OR INCIDENTAL DAMAGES FOR BREACH OF THIS OR ANY OTHER WARRANTY EXPRESS OR IMPLIED WHATSOEVER THE COMPANY SHALL NOT BE LIABLE FOR THE DELAY IN RENDERING SERVICE UNDER THIS WARRANTY OR LOSS OF USE DURING THE TIME THE PRODUCT IS BEING REPAIRED OR REPLACED No person or representative is authorized to as sume for the Company any liability oth...

Page 103: ...d hold Messaging Features Received Text Messages Press and hold Number of Voice Mail Voice mail F Voice Mail Dialing V Basic Operation Turn On Off Press and hold Place a Call Phone Number Terminate a Call Receive a Call Any Key except and Rcl F Clear Last Digit CLR Clear All Digits Press and hold CLR Ear SPK Volume or during a call Speakerphone Two Way V during a call Convenience Features Phoneboo...

Page 104: ...1 Data Fax Mode F 7PQRS 2ABC TTY Mode F 7PQRS 3DEF Vibrating Alert F 8TUV Automatic Answering F 0 2ABC Functions Mute Unmute F F Keypad Lock F 1 1 Lock the Phone F 1 2ABC Automatic Lock F 1 3DEF Display Own Phone Number SID F 2ABC 1 Backlight Control F 2ABC 2ABC Language Selection F 2ABC 4 GHI Last Call Time Display F 4 GHI 1 Outgoing Call Time Display F 4 GHI 1 2ABC All Calls Time Display F 4 GHI...

Page 105: ...R 9100 AC Adapter HS 911 Earclip with Boom Mic MOK 9150 Mobile Office Kit DTC 9100 Desktop Charger DTH 9100 Desktop Holder EM 425 Earbud CHF 9100 Cigarette Lighter Hands Free Kit JEARBOOM JEARWRAP JEARSET Hands Free Headset LB 9100 Leather Carrying Case HF 9150 Hands Free Car Kit PCP 9155 User Changeable Faceplates TRC 9100 Travel Charger 9155 GPX ...

Page 106: ...or your cellular phone giving special consideration to paragraph seven Warranty does not apply to any dam age that has resulted from the connection to or use of any accessories not ex pressly approved by Audiovox Some companies are marketing look alike ac cessories that are not compatible for use with your Audiovox product and may damage the unit or cause it to malfunction If service is required o...

Page 107: ...107 ...

Reviews: