


36
37
Operation with Logic Pro
Once iD14 has been successfully installed
following the steps detailed after
page 11
of
this manual, launch Logic Pro and check the
following:
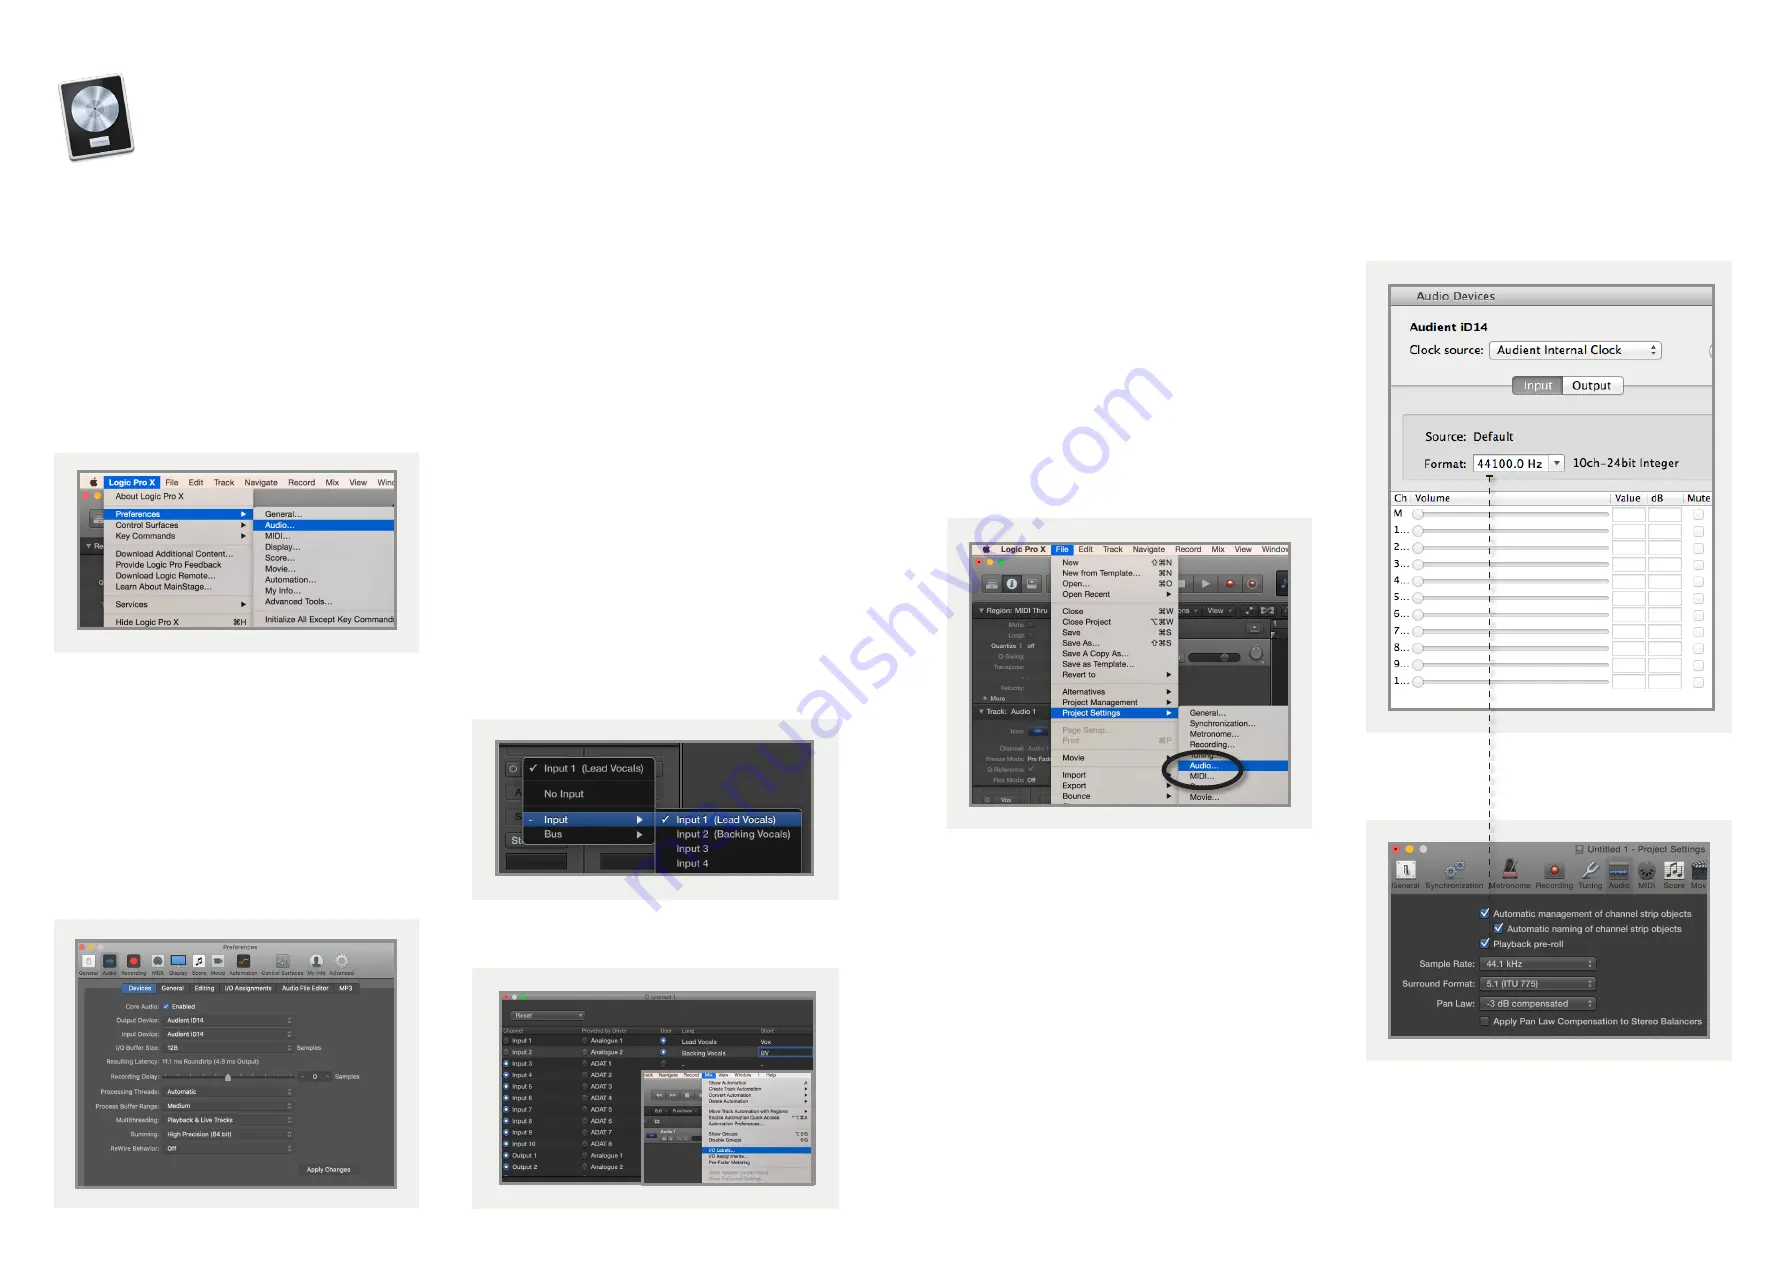
Logic Pro > Preferences > Audio
Ensure that iD14 is selected as the active
audio device and set the buffer size (to affect
system latency). If you are experiencing issues
with playback stability and CPU loading, try
increasing the buffer size. This appears with
“overload” errors and/or pops and clicks and
distortion in the audio.
Logic Pro Setup
If you are using the iD mixer to monitor input
signals while recording, be sure to disable
Logic’s software monitoring to avoid phasing
as the same source will be heard twice with
a short delay between the low latency DSP
signal and the delayed software monitoring
signal.
Assigning I/O
All of iD14’s input and output channels will
be available to Logic for routing. There are
a total of 10-inputs and 6-outputs reported
from the driver.
You can rename input and
output channels to whatever you wish using
the I/O label function. This is a great way to
keep things organised.
Mix > I/O Labels
Operation with Logic Pro
If you are using an external clock source
(ADAT or S/PDIF) to clock iD14, please ensure
that your Logic Pro project is set to the same
sample rate when recording and playingback
in a session, otherwise things may sound a bit
sharp or flat!
File > Project Settings > Audio
If you are using the internal clock in iD14,
setting the sample rate via Logic Pro will
update the iD14 sample rate to follow your
session.
There may be a slight pause as the system
re-clocks. This is normal.
This can be verified in Audio MIDI Setup.
Macintosh HD > Applications > Utilities
For more Logic Pro information please
consult your Apple user manuals &
documentation.


