


Advanced Telemetry Systems, Inc. R4520C Reference User Manual R05-11A
22
If the enter frequency that is not within the receiver’s range,
“
Out of range
” error will be displayed.
The Manual mode does not automatically store the data. To store data in the manual mode, pressing
“SHIFT”
and
then
“RECORD”
will store all data that has been detected and is displayed in the screen.
The Manual mode will display ID tags on the display as it decodes them. Other than storing data, all the features
described for the Aerial’s
Hold
mode also work here.
The time stamp of all detected tag ID’s will be stored when pressing “
RECORD
”
. If no ID’s are available, only
the frequency is saved along with the latest time stamp. Note: GPS data will only be stored if an optional antenna
is connected to the receiver, the GPS functionality is turned on and a valid GPS fix has been acquired.
Saving targets
will flash on the display
To exit the Manual mode, press the
“ESC”
key.
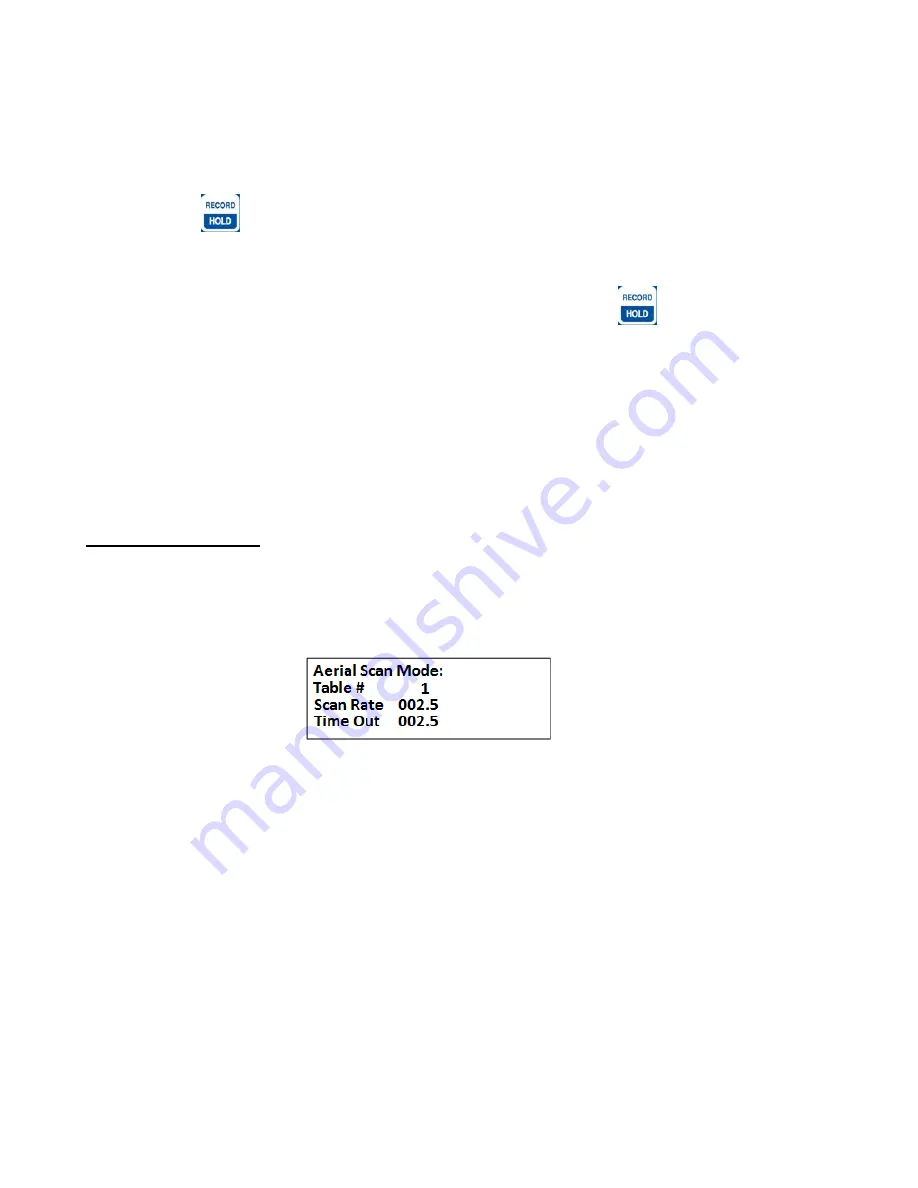
2.3 AERIAL Mode
Move the cursor to the
AERIAL
item and press
“ENTER”
.
Screen
1
Table #:
Selects the frequency table used for scanning. Twelve tables are available.
Multiple tables are used to optimize Aerial surveys in multiple locations.
Scan Rate:
Sets the amount of time the R4520C will stop on each frequency while attempting
to detect tags. The number after the decimal point may be a 0 or a 5 to allow half
second increments. For setting Scan Rate time, see section
13.0
.
Time Out:
The amount of time the receiver will stay on a Frequency while attempting to
detect a tag. If no tag is detected in the Time Out period, the receiver will advance
to the next frequency in its frequency table. This feature allows faster scanning by
truncating the scan time if no tag is detected in the Time Out period. The user
defines the parameter (e.g. 003 – 300 seconds). Refer to section
14.0
for
information on setting the Time Out value.
If the defaults were set up correctly, just press enter for each item listed, and the cursor will move through each
setting in the Aerial Setup windows. When all settings have been entered, the Aerial scan will start.
Summary of Contents for R4520C
Page 5: ...Advanced Telemetry Systems Inc R4520C Reference User Manual R05 11A 5 Intentionally Left Blank...
Page 6: ...Advanced Telemetry Systems Inc R4520C Reference User Manual R05 11A 6 Intentionally Left Blank...
Page 7: ...Advanced Telemetry Systems Inc R4520C Reference User Manual R05 11A 7 Intentionally Left Blank...


