ATAN0080 [APPLICATION NOTE]
9341B–AVR–02/15
16
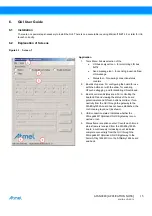
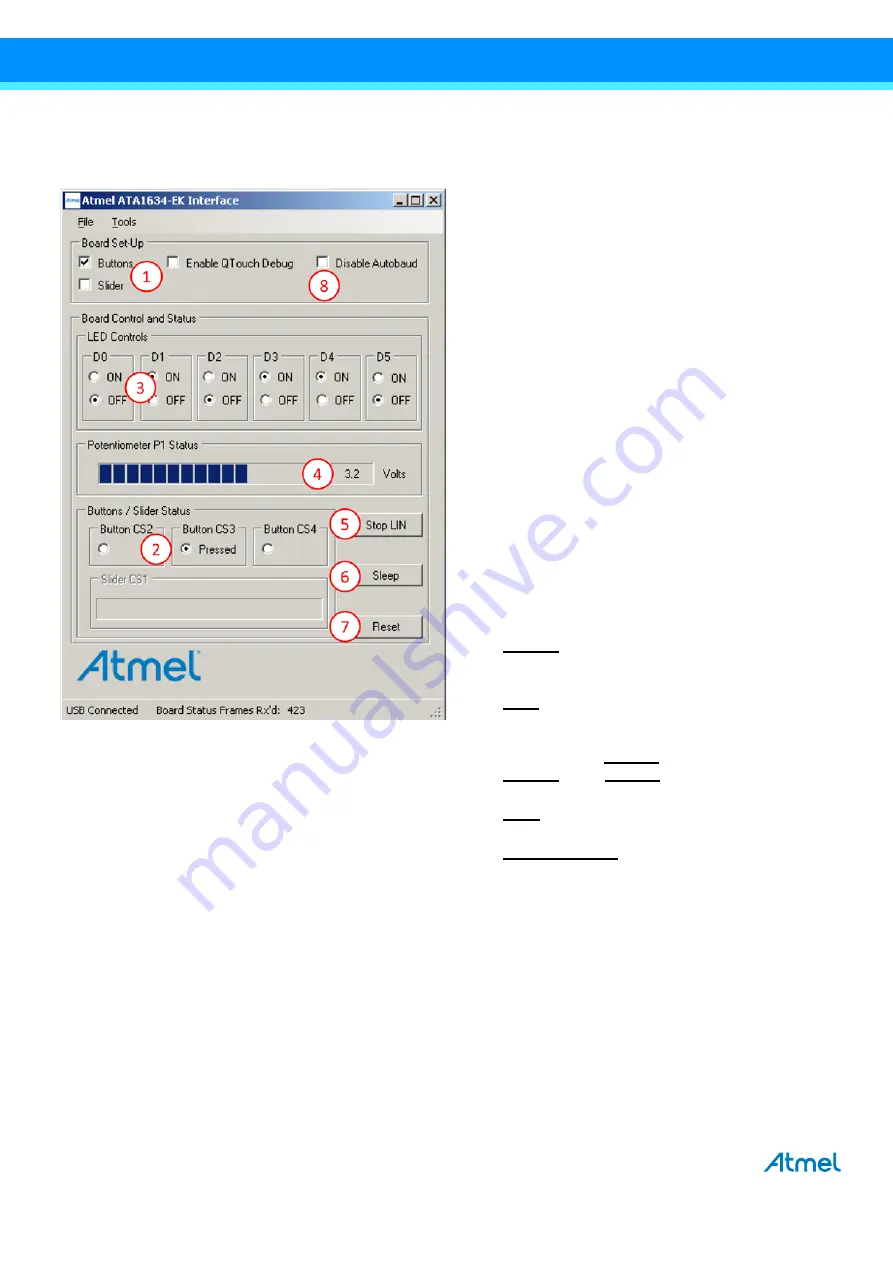
Figure 6-2.
Screen 2
Application
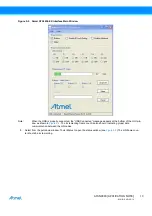
Connection to ATABtiny1634A Board Established
1.
Buttons/slider configuration: Configures the
ATABtiny1634A board for operation with either (3x)
QTouch buttons or (1x) QTouch slider or operating
without the QTouch buttons or slider. For proper
operation, the board jumpers must be set according
to the configuration selected.
2.
Buttons/slider status: Indicates the current status of
the buttons or slider. Activity on the configured sen-
sor on the board should be reflected on the GUI,
e.g., the illustration shows that the CS3 button on
the ATABtiny1634A board is being pressed. The sta-
tus is only shown for the configured function; the
function that is not configured is grayed out (e.g., in
this case, the board is configured for buttons, so the
slider status is grayed out).
3.
LED controls: Click ON or OFF to control the
ATABtiny1634A board LEDs; the LEDs on the board
will correspond to the selection on the GUI (assum-
ing the board jumpers are properly configured).
4.
Potentiometer status: Follows the potentiometer set-
ting on the ATABtiny1634A board, e.g., rotating the
potentiometer on the board should cause a corre-
sponding change on the GUI.
5.
Stop LIN
: Used to stop the transmission of applica-
tion messages via the LIN. Press again to restart the
message transmission via the LIN.
6.
Sleep
: Press to send a sleep message to the
ATABtiny1634A board; once the sleep message is
sent, subsequent LIN messages are automatically
stopped and the
Stop LIN
button (5) changes to
Start LIN
. Press
Start LIN
to restart the LIN mes-
sages and thus also wake up the board.
7.
Reset
: Press to send a reset message to the
ATABtiny1634A board.
8.
Disable Autobaud
: Check to disable the LIN auto-
baud function.
Note:
The LIN autobaud implementation uses the same
MCU pin as LED5, so LED5 is not enabled when
autobaud is enabled. Before disabling autobaud,
remove the autobaud jumper on the
ATABtiny1634A board.


