


Installation Guide
3
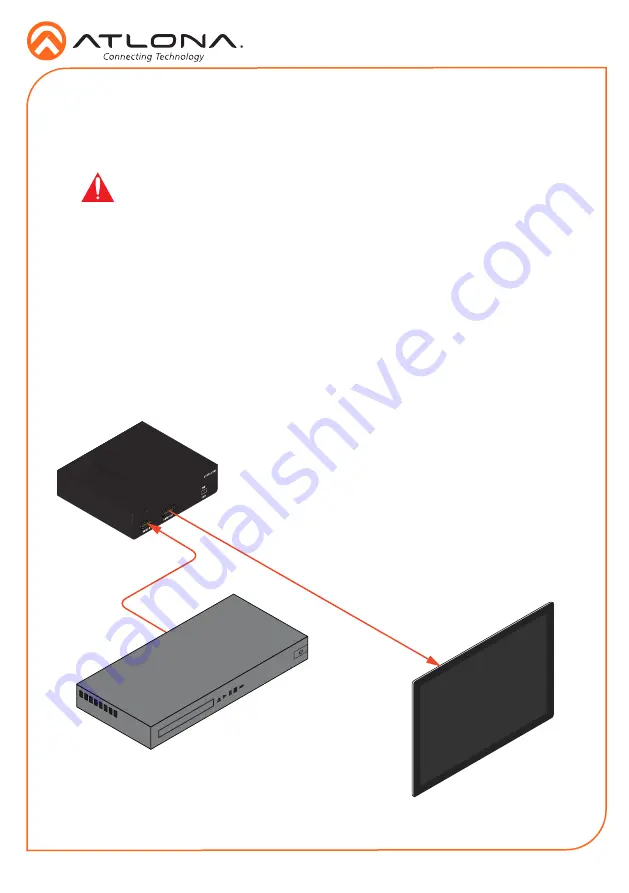
1. Connect an HDMI cable from the source to the
HDMI IN
port on the AT-ETU-SYNC.
2. Connect an HDMI cable from the sink (display) to the
HDMI OUT
port on the AT-ETU-SYNC.
3. Connect the included 5V DC power supply to the
FW / PWR
port on the AT-ETU-SYNC.
4. Connect the 5V DC power supply to an available AC outlet.
The illustration below, shows the proper location of the AT-ETU-SYNC in a basic source-sink
setup. The location of the AT-ETU-SYNC will vary, depending on the system. Before using the
AT-ETU-SYNC as an EDID emulator, an EDID must be selected or programmed.
Installation
Video
Video
AT-ETU-SYNC
HD/UHD Source
Display (Sink)
Connection Diagram
IMPORTANT:
The AT-ETU-SYNC is an HDR device. For best performance,
use premium HDMI cables that are HDR-certified. The HDMI cable between the
display (sink) and the AT-ETU-SYNC should not exceed 15 feet (4.5 meters).
Summary of Contents for Etude AT-ETU-SYNC
Page 7: ...Installation Guide 7 Notes...


