


Installation Guide
2
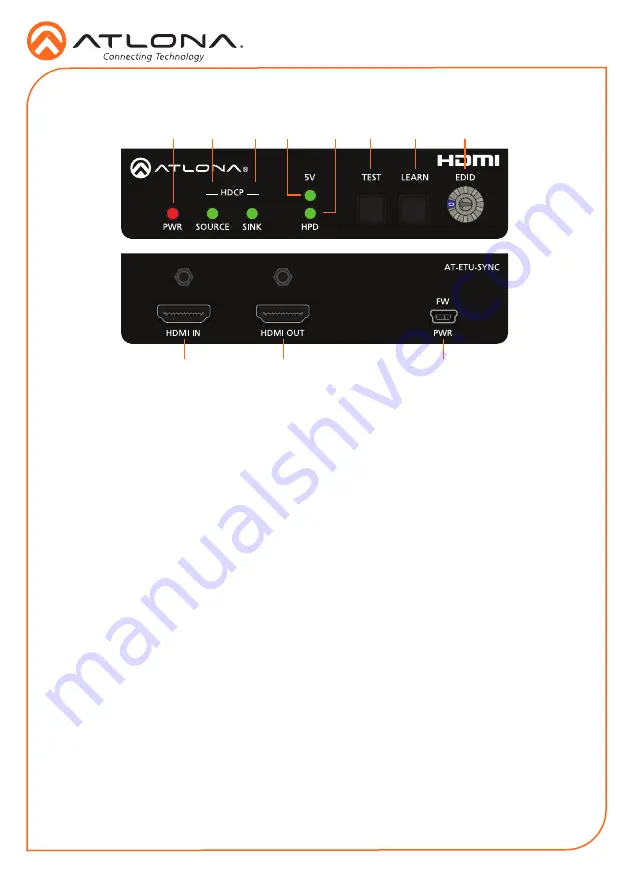
1
PWR
This LED indicator will glow red when the
unit is powered.
2
SOURCE
This LED indicator will glow green if the
source is HDCP compliant.
3
SINK
This LED indicator will glow green if the
sink (display) is HDCP compliant.
4
5V
This LED indicator will glow green if a 5V
signal is received from the source.
5
HPD
This LED indicator will glow green when
the unit receives a Hot-Plug Detect signal
from the sink.
6
TEST
Press this button to run the test
procedure.
7
LEARN
Press this button to program the AT-ETU-
SYNC with an EDID from a sink device.
8
EDID
Turn this dial to select the desired EDID
mode.
9
HDMI IN
Connect an HDMI cable from the source
to this port.
10 HDMI OUT
Connect an HDMI cable from the sink
(display) to this port.
11 FW / PWR
Connect the included power supply to this
port.
Panel Descriptions
1
9
10
2
3
11
4
5
6
7
8
Summary of Contents for Etude AT-ETU-SYNC
Page 7: ...Installation Guide 7 Notes...


