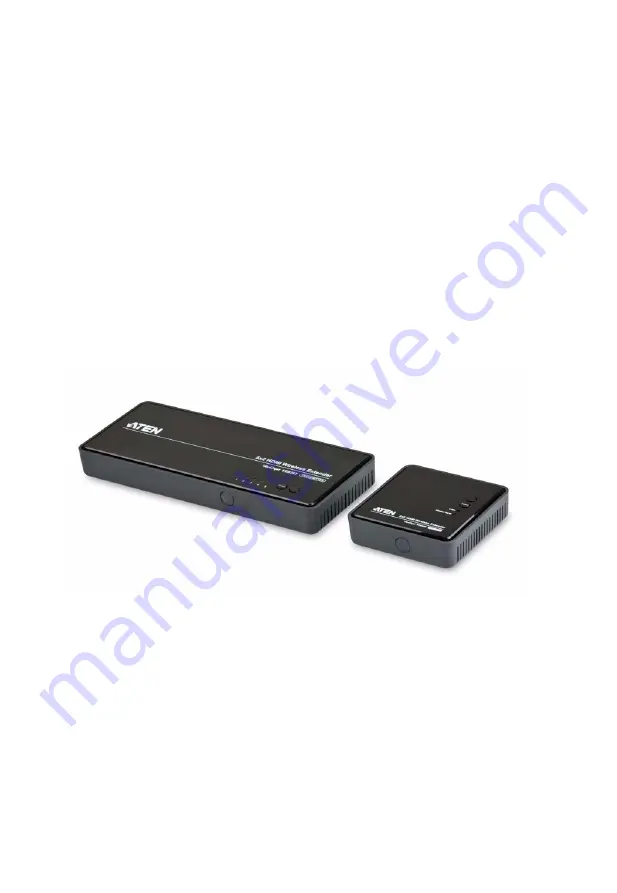
5x2 HDMI Wireless Extender
VE829
User Manual
www.aten.com
Page 1: ...5x2 HDMI Wireless Extender VE829 User Manual www aten com...
Page 2: ...VE829 User Manual ii RoHS This product is RoHS compliant SJ T 11364 2006 The following contains information that relates to China...
Page 3: ...ve following their purchase the buyer and not the manufacturer its distributor or its dealer assumes the entire cost of all necessary servicing repair and any incidental or consequential damages resul...
Page 4: ...ing If you encounter a problem contact your dealer Read this manual thoroughly and follow the installation and operation procedures carefully to prevent any damage to the unit and or any of the device...
Page 5: ...nsoles 3 Sources 3 Cables 3 Components 4 VE829T Top View 4 VE829R Top View 5 VE829R Rear View 6 Front View 7 2 Hardware Setup Wall Mounting 9 Single Station Installation 11 IR Blaster Extender Cable S...
Page 6: ...1 Adding and Selecting Active Transmitter 21 Remove Transmitter 23 Modify Transmitter Name 23 Appendix Safety Instructions 25 Technical Support 27 International 27 North America 27 Specifications 28 V...
Page 7: ...rpose features and benefits are presented and its front and back panel components are described Chapter 2 Hardware Setup describes how to set up your installation Diagrams showing the necessary steps...
Page 8: ...ndicates keys you should press For example Enter means to press the Enter key If keys need to be chorded they appear together in the same bracket with a plus sign between them Ctrl Alt 1 Numbered list...
Page 9: ...o up to 30m away within the home or any desired setup Note Distance quality and signal may vary depending on the environment solid structures such as steel concrete and brick may result to shorter dis...
Page 10: ...f signal Allows you to switch and independently select any of 5 sources 4 x HDMI connectors 1 x component connector between 2 HDTVs Supports full uncompressed HD 1080P 3D content and 5 1 channel digit...
Page 11: ...urce with component output connector Computer or laptop optional Cables Up to 4 HDMI cables for the source devices you will be connecting Note The package includes 1 HDMI cable 2 HDMI cables for the d...
Page 12: ...k slowly if the video from the source cannot be recognized 2 Source Selection Button Press this to manually switch between ports 3 Power Button LED Press this button to power on off the VE829T Note Th...
Page 13: ...vice is in standby mode The LED blinks to indicate that it is trying to link with a Transmitter 2 Source Button Press this to manually switch between ports 3 Video LED The LED blinks to indicate that...
Page 14: ...e to any of these ports 1 4 You can connect up to 4 HDMI input source devices 5 HDMI OUT Use an HDMI cable to connect your HDMI display device to this port 6 Mini USB Port Connect a computer to this p...
Page 15: ...Introduction 7 Front View No Component Description 1 IR Receiver This receives signals from the IR remote control 1 1 VE829T VE829R...
Page 16: ...3 Info Press this button to have Transmitter or Receiver display the signal quality source channel and resolution as follows Press it again to exit the Info display 4 IR Button Press this button to c...
Page 17: ...drill two 1 4 holes as per instructions 2 Insert anchors into the wall followed by the screws Leave 5 8 of the screw protruding for mounting the Receiver 1 Important safety information regarding the...
Page 18: ...l 10 3 Hang the VE829R by having the bottom panel holes aligned into the screws Slide down into position Note These screws are not provided We recommend that you use M5 x 12 Phillips Type I cross rece...
Page 19: ...o display device to the HDMI OUT port on the rear of the VE829R 4 Optional Connect a PC to the USB port using a mini USB to Type A USB cable 5 a Connect one end of the IR Blaster Cable to the IR Out p...
Page 20: ...USB HID control keyboard mouse of the PC connected to the Transmitter connect a keyboard or mouse to the USB port 8 Power on all connected source devices 2 2 3 3a 2 1 2 4 HDMI Display Device 6a 5a 4 2...
Page 21: ...hem Do the following steps for your units Transmitter 1 Connect one end of the IR Blaster Extender Cable to the IR Out port on the VE829T 2 Attach the IR Blaster heads to the input source device panel...
Page 22: ...VE829 User Manual 14 This Page Intentionally Left Blank...
Page 23: ...ter 4 Transmitter and Receiver Link After powering on the Transmitter and Receiver the panel LEDs blink to indicate that the two units are establishing a connection This takes around 15 to 20 seconds...
Page 24: ...eo you want displayed on screen Remote Control Press the SOURCE button on your IR remote control while pointing at the Transmitter or Receiver to toggle between connected input sources and select the...
Page 25: ...d video timing formats Item Mode Status Description Power LED Source LED Video LED VE829R Wireless LED VE829R OSD Display Standby For power saving mode Static Red off off off Initial Boot up Warm up I...
Page 26: ...e control or on the top panel of the VE829T The name should appear on screen when the input source device is selected for both Transmitter and Receiver sides Note Refer to Modify Transmitter Name page...
Page 27: ...starting it back up you must do the following 1 Shut down all the devices that are attached to the VE829T VE829R 2 Unplug the VE829T VE829R s power adapter cable 3 Wait 10 seconds then plug the VE829T...
Page 28: ...VE829 User Manual 20 This Page Intentionally Left Blank...
Page 29: ...E829T Transmitter Press the Up Down keys VE829R Receiver Press the Left Right keys The OSD cycles through the input devices and you can press OK once the desired source is selected Adding and Selectin...
Page 30: ...successful the OSD displays Transmitter 2 on screen Note Refer to Naming Source Devices page 18 for details on how to edit the name of a Transmitter 4 After successfully connecting the Receiver with T...
Page 31: ...To change a Transmitter name do the following 1 Press Transmitter No on the IR remote control go to SETUP then press OK 2 Select Modify Transmitter Name 3 Go to the Transmitter that you want to renam...
Page 32: ...VE829 User Manual 24 This Page Intentionally Left Blank...
Page 33: ...ation has been provided Never spill liquid of any kind on the device Unplug the device from the wall outlet before cleaning Do not use liquid or aerosol cleaners Use a damp cloth for cleaning The devi...
Page 34: ...or short out parts resulting in a risk of fire or electrical shock Do not attempt to service the device yourself Refer all servicing to qualified service personnel If the following conditions occur u...
Page 35: ...d Product model number serial number and date of purchase Your computer configuration including operating system revision level expansion cards and software Any error messages displayed at the time th...
Page 36: ...ss 5Ghz Wireless 5Ghz Power 1 x DC Jack 1 x DC Jack Mini USB Switches Power 1 x Pushbutton 1 x Pushbutton Source 1 x Pushbutton 1 x Pushbutton LEDs Source 5 Green N A Video Source N A 1 Green Wireless...
Page 37: ...97 30Hz VESA Timing DVI Only 640x480 59 94 72 809Hz VGA 800x600 60 317 72 188Hz SVGA 1024x768 60 70 069Hz XGA 1280x768 60 Hz WXGA 1280x1024 60 Hz SXGA Mandatory CEA 3D Video Format Timings 1280x720p 5...
Page 38: ...that the distance between the Transmitter and Receiver does not exceed 100 feet Move the Transmitter closer to the Receiver Power LED lights solid Source LED blinking slowly green Ensure that the vid...
Page 39: ...pported refer to page 29 IR Remote Control cannot control input source device Check where is IR sensor is located on the input source device Make sure that the IR Blaster Extender Sensor is close alig...
Page 40: ...vendor makes no warranty or representation expressed implied or statutory with respect to the contents or use of this documentation and especially disclaims its quality performance merchantability or...
Page 41: ...nsoles 3 Sources 3 Cables 3 Components 4 VE829T Top View 4 VE829R Top View 5 VE829R Rear View 6 Front View 7 2 Hardware Setup Wall Mounting 9 Single Station Installation 11 IR Blaster Extender Cable S...
Page 42: ...1 Adding and Selecting Active Transmitter 21 Remove Transmitter 23 Modify Transmitter Name 23 Appendix Safety Instructions 25 Technical Support 27 International 27 North America 27 Specifications 28 V...