background image


11 


MACHINES HAVE 1 YEARS GUARANTEED. 


PLEASE CONTACT WITH YOUR DEALER FOR THE PROBLEMS AND WHEN YOU NEED A SERVICE. 


***OUR GUARANTEE DOESN’T CONTAIN ELECTRIC MOTOR. 


FOR SPARE PARTS ORDER :


PLEASE INFORM THE SERIAL NUMBER OF THE MACHINE AND MANUFACTURING YEAR. 


PLEASE INFORM THE PART CODE. 


PLEASE INFORM THE QUANTITIES.


YEARLY 

1) 

Check the daıly, weekly, monthly and 6 monthly maıntenance are done. 

2) 

Are 

there any ubnormal noıses comıng from the machıne. 

3) 

Are there any ubnormal noıses comıng from the engıne. 

4) 

Are there any ubnormal noıses from the machıne when the machıne ıs not workıng but plugged. 

5) 

Is there any heatıng ın the cables. 

6) 

Is there any ubnormalıtyın the engıne durıng the operatıon. 


If any answers of these guestıons are yes call the technıcal servıce ımmedıateley do not try to solve the problems by 
yourself. 


GUARANTEE 


ATTENTION 

PLEASE DON’T TRY TO REPAIR IF THE PERSONAL IS NOT OUR REGISTERED SERVICE MAN. 


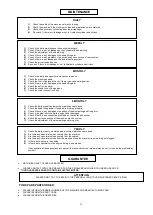
MAINTENANCE


DAILY 


1) 

Check the cable of the machıne before the runnıng. 

2) 

Check the machıne ıf the machıne ıs clean and maıntenance ıs completed. 

3) 

Check the pneumatıc cylınder agaınst the aır leakage. 

4) 

Do check  If there is oil leakage or not  in Hydraulic cylinder and oil tank. 


WEEKLY 


1) 

Check ıf the daıly maıntenance ıs done systematıcally. 

2) 

Check ıf there ıs any aır leakage on the cylınderof the bead lıftıng. 

3) 

Check the adjustment of the bead lıftıng. 

4) 

Check ıf there ıs any damage on the bead lıftıng arm. 

5) 

Check ıf there ıs any problem on the swıtches and connectıon of the machıne. 

6) 

Check ıf there ıs any leakage on the aır dıstrıbutıng system. 

7) 

Check the aır valves and hoses. 

8) 

Do check  If there is oil leakage or not  in Hydraulic cylinder and oil tank 


MONTHLY 


1) 

C

heck ıf the daıly and weekly maıntenances are done. 

2) 

Check the machıne pedals. 

3) 

Check the foot ıs tıghtened the rım ıf there ıs any abnormal posıtıon. 

4) 

Check ıf there ıs any damage on the bead lıftıng arm. 

5) 

Check the belt of the motor. 

6) 

Check the connectıon of the gearbox. 

7) 

Check the motor connectıon bolts. 


6 MONTHLY 


1) 

C

heck the daıly, weekly and monthly maıntenance are done. 

2) 

Check the bead lıftıng pedal ıf the pedal ıs workıng properly. 

3) 

Check ıf there ıs any damage on the pulley of the dısmantlıng and fıxıng arm. 

4) 

Check ıf the plastıcs of the naıls are spoıled or damaged. 

5) 

Check ıf there ıs any connectıon problems on the cables and socket. 

6) 

Check the earth connectıon of the machıne electrıc system. 

7) 

Check the adjustment of the dısmantlıng and fıxıng arm. 


Summary of Contents for POLISH-CLN

Page 1: ...1 FULL AUTOMATIC RIM POLISHING AND CLEANING MACHINE POLISH CLN INSTRUCTIONS BOOKLET English ...

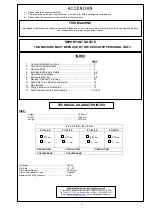
Page 2: ...x 2 2 Technical Characteristics 2 3 Machine Parts 3 4 Importants Warnings Safety 4 5 5 Operations and Usage 6 7 6 Electricity Diagram 8 9 7 Packing Transport Stocking 10 8 Assembly of the Machine and Setup 10 9 Maintenance 11 10 Oiling Periods and Guarantee 12 11 Standard Accessories and Supplies 13 14 15 TECHNICAL CHARACTERISTICS ATEK MAKİNA Service Garage Equipments Turgut Özal Cad Hastane Mah N...

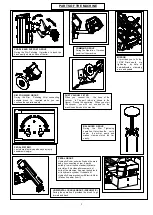
Page 3: ...e figure During the operation When you start the vacuum you willl not see dust on the machine and around the machine PEDAL SİSTEMİ Jant sıkma işlemini yaparken aynayı açıp kapatmanızı sağlar PEDAL GROUP Hydraulic Power unit was fixed on the main body by connecting screw It works suitably to well known standart hydraulic princibles It provides all movements of units of the machine It pumps the hydr...

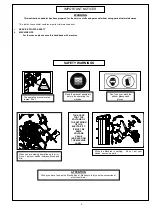
Page 4: ... VOLTAGE VALUE INDICATED ON THE MACHINE LABEL Read the manual absolutely before the operating the machine Don t use your machine without glasses and gloves ATTENTION When you have to open the Electric panel Make sure that you stop connection of electric network When you are making operation on the rim Do not put your hands between Brush and Rim The operating pressure value is max 8 bar IMPORTANT N...

Page 5: ...o not put your hands between Rim Clamping Arm and the Rim While you are working on the flange don t put your hands between the dismantling foot and rim While you are dismantling the tyres don t insert your hand between the dismantling foot and rim While you are working with the machine if you heard any abnormal noise please call the technical service Protect the electric connection of the machine ...

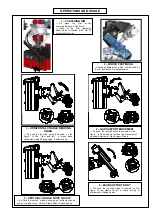
Page 6: ...h is showed on the figure to the right and left to make move Horizontal Cradle Bearing lining to down and up 4 GAP SUPPORT MOVEMENT Do push the joy stick which is showed on the figure to Down and up to make the movement of opening closing of Gap Support Group 5 VERTICAL CRADLE BODY GROUP Do Push the joy stick which is showed on the figure to down and up to make move Vertical Cradle Body to down an...

Page 7: ...he button with latch which is showed on the figure A to the direction where you require to turn the mirror If you require to make this rotation automatically at clockwise Do press the button which is showed on figure B If you require to stop it do press on other side of the button STOP 1 2 9 ROTATION OF THE BRUSH Do Press Button No 1 which is showed on figure to rotate the brush Do Press Button No...

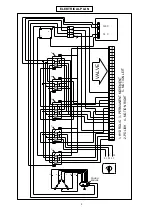
Page 8: ...A V U 8 1 6 3 13 11 W 14 L2 2 5 L1 L3 2 1 0 3 2 1 27 26 25 24 22 21 20 18 17 15 16 19 12 11 9 10 13 7 6 5 4 8 14 23 1 2 3 380 V 24 V 1 HYDROLIC 2 POLISH 4 MOTION RIGHT 5 MOTION LEFT 3 PERMANENT MOVEMENT VALVE POLISH ENGINE ELEKTRICAL PLAN ...

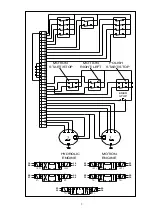
Page 9: ...33 21 28 30 22 21 29 31 22 19 24 20 26 19 25 20 27 12 2 1 3 4 5 6 7 8 10 9 11 21 17 14 13 16 15 19 18 20 23 22 24 25 26 27 28 29 30 31 32 33 34 MOTION START STOP MOTION RIGHT LEFT POLISH START STOP HYDROLIC ENGINE MOTION ENGINE EMER STOP ...

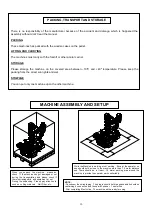
Page 10: ... be close to the machine more than 1 5 meter distance and There should be at least 1 5 meter working area around the machine to provide the operator work comfortably MACHINE ASSEMBLY AND SET UP 1 5 M 1 5 M 1 5 M 1 5 M There is no responsibility of the manufacturer because of the accident and damage which is happened the assembly without dont t read the manual PACKING These machınes has packed wıth...

Page 11: ...there is oil leakage or not in Hydraulic cylinder and oil tank WEEKLY 1 Check ıf the daıly maıntenance ıs done systematıcally 2 Check ıf there ıs any aır leakage on the cylınderof the bead lıftıng 3 Check the adjustment of the bead lıftıng 4 Check ıf there ıs any damage on the bead lıftıng arm 5 Check ıf there ıs any problem on the swıtches and connectıon of the machıne 6 Check ıf there ıs any lea...

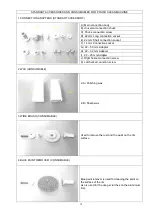
Page 12: ...ection socket G 22 50 mm Adapter H 22 32 mm Adapter I 22 25 mm Adapter J Rİght helical connection screw K Left helical connction screw 2 WAX CONSUMABLE 2 A Polishing wax 2 B Sharp wax 3 WIRE BRUSH CONSUMABLE Used to remove the rust and the paint on the rim surface 4 BLUE PAINT REMOVER CONSUMABLE Blue paint remover is used for cleaning the paint on the surface of the rim also is used for the deep s...

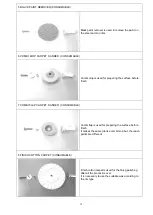
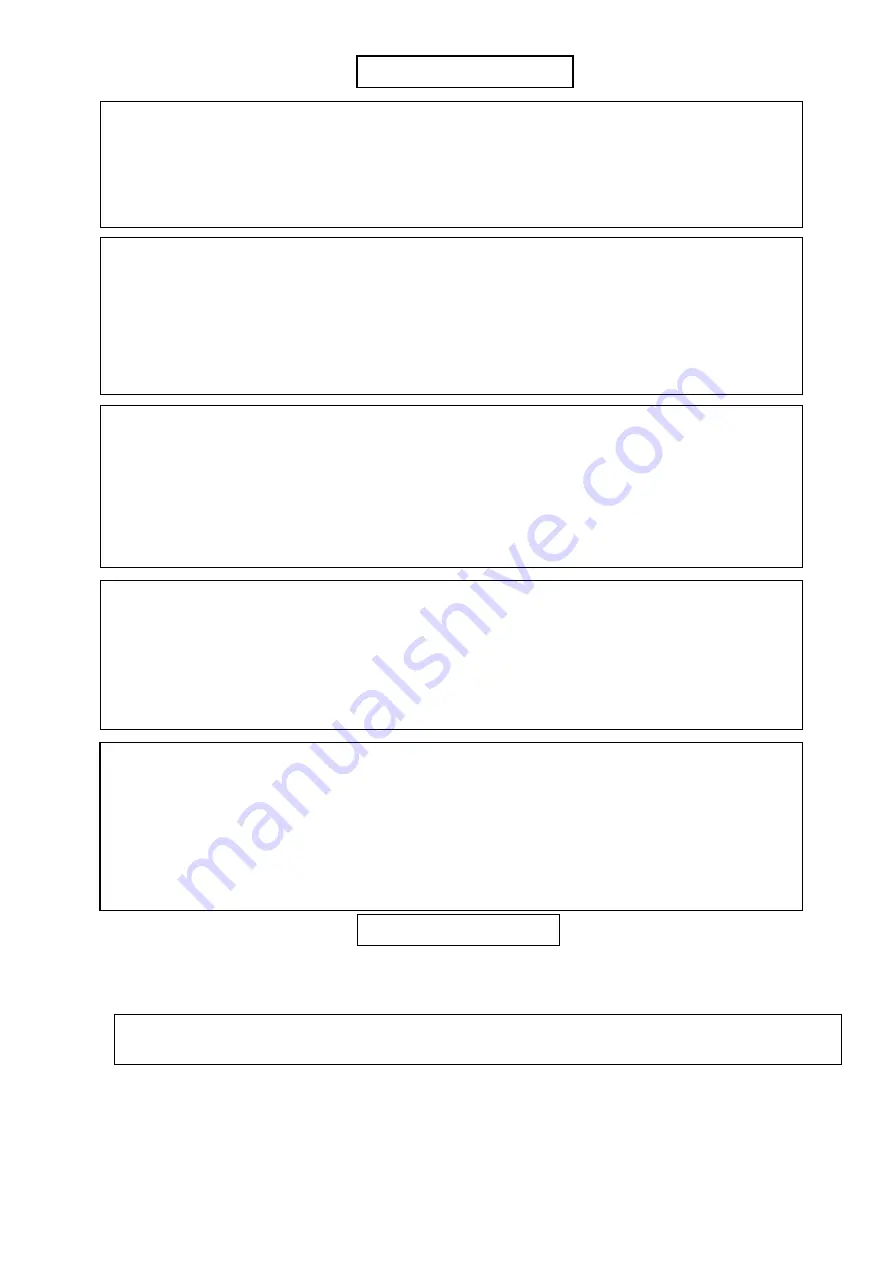
Page 13: ...g the surface before finish 7 COMBI FLAP CARPET SANDER CONSUMABLE Combi flap is used for preparing the surface before finish It makes the same job like combi mop but the reach points are different 8 FINISH COTTON CARPET CONSUMABLE Finish cotton carpet is used for the finisg polishing after all the process is over It is necessary to use the suitable wax according to the rim type ...

Page 14: ... very necessary to use otherwise there may be some dark point on the surface because of burning Do not press to much on the surface of the rim to have a quick process this may burn the surface and may cause some dark point on the rim surface While polishing the rim you have to use protective glasses and gloves because with the high temperature some sharp pieces may remove from the surface of the r...

Reviews: