background image

NL 17

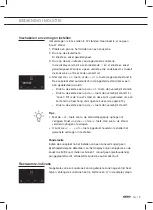
De kookplaat naar eco stand-by modus schakelen

•  Druk kort op de sleuteltoets. 

Er klinkt een enkel geluidssignaal. De eco stand-by modus is actief, 

het rode lampje naast de sleuteltoets blijft langzaam aan en uit 

gaan.

Vanuit de eco stand-by modus kunt u niet meteen beginnen met koken. 

Hiervoor moet de kookplaat eerst naar stand-by modus geschakeld 

worden.

Wist u dat

Na 30 minuten in de stand-by modus schakelt de kookplaat 

automatisch naar eco stand-by modus om onnodig energieverbruik 

te voorkomen.

Kinderslot

U kunt de kookplaat met het kinderslot vergrendelen. Onbedoeld 

inschakelen van de kookzones wordt hiermee voorkomen. 

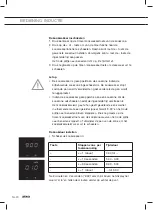
De kookplaat naar kinderslot schakelen

1.  Druk gedurende 2 seconden op de sleuteltoets.

Er klinkt een dubbel geluidssignaal. Alle toesten zijn nu inactief 

behalve de sleuteltoets. De kookplaat schakelt eerst naar eco stand-

by modus en dan door naar de kinderslot modus. Het rode lampje 

brandt constant.

2.  

Druk nogmaals 2 seconden op de sleuteltoets om de kookplaat van 

het kinderslot te halen.

Er klinkt een enkel geluidssignaal. De kookplaat is nu in stand-by 

modus. Het rode lampje naast de sleuteltoets is uit.

Tip

Zet de kookplaat in de kinderslot modus voordat u de kookplaat gaat 

reinigen om te voorkomen dat deze per ongeluk inschakelt.

Wist u dat

Wanneer de kookplaat op het kinderslot staat, deze net zo weinig 

energie verbruikt als in de eco stand-by modus.

 BEDIENING INDUCTIE

Summary of Contents for IG9571MB

Page 1: ...card here Houd wanneer u contact opneemt met de serviceafdeling het complete typenummer bij de hand When contacting the service department have the complete type number to hand Adressen en telefoonnu...

Page 2: ...NL Handleiding NL 3 NL 37 EN Manual EN 3 EN 37 Gebruikte pictogrammen Pictograms used Belangrijk om te weten Important information Tip...

Page 3: ...en van de Vario inductiezones 15 Uitschakelen 16 Stand by modus 16 Eco stand by modus 16 Kinderslot 17 Pauze 18 Herkennen van een modus 18 Timer Kookwekker 19 Geluidssignaal in en uitschakelen 21 Auto...

Page 4: ...ie Met de wokbrander gas die een zeer hoog vermogen heeft kunt u nog beter wokgerechten bereiden Dankzij de in de knop ge ntegreerde vonkontsteking ontsteekt n bedient u de wokbrander met n hand Voor...

Page 5: ...je in het daarvoor bestemde kader achter in de handleiding Het gegevensplaatje bevat alle informatie die de servicedienst nodig heeft om adequaat op uw vragen te reageren Veel kookplezier Let op Panne...

Page 6: ...ermogen ophogen 10 Vermogen versneld ophogen 11 Boost 12 Timer kookwekkertoets 13 Kookwekkerindicatie 14 Timerindicatie 15 Tijd verlagen toets 16 Bridge functie koppelt twee kookzones aan elkaar tot n...

Page 7: ...ng 1 Kookzone links wokbrander gas 6 kW 2 Vario zone 180 x 220 mm 3 7 kW koppelbare zones 1 0 stand 2 Volstand 3 Kleinstand 4 Wokstand wokbrander 5 Braadstand wokbrander UW GAS INDUCTIEKOOKPLAAT 1 2 5...

Page 8: ...kookzone kookplaat automatisch verlaagd of schakelt de kookzone kookplaat helemaal uit Kookduurbegrenzing Als een kookzone gedurende een ongebruikelijk lange tijd aan is wordt deze automatisch uitges...

Page 9: ...op een hogere stand aan de kook brengen gaat zeer snel Om overkoken of droogkoken te voorkomen kunt u er het beste altijd bij blijven Het vermogen past zich aan Bij inductiekoken wordt alleen dat deel...

Page 10: ...nen voedselresten niet inbranden Veilig De warmte wordt opgewekt in de pan zelf De glasplaat wordt niet warmer dan de pan Hierdoor blijft de kookzone een stuk koeler dan die van bijvoorbeeld een keram...

Page 11: ...nen waarmee al eerder op een gaskookplaat is gekookt zijn niet meer geschikt voor inductiekoken Gebruik alleen pannen die geschikt zijn voor elektrisch en inductiekoken met een dikke bodem van minimaa...

Page 12: ...kan dan te warm worden waardoor de glasplaat kan barsten en de panbodem kan smelten Schade ontstaan door het gebruik van ongeschikte pannen of droogkoken valt buiten de garantie Pandiameter De maximal...

Page 13: ...de toets dan verschijnt stand 12 boost Dit is de boost stand en deze kunt u gebruiken om een korte tijd op heel hoog vermogen te koken zie pagina 14 Drukt u de eerste keer op de toets dan verschijnt...

Page 14: ...ookzone die u wilt uitschakelen Er klinkt een enkel geluidssignaal en de display dooft De kookzone is nu helemaal uit Twee achter elkaar liggende kookzones Twee kookzones die achter elkaar liggen be n...

Page 15: ...nde een aantal seconden twee toetsen gelijktijdig ingedrukt druk eerst de toets van de achterste vario zone in en druk meteen daarna de toets van de voorste vario zone erbij in BR verschijnt in de dis...

Page 16: ...schakelen vanuit eco stand by modus of door alle afzonderlijke kookzones uit te schakelen Vanuit de stand by modus kunt u direct beginnen met koken door op de aan uittoets van de gewenste kookzone te...

Page 17: ...es wordt hiermee voorkomen De kookplaat naar kinderslot schakelen 1 Druk gedurende 2 seconden op de sleuteltoets Er klinkt een dubbel geluidssignaal Alle toesten zijn nu inactief behalve de sleuteltoe...

Page 18: ...nden zodat u het bedieningspaneel kunt schoonmaken Indien u binnen 5 minuten nogmaals op de pauzetoets drukt zullen de gepauzeerde kookprocessen hervatten Er klinkt een dubbel geluidssignaal de kookpl...

Page 19: ...doet De kookwekkerfunctie is te bereiken vanuit de timerfunctie door op de rode of toets te drukken Let op Per set van twee kookzones voor en achter is n timer kookwekker beschikbaar De timer kookwek...

Page 20: ...eruggeplaatst Indien de kookwekker gekoppeld is aan een kookzone zal de kookzone uitschakelen nadat de ingestelde tijd verstreken is Het kookwekkeralarm gaat af en geeft gedurende een kwartier in afne...

Page 21: ...in en uitschakelen Als er na het inschakelen van de kookplaat een pan op een inactieve kookzone geplaatst wordt licht de corresponderende bediening op en kan deze direct bedient worden zonder de aan u...

Page 22: ...erecht naar uw eigen wensen aanpassen Een automatisch kookprogramma instellen De kookzone is ingeschakeld Druk op de menutoets Druk nogmaals op de menutoets of houd de menutoets ingedrukt om naar de v...

Page 23: ...Pasta 2 3 200 300 g Hoge pan 200 210 Vario 2 0 l alleen water 1 1 Na het geluidssignaal kan de rijst of pasta worden toevoegd Deze functie werkt het best met pannen die door ATAG worden geadviseerd zi...

Page 24: ...nd zorgt voor een optimale woktemperatuur zowel voor de olie als voor het wokken Na het geluidssignaal is de pan op temperatuur de olie kan in de pan en daarna het gerecht Gerecht Aantal personen Maxi...

Page 25: ...atuur Elke oliesoort heeft een ander rookpunt waarbij giftige gassen vrijkomen In onderstaande tabel ziet u de rookpunten van verschillende oliesoorten Olie Rookpunt C Extra vierge olijfolie 160 C Bot...

Page 26: ...ees bakken van vis bakken van omeletten bakken van gekookte aardappelen frituren Gebruik stand 7 en 8 voor bakken van dikke pannenkoeken bakken van dik gepaneerd vlees uitbakken van spek of bacon bakk...

Page 27: ...ige vlekken Ook hardnekkige vlekken zijn met een mild reinigingsmiddel bijvoorbeeld afwasmiddel te verwijderen Verwijder waterkringen en kalkresten met schoonmaakazijn Metaalsporen ontstaan door schui...

Page 28: ...routine Normale werking De ventilatie blijft nog enkele minuten doorwerken nadat de kookplaat is uitgeschakeld Afkoeling van de kookplaat Normale werking De kookplaat geeft bij de eerste kookbeurten e...

Page 29: ...hakeld Schakel de bridge functie uit zie pagina 15 Foutcode F00 Het bedieningspaneel is vervuild of er ligt water op Bedieningspaneel schoonmaken Foutcode F0 t m F6 en FC De generator is defect Neem c...

Page 30: ...dt De wokbrander schakelt automatisch terug naar de wokstand als de bedieningsknop van de wokbrander naar de 0 stand wordt gedraaid Let op Tijdens het koken kan overgestapt worden van wokstand naar br...

Page 31: ...s zorgt voor extra stabiliteit bij een wok met een ronde bodem Gebruik de wokring niet op de wok braadstand De roosters kunnen dan verkleuren Pandrager Plaats de pandrager rechtstandig naar beneden zo...

Page 32: ...an leiden tot een slecht functionerende brander 1 Plaats de branderkelk 2 in het branderhuis 1 2 Plaats de binnenring 3 op de branderkelk 2 met gebruik van de positioneernokken 3 Plaats de buitenring...

Page 33: ...ragers branderdoppen Hardnekkige vlekken kunt u het beste verwijderen met een vloei baar reinigingsmiddel of een kunststof schuursponsje Gebruik nooit schuurpoeders schuurpads scherpe voorwerpen of ag...

Page 34: ...nk is leeg Verkeerd soort gas gebruikt Neem contact op met uw installateur Monteer een nieuwe zekering of schakel de zekering weer in Reinig droog de bougie Zet de branderdelen via de centreernokken i...

Page 35: ...p minimaal 3 sec volledig ingedrukt tussen de vol en de klein stand Bij eerste gebruik kan dit langer duren i v m aanvoer van gas Reinig droog het thermokoppel Keramische glasplaat gebroken Voorwerp o...

Page 36: ...hter 3 7 kW 180x220 Rechtsvoor 3 7 kW 180x220 Aansluitwaarde L1 3 7 kW L2 3 7 kW L3 max 5 W Totale aansluitwaarde 7400 W Inbouw maten Toestel breedte x diepte 904 x 522 mm Inbouwhoogte vanaf bovenkant...

Page 37: ...kruiste vuilnisbak aangebracht Dit betekent dat het apparaat aan het einde van zijn levensduur niet bij het gewone huisvuil mag worden gevoegd Het toestel moet naar een speciaal centrum voor gescheide...

Page 38: ...NL 38...

Page 39: ...ge the Vario induction zones 15 Switching off 16 Stand by modus 16 Eco stand by modus 16 Child lock 17 Pause 18 Recognizing a mode 18 Timer Kitchen timer 19 Switching on and off the beep 21 Automatic...

Page 40: ...gives more information about this You can prepare wok dishes much more effectively with the high power wok burner gas Thanks to the spark ignition integrated into the knob you can ignite and operate t...

Page 41: ...d at the back of the manual The appliance identification card contains all the information that the service technician will need in order to respond appropriately to your needs and questions Enjoy you...

Page 42: ...ower quickly 11 Boost 12 Timer alarmclock button 13 Alarmclock indicator 14 Cooking time indicator 15 Reduce the time button 16 Bridge function Two zones are connected this creates one big zone Contro...

Page 43: ...ne left wok burner gas 6 kW 2 Vario zone 180 x 220 mm 3 7kW zones that can be connected 1 0 position 2 High setting 3 Low setting 4 Wok setting wok burner 5 Roasting setting wok burner YOUR GAS INDUCT...

Page 44: ...ob switches off automatically Cooking time limiter The cooking time limiter is a safety function of your cooking appliance It will operate if you forget to switch off your hob Depending on the setting...

Page 45: ...oods and liquids will boil very rapidly It is best not to leave pans unattended to avoid them boiling over or boiling dry The power will be adjusted In the case of induction cooking it is only the par...

Page 46: ...do not get any hotter than the pans themselves food spills cannot burn on Safe The heat is generated in the pan itself The glass top does not get any warmer than the pan This means that the cooking zo...

Page 47: ...of pan Attention Pans that have already been used for cooking on a gas hob are no longer suitable for use on an induction hob Only use pans that are suitable for electric and induction cooking with a...

Page 48: ...g protection so that the appliance becomes too hot This may lead to the glass top cracking and the pan base melting Damage arising from the use of unsuitable pans or from boiling dry is excluded from...

Page 49: ...appear in the display This is power level boost and you can use this setting if you want to bring dishes to the boil quickly see page 14 If you press the button first level 1 will appear Tips With the...

Page 50: ...will hear a beep and the level in the display disappears The cooking zone has been switched off completely Two cooking zones one in front of the other Two cooking zones one in front of the other affec...

Page 51: ...zone on 3 Hold two keys down at the same time for a few seconds first press the button on the rear vario zone and then immediately the button on the front vario zone BR will appear in the display on t...

Page 52: ...d off You can switch to the stand by mode from the eco stand by mode or by switching off all cooking zones From the stand by mode you can directly start cooking by pressing the on off button of the de...

Page 53: ...lock the appliance It prevents unintended switching on Switching on the child lock 1 Press the child lock button for two seconds You will hear a double beep All buttons are active now except for the c...

Page 54: ...y of two seconds If you press the pause button again within 5 minutes the paused cooking process will be resumed You will hear a double beep the hob resumes the settings as they were set before the pa...

Page 55: ...kitchen timer function can be reached from the timer function by pressing the red button or red button Attention Per set of two cooking zones front and back one timer kitchen timer is available The ti...

Page 56: ...the kitchen timer is linked to a cooking zone the cooking zone will switch off after the set time has passed The kitchen timer alarm beeps for a quarter of an hour while decreasing as the time passes...

Page 57: ...tic pan detection If after the hob has been turned on a pan is placed in an inactive cooking zone the corresponding operating controls light up and this can be used immediately without operating the o...

Page 58: ...the dish according to your wishes To set an automatic program The cooking zone is switched on Press the menu button Again press the menu button or press and hold down the menu button to go to the nex...

Page 59: ...gh pan 240 210 Vario 2 0 l only water 1 Pasta 2 3 200 300 g High pan 200 210 Vario 2 0 l only water 1 1 After the beep the rice or pasta can be added This function works best with pans recommended by...

Page 60: ...ides an optimal wok temperature for both the oil and the wok After the beep the pan has reached its temperature the oil can be put in the pan and then the dish Dish Number of people Maximum amount of...

Page 61: ...type of oil according to the frying temperature Each oil has a different burning point at which toxic gasses are released The below table shows the burning points for various types of oil Oil Smoke po...

Page 62: ...k Use setting 9 and 10 to sear meats cook fish cook omelettes fry boiled potatoes deep fry foods Use setting 7 and 8 to fry thick pancakes fry thick slices of breaded meat fry bacon fat cook raw potat...

Page 63: ...rn stains Stubborn stains can also be removed with a mild cleaning agent such as washing up liquid Remove water marks and lime scale with vinegar Metal marks caused by sliding pans can be difficult to...

Page 64: ...rd set up routine Normal operation The fan runs on for several minutes after the hob has been switched off The hob is cooling Normal operation A slight smell is noticeable the first few times the hob...

Page 65: ...on it Clean the control panel Error code F0 up to and including F6 and FC Defective generator Contact the service department Error code F7 The ambient temperature is not good Switch off all heat sour...

Page 66: ...d the outer ring roasting setting will switch on The wok burner will switch automatically to the wok setting if the control knob of the wok burner is set to 0 Please note It is possible to switch betw...

Page 67: ...an accessory provides extra stability for woks with a round base Do not use the wok ring on the wok roasting setting This can result in discolouring Pan support Place the pan support vertically withou...

Page 68: ...can result in a poorly functioning burner 1 Place the burner distributor 2 in the burner housing 1 2 Use the leads to place the inner ring 3 on the burner distributor 2 3 Use the leads to place the ou...

Page 69: ...s on enamel pan supports burner caps Persistent stains can best be removed with a fluid detergent or a plastic scouring sponge Never use scouring powder scouring pads sharp objects or aggressive clean...

Page 70: ...in gas mains Gas bottle or tank is empty Wrong type of gas used Contact your installer Put in a new fuse or switch on the fuse in the fuse box Clean dry the spark plug Use the centring leads to put th...

Page 71: ...ssed for at least 3 seconds between high and low settings This can take longer the first time because of the gas supply Clean dry thermocouple Ceramic glass plate broken Object fallen onto it Close th...

Page 72: ...Rear right 3 7 kW 180x220 Front right 3 7 kW 180x220 Connected load L1 3 7 kW L2 3 7 kW L3 max 5W Total connected load 7400 W Building in dimensions Appliance width x depth 904 x 522 mm Build in heig...

Page 73: ...pliances separately the product is marked with the symbol of a crossed out wheeled dustbin This means that at the end of its working life the product must not be disposed of as urban waste It must be...

Page 74: ...EN 38...

Reviews: