


Rubber Track Loader
8. Loader/Transmission Controls Disassembly and Assembly
8-3
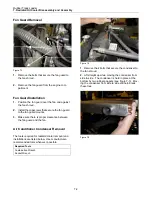
5.
Make sure the hoses are labeled before remov-
ing to aid in reinstalling. Remove the hoses and
disconnect the wiring harness from the joystick
6.
Unbolt the joystick from the joystick tower and
remove.
Loader Float Magnet Removal
and Installation
The tools required for loader float magnet removal
and installations are listed in Table 8-1. Use manu-
facturer-recommended tools whenever possible.
Table 8-1
Required Tools
Screwdriver
Open End Wrench
Allen Wrench
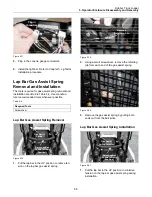
Loader Float Magnet Removal
Pull the
Boot Up
Figure 8-8
7.
Remove the rubber boot from the base of the
joystick and pull the boot up.
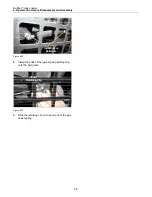
Loader Float
Magnet
Figure 8-9
8.
Locate the loader float magnet at the front of the
control.
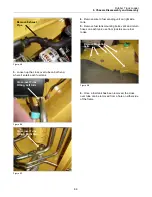
Remove
Screw
Figure 8-10
9.
The loader float magnet is held in place by an
allen screw at the bottom of the magnet. Re-
move this screw.
Remove
Magnet
Figure 8-11
14.
Remove the loader float magnet.