K005
File Manager
File Manager allows you to easily locate and manage your data either on the
internal storage or the connected external storage devices.
Accessing the internal storage
To access the internal storage:
1. Tap
to go to the All Apps screen.
2. Tap
File Manager
>
Internal Storage
on the left panel to view the contents of your
ASUS Tablet then tap an item to select. If a microSD card is inserted, tap
MicroSD
to view the contents of your microSD card.
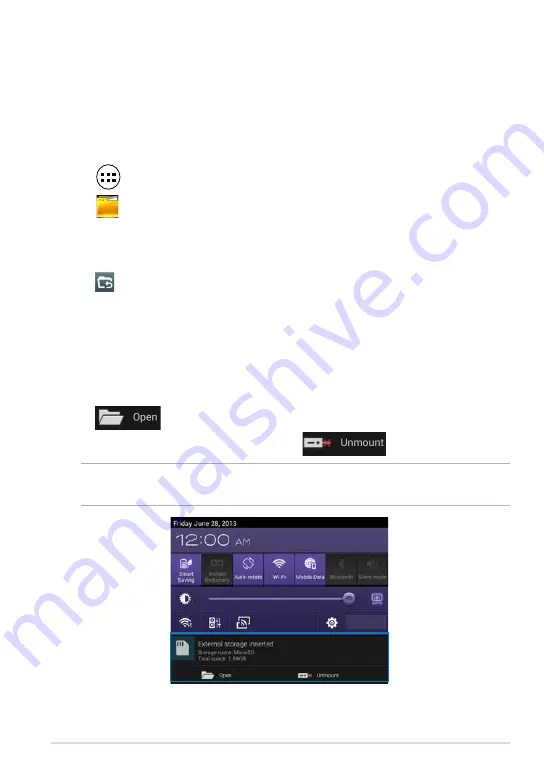
Accessing the external storage device
To access the external storage device:
1. Swipe down the notification bar on top of the screen to display the
notification box.
2. Tap
to display the contents of your microSD card. To unmount the
microSD card from your ASUS Tablet, tap
.
IMPORTANT!
Ensure to save your data stored in your microSD card before
unmounting the microSD card from your ASUS Tablet.
3. Tap
to return to the root directory of My Storage.
Summary of Contents for VTD-VPH
Page 1: ...support asus com ...
Page 10: ...ASUS Tablet E Manual 10 ...
Page 11: ...K005 11 Chapter 1 Hardware Setup Chapter 1 Hardware Setup ...
Page 16: ...ASUS Tablet E Manual 16 ...
Page 17: ...K005 17 Chapter 2 Using your ASUS Tablet Chapter 2 Using your ASUS Tablet ...
Page 26: ...ASUS Tablet E Manual 26 ...
Page 27: ...K005 27 Chapter 3 Working with Android Chapter 3 Working with Android ...
Page 48: ...ASUS Tablet E Manual 48 ...
Page 49: ...K005 49 Chapter 4 Pre installed Apps Chapter 4 Pre installed Apps ...
Page 87: ...K005 87 Appendices Appendices ...
Page 97: ...K005 97 ...
Page 98: ...ASUS Tablet E Manual 98 ...