


A - 2
A - 2
A - 2
A - 2
A - 2
A p p e n d i x : C P U f e a t u r e s
A p p e n d i x : C P U f e a t u r e s
A p p e n d i x : C P U f e a t u r e s
A p p e n d i x : C P U f e a t u r e s
A p p e n d i x : C P U f e a t u r e s
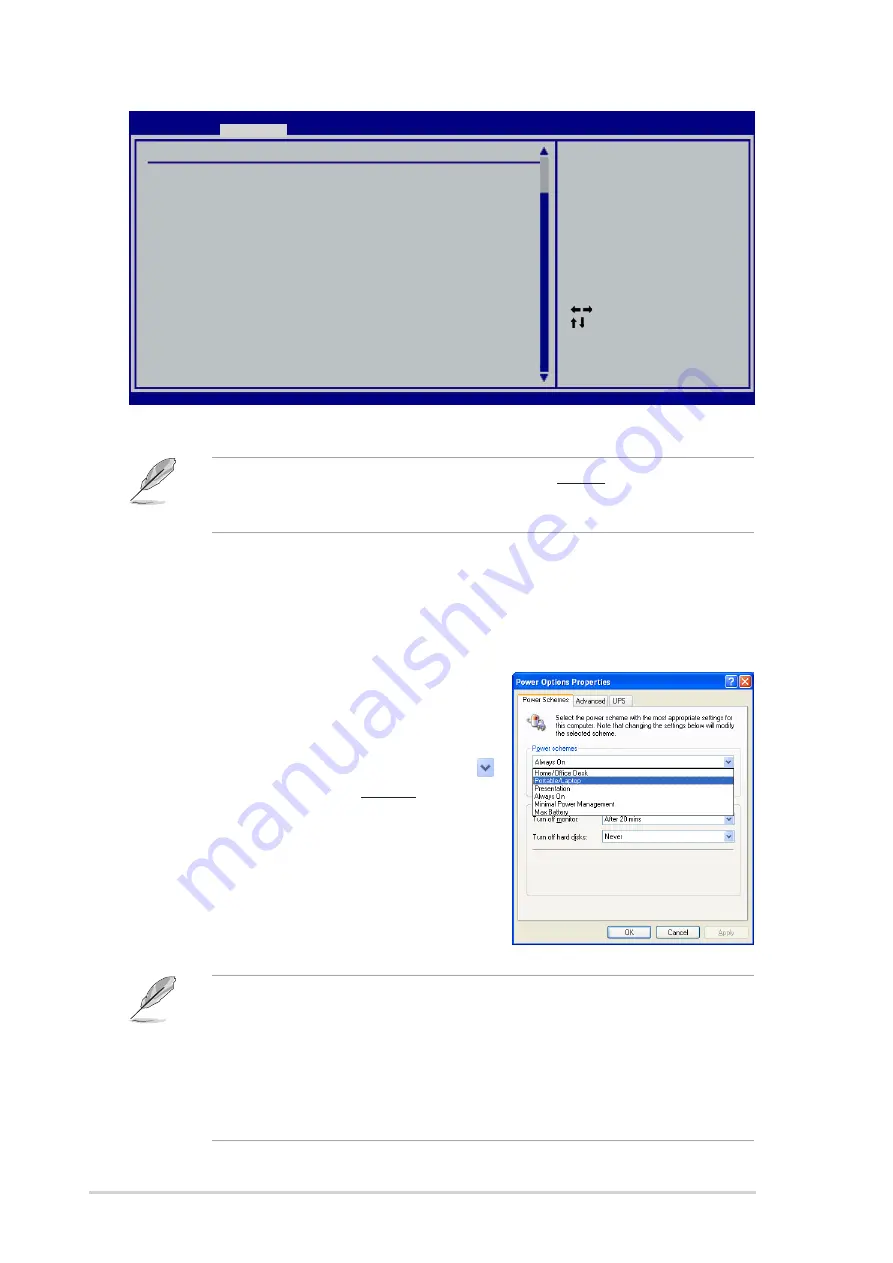
4.
Select A u t o m a t i c
A u t o m a t i c
A u t o m a t i c
A u t o m a t i c
A u t o m a t i c (default) from the options, then press <Enter>.
Set this item to [Maximum] or [Disabled] if you do not want to use the
EIST feature. The CPU constantly operates at a lower internal frequency
if you set this item to [Minimum].
5.
Press <F10> to save your changes and exit the BIOS setup.
6.
After the computer restarts, right click on a blank space on the
desktop, then select P r o p e r t i e s
P r o p e r t i e s
P r o p e r t i e s
P r o p e r t i e s
P r o p e r t i e s from the pop-up menu.
7.
When the D i s p l a y P r o p e r t i e s
D i s p l a y P r o p e r t i e s
D i s p l a y P r o p e r t i e s
D i s p l a y P r o p e r t i e s
D i s p l a y P r o p e r t i e s window appears, click the S c r e e n
S c r e e n
S c r e e n
S c r e e n
S c r e e n
S a v e r
S a v e r
S a v e r
S a v e r
S a v e r tab.
8.
Click the P o w e r
P o w e r
P o w e r
P o w e r
P o w e r button on the Monitor
power section to open the P o w e r
P o w e r
P o w e r
P o w e r
P o w e r
O p t i o n s P r o p e r t i e s
O p t i o n s P r o p e r t i e s
O p t i o n s P r o p e r t i e s
O p t i o n s P r o p e r t i e s
O p t i o n s P r o p e r t i e s window.
9.
On the Power schemes
Power schemes
Power schemes
Power schemes
Power schemes section, click ,
then select any option except
Home/Office Desktop
Home/Office Desktop
Home/Office Desktop
Home/Office Desktop
Home/Office Desktop or Always On
Always On
Always On
Always On
Always On.
10. Click A p p l y
A p p l y
A p p l y
A p p l y
A p p l y, then click O K
O K
O K
O K
O K.
11. Close the Display Properties
Display Properties
Display Properties
Display Properties
Display Properties window.
After you adjust the power scheme,
the CPU internal frequency slightly
decreases when the CPU loading is low.
•
The motherboard comes with a BIOS file that supports EM64T and EIST.
You can download the latest BIOS file from the ASUS website
(www.asus.com/support/download/) if you need to update the BIOS file.
•
The screen displays and procedures may vary depending on the
operating system.
•
Visit www.intel.com for more information on the EM64T and EIST features.
•
Visit www.microsoft.com for more information on Windows
®
64-bit OS.
Select Screen
Select Item
+-
Change Option
F1
General Help
F10 Save and Exit
ESC Exit
v02.58 (C)Copyright 1985-2004, American Megatrends, Inc.
BIOS SETUP UTILITY
Advanced
Configure Advanced CPU settings
Frequency : 2800 MHz
FSB Speed : 800 MHz
Cache L1 : 16 KB
Cache L2 : 1024 KB
Cache L3 : 0 KB
Ratio Status: Unlocked (Max:14, Min:14)
Ratio Actual Value : 14
Ratio CMOS Setting:
[ 14]
Max CPUID Value Limit:
[Disabled]
Execute Disable Function
[Disabled]
Hardware Prefetcher
[Enabled]
Adjacent Cache Line Prefetch
[Enabled]
CPU Internal Thermal Control
[Disabled]
Hyper Threading Technology
[Enabled]
Intel(R) SpeedStep Technology
[Automatic]
Sets the ratio
between the CPU core
clock and the FSB
frequency


