background image

Load Optimized Defaults

This option allows you to load the default values for each of the parameters on the Setup 

menus. When you select this option or if you press <F5>, a con rmation window appears. 

Select OK to load the default values.

Save Changes & Reset

Once you are  nished making your selections, choose this option from the Exit menu to 

ensure the values you selected are saved. When you select this option or if you press <F10>, 

a con rmation window appears. Select OK to save changes and exit.

Discard Changes and Exit

This option allows you to exit the Setup program without saving your changes. When you 

select this option or if you press <Esc>, a con rmation window appears. Select OK to discard 

changes and exit.

Launch EFI Shell from USB drives

This option allows you to attempt to launch the EFI Shell application (shellx64.e ) from one of 

the available USB devices.

Exit menu

The Exit menu items allow you to load the optimal default values for the BIOS items, and 

save or discard your changes to the BIOS items.

Search on FAQ

Move your mouse over this button to show a QR code. Scan this QR code with your mobile 

device to connect to the ASUS BIOS FAQ web page. You can also scan the QR code below.

2-4

Chapter 2: Getting started

Summary of Contents for H170-PRO/USB 3.1

Page 1: ...Motherboard H170 PRO USB 3 1 ...

Page 2: ...espective companies and are used only for identi cation or explanation and to the owners bene t without intent to infringe Offer to Provide Source Code of Certain Software This product contains copyrighted software that is licensed under the General Public License GPL under the Lesser General Public License Version LGPL and or other Free Open Source Software Licenses Such software in this product ...

Page 3: ...USB 3 1 specifications summary vi Chapter 1 Product introduction Motherboard overview 1 1 Central Processing Unit CPU 1 9 System memory 1 10 Chapter 2 BIOS information BIOS setup program 2 1 EZ Mode 2 2 Advanced Mode 2 3 Exit menu 2 4 Appendices Notices A 1 ASUS contact information A 4 ...

Page 4: ...rboard and adding components carefully read all the manuals that came with the package Before using the product ensure all cables are correctly connected and the power cables are not damaged If you detect any damage contact your dealer immediately To avoid short circuits keep paper clips screws and staples away from connectors slots sockets and circuitry Avoid dust humidity and temperature extreme...

Page 5: ...s properly take note of the following symbols used throughout this manual DANGER WARNING Information to prevent injury to yourself when completing a task CAUTION Information to prevent damage to the components when completing a task IMPORTANT Instructions that you MUST follow to complete a task NOTE Tips and additional information to help you complete a task Typography Bold text Indicates a menu o...

Page 6: ...rchitecture Supports Intel Extreme Memory Pro le XMP Refer to www asus com for the latest Memory QVL Qualified Vendors List The maximum memory frequency supported varies per CPU Expansion slots 1 x PCI Express 3 0 2 0 x16 slot at x16 mode 1 x PCI Express 3 0 2 0 x16 slot max at x4 mode compatible with PCIe x1 and x4 devices 2 x PCI Express 3 0 2 0 x1 slots 2 x PCI slots When PCIe x16_2 is occupied...

Page 7: ...udio capacitors Provide warm natural and immersive sound with exceptional clarity and delity Audio Shielding Ensures precision analog digital separation and greatly reduces multi lateral interference USB ASMedia USB 3 1 Controllers supports ASUS USB 3 1 Boost 2 x 10 Gb s USB 3 1 3 0 2 0 ports at the rear panel teal blue Type A Intel H170 Express Chipset 6 x USB 3 0 2 0 ports 4 ports at mid board 2...

Page 8: ... 4 0 system ASUS Exclusive Features ASUS AI Charger ASUS AI Suite 3 ASUS Disk Unlocker featuring 3 TB HDD support EZ DIY Push Notice Monitor your PC status with smart devices in real time UEFI BIOS EZ Mode Featuring friendly graphics user interface ASUS CrashFree BIOS 3 ASUS EZ Flash 3 Q Design ASUS Q Slot ASUS Q DIMM Rear panel I O ports 1 x PS 2 Keyboard mouse port 1 x DisplayPort 1 x HDMI port ...

Page 9: ...nector 1 x 8 pin EATX 12V power connector 1 x COM header 1 x Clear CMOS header By default the CPU Q Fan control is set in Auto mode to detect the CPU installed and change to the control mode automatically BIOS features 128 Mb Flash ROM UEFI AMI BIOS PnP DMI 3 0 WfM2 0 SM BIOS 3 0 ACPI 5 0 Multi language BIOS ASUS EZ Flash 3 ASUS CrashFree BIOS 3 F11 EZ Tuning Wizard F6 Qfan Control F3 My Favorites...

Page 10: ...x ...

Page 11: ...do so can cause you physical injury and damage to motherboard components Place this side towards the rear of the chassis Scan the QR code to get the detailed pin de nitions H170 PRO USB 3 1 PCIEX16_1 2280 2260 2242 PCIEX16_2 PCI1 PCI2 PCIEX1_2 PCIEX1_1 M 2 SOCKET3 LANGuard ASM 1442K ASM 1142 ASM 1083 USB1314 USB1112 AAFP EATXPWR BATTERY Super I O ALC 887 KBMS_USB910 DVI CLRTC 22 4cm 8 8in DDR4 DIM...

Page 12: ...tor Do not forget to connect the fan cables to the fan connectors Insuf cient air ow inside the system may damage the motherboard components These are not jumpers Do not place jumper caps on the fan connectors The CPU_FAN connector supports a CPU fan of maximum 1A 12 W fan power Intel LGA1151 CPU socket Install Intel LGA1151 CPU into this surface mount LGA1151 socket which is designed for 6th Gene...

Page 13: ...he power cable before removing or plugging in any motherboard component SB_PWR ON Standby Power Powered Off OFF SATAEXPRESS connector This connector connects to SATAEXPRESS hard disk drives via SATAEXPRESS signal cables SATA6G_2 SATA6G_1 SATAEXPRESS GND RSATA_TXP1 RSATA_TXN1 GND RSATA_RXN1 RSATA_RXP1 GND GND RSATA_TXP2 RSATA_TXN2 GND RSATA_RXN2 RSATA_RXP2 GND Floating Device_Reset GND Detection Se...

Page 14: ...s up to 480Mbps connection speed Serial port connector 10 1 pin COM Connect the serial port module cable to this connector then install the module to a slot opening at the back of the system chassis Digital audio connector 4 1 pin SPDIF_OUT Connect the S PDIF Out module cable to this connector then install the module to a slot opening at the back of the system chassis SPDIF_OUT 5V SPDIFOUT GND PIN...

Page 15: ...such as a LAN card SCSI card USB card and other cards that comply with PCI speci cations PCI Express 3 0 2 0 x16 slots This motherboard has two PCI Express 3 0 2 0 x16 slots that support PCI Express 3 0 2 0 x16 graphic cards complying with the PCI Express speci cations VGA configuration PCI Express operating mode PCIe 3 0 x16_1 gray PCIe 3 0 x16_2 Single VGA PCIe card x16 Recommended for single VG...

Page 16: ...Controller shared XHCI Controller shared HD Audio shared ASM1142 shared ASM1083 shared Intel LAN shared PCIEx16_1 shared PCIEx16_2 shared PCIEx1_1 shared PCIEx1_2 shared Rear panel connectors LAN port Speed LED Activity Link LED 4 5 3 6 8 9 7 10 11 2 1 12 1 PS 2 Keyboard Mouse combo port This port connects to a PS 2 mouse or PS 2 keyboard 2 DisplayPort This port connects a display monitor or a hom...

Page 17: ...1 or 7 1 channel configuration Port Headset 2 1 channel 4 1 channel 5 1 channel 7 1 channel Light Blue Rear panel Line In Rear Speaker Out Rear Speaker Out Rear Speaker Out Lime Rear panel Line Out Front Speaker Out Front Speaker Out Front Speaker Out Pink Rear panel Mic In Mic In Bass Center Bass Center Lime Front panel Side Speaker Out To configure a 7 1 channel audio output Use a chassis with H...

Page 18: ...evices 10 HDMI port This port is for a High De nition Multimedia Interface HDMI connector and is HDCP compliant allowing playback of HD DVD Blu ray and other protected content 11 DVI D port This port is for any DVI D compatible device DVI D cannot be converted to output from RGB Signal to CRT and is not compatible with DVI I 12 USB 2 0 ports These 4 pin Universal Serial Bus USB ports are for USB 2...

Page 19: ... retailer immediately if the PnP cap is missing or if you see any damage to the PnP cap socket contacts motherboard components Keep the cap after installing the motherboard ASUS will process Return Merchandise Authorization RMA requests only if the motherboard comes with the cap on the LGA1151 socket The product warranty does not cover damage to the socket contacts resulting from incorrect CPU ins...

Page 20: ...y For an optimum compatibility we recommend that you install memory modules of the same version or data code D C from the same vendor Check with the vendor to get the correct memory modules According to Intel CPU spec DIMM voltage below 1 35V is recommended to protect the CPU Due to the memory address limitation on 32 bit Windows OS when you install 4GB or more memory on the motherboard the actual...

Page 21: ...ns Using the power button reset button or the Ctrl Alt Del keys to force reset from a running operating system can cause damage to your data or system We recommend you always shut down the system properly from the operating system The BIOS setup screens shown in this section are for reference purposes only and may not exactly match what you see on your screen Visit the ASUS website at www asus com...

Page 22: ...ing on the devices you installed to the system Saves the changes and resets the system Selects the display language of the BIOS setup program Displays the CPU motherboard temperature CPU voltage output CPU chassis fan speed and SATA information Displays the system properties of the selected mode Click Enter to switch EZ System Tuning modes Displays the Advanced mode menus Selects the boot device p...

Page 23: ...U motherboard temperature CPU and memory voltage output Quick Note Advanced Mode The Advanced Mode provides advanced options for experienced end users to con gure the BIOS settings The gure below shows an example of the Advanced Mode Refer to the following sections for the detailed con gurations To access the EZ Mode click EzMode F7 or press F7 Popup window Search on FAQs ASUS H170 PRO USB 3 1 2 3...

Page 24: ...d Exit This option allows you to exit the Setup program without saving your changes When you select this option or if you press Esc a con rmation window appears Select OK to discard changes and exit Launch EFI Shell from USB drives This option allows you to attempt to launch the EFI Shell application shellx64 e from one of the available USB devices Exit menu The Exit menu items allow you to load t...

Page 25: ...to which the receiver is connected Consult the dealer or an experienced radio TV technician for help The use of shielded cables for connection of the monitor to the graphics card is required to assure compliance with FCC regulations Changes or modi cations to this unit not expressly approved by the party responsible for compliance could void the user s authority to operate this equipment IC Canadi...

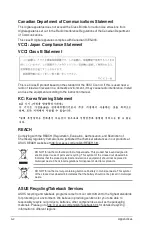
Page 26: ...keback programs come from our commitment to the highest standards for protecting our environment We believe in providing solutions for you to be able to responsibly recycle our products batteries other components as well as the packaging materials Please go to http csr asus com english Takeback htm for detailed recycling information in different regions Canadian Department of Communications Statem...

Page 27: ...kran om överensstämmelse för mer information AsusTek Inc Türkçe AsusTek Inc bu aygıtın temel gereksinimlerle ve CEYönergelerinin diğer ilgili koşullarıyla uyumlu olduğunu beyan eder Daha fazla ayrıntı için lütfen CE Uygunluk Beyanına bakın Bosanski AsusTek Inc ovim potvrđuje da je ovaj uređaj usklađen s osnovnim zahtjevima i drugim relevantnim propisima Direktiva EK Za više informacija molimo pogl...

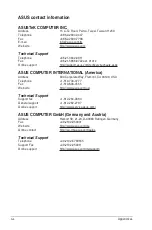
Page 28: ...merica Address 800 Corporate Way Fremont CA 94539 USA Telephone 1 510 739 3777 Fax 1 510 608 4555 Web site http www asus com us Technical Support Support fax 1 812 284 0883 General support 1 812 282 2787 Online support http www service asus com ASUS COMPUTER GmbH Germany and Austria Address Harkort Str 21 23 D 40880 Ratingen Germany Fax 49 2102 959931 Web site http www asus com de Online contact h...

Page 29: ...11 EN 302 291 2 V1 1 1 2005 07 EN 302 623 V1 1 1 2009 01 EN 50566 2013 AC 2014 EN 50385 2002 2014 35 EU LVD Directive EN 60950 1 2006 A12 2011 EN 60950 1 2006 A2 2013 EN 60065 2002 A12 2011 2009 125 EC ErP Directive Regulation EC No 1275 2008 Regulation EC No 642 2009 Regulation EC No 278 2009 Regulation EU No 617 2013 2011 65 EU RoHS Directive Ver 151019 CE marking Declaration Date 04 11 2015 Yea...

Reviews: