


Notebook PC E-Manual
39
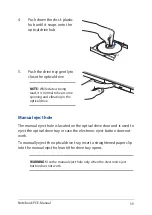
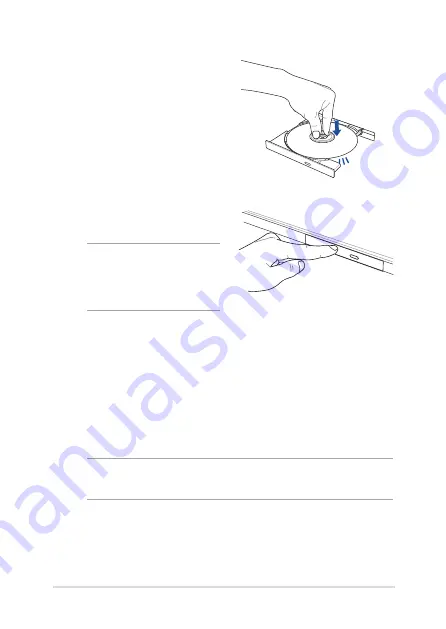
4.
Push down the disc’s plastic
hub until it snaps onto the
optical drive hub.
5.
Push the drive tray gently to
close the optical drive.
NOTE:
While data is being
read, it is normal to hear some
spinning and vibrating in the
optical drive.
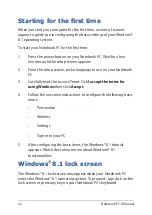
Manual eject hole
The manual eject hole is located on the optical drive door and is used to
eject the optical drive tray in case the electronic eject button does not
work.
To manually eject the optical drive tray, insert a straightened paper clip
into the manual eject hole until the drive tray opens.
WARNING!
Use the manual eject hole only when the electronic eject
button does not work.
Summary of Contents for F751L
Page 1: ...Notebook PC E Manual Revised Edition V5 May 2015 E10453 ...
Page 11: ...Notebook PC E Manual 11 Chapter 1 Hardware Setup ...
Page 21: ...Notebook PC E Manual 21 Chapter 2 Using your Notebook PC ...
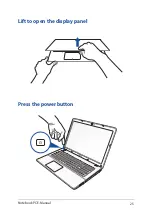
Page 25: ...Notebook PC E Manual 25 Lift to open the display panel Press the power button ...
Page 40: ...40 Notebook PC E Manual ...
Page 41: ...Notebook PC E Manual 41 Chapter 3 Working with Windows 8 1 ...
Page 68: ...68 Notebook PC E Manual ...
Page 69: ...Notebook PC E Manual 69 Chapter 4 Power on Self Test POST ...
Page 85: ...Notebook PC E Manual 85 Tips and FAQs ...
Page 92: ...92 Notebook PC E Manual ...
Page 93: ...Notebook PC E Manual 93 Appendices ...
Page 111: ...Notebook PC E Manual 111 German Greek Italian Portuguese Spanish Swedish ...