background image

24

Summary of Contents for AP1400R

Page 1: ...1U Rackmount Kit Installation Guide Installation Guide 1U Rackmount A631 English ...

Page 2: ...2 English Content English 3 11 19 27 ...

Page 3: ...Rackmount Kit Installation Guide This installation guide provides a step by step procedure on how to install the AP1400R 1U Rackmount Server into a 4 post 19 inch industrial rack English Rack Installation ...

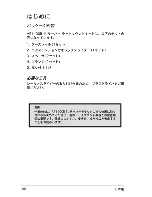
Page 4: ...5 Screws Rackmount Kit Contents Tool Required You will need one Phillips screwdriver to secure the rails and slides IMPORTANT Before mounting the AP1400R 1U Rackmount Server plan the server s location in the rack taking note of other rack components and ensuring effective cable management It is important that you select an optimal location for a safe and efficient operation of the server ...

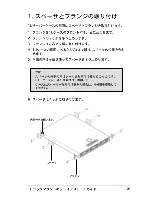
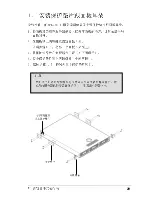
Page 5: ...w steps 1 and 2 to attach the other mounting ear 4 Align the holes of a spacer with a group of four holes on the side of the chassis 5 Secure the spacer by driving two screws on the two inner holes Mounting Ear Spacer 6 Follow steps 4 and 5 to attach the other three spacers Inner Holes for a Spacer NOTES The outer holes on the spacer are for securing the chassis rails See 2 Attach the Chassis Rail...

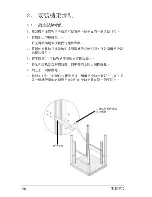
Page 6: ...is Note that one end of a rail is straight and the other end is curved 1 Align a rail on one side of the chassis matching the straight end with a mounting ear 2 Secure the rail with four screws opposite the outer holes on the spacers 3 Follow steps 1 and 2 to attach the other rail Chassis Rail Straight End Curved End ...

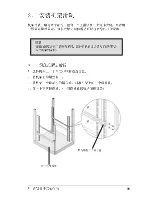
Page 7: ...n the bent end of a rack slide to the 1U space 4 Drive in two screws on the outer holes of the slide to secure it Bent End with Three Screw Holes Each rack slide includes an extension piece attached to it with a screw You need to pull this extension so that the slide reaches the rear end of the rack 4 Post 19 Rack NOTE Racks vary in depth and require different length of slides The extension was de...

Page 8: ...ures the extension piece to the slide 4 Pull the extension to a length that fits the depth of the rack 5 Secure the extension to the rack slide with the screw that you removed in step 3 6 Align the holes of the extension to the holes on the rear 1U space 7 Drive in two screws on the outer holes of the extension to secure it Rack Slide Extension Screw for the Slide Extension Follow the steps in sec...

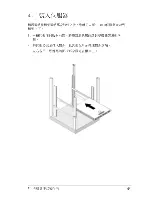
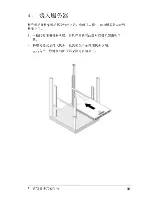
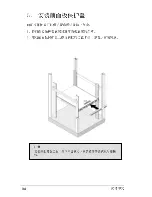
Page 9: ...lled you are now ready to mount the server to the rack 1 Firmly hold the server on both sides and align the chassis rails with the rack slides 2 Push the server all the way to the back until its front panel fits the front edge of the rack 3 Secure the server with a screw on each of the mounting ears ...

Page 10: ...isk drives attach the front panel faceplate 1 Attach the bottom edge of the faceplate to the hooks on the lower corners of the chassis 2 Swing the upper edge of the faceplate until the clips fit in place NOTE When the server is settled on the rack connect the cables to the rear ports ...

Page 11: ...11 Rack Installation ...

Page 12: ...12 ...

Page 13: ...13 ...

Page 14: ...14 ...

Page 15: ...15 ...

Page 16: ...16 ...

Page 17: ...17 ...

Page 18: ...18 ...

Page 19: ......

Page 20: ...20 ...

Page 21: ...21 ...

Page 22: ...22 ...

Page 23: ...23 ...

Page 24: ...24 ...

Page 25: ...25 ...

Page 26: ...26 ...

Page 27: ...27 Rack Installation ...

Page 28: ...28 ...

Page 29: ...29 ...

Page 30: ...30 ...

Page 31: ...31 ...

Page 32: ...32 ...

Page 33: ...33 ...

Page 34: ...34 ...

Page 35: ...35 R MEMO ...

Page 36: ...36 15 XXXXXXXXX w w w a s u s c o m ...

Reviews: