1U Rackmount Kit Installation Guide
7
3.
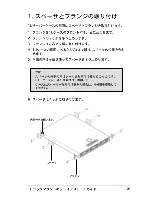
Attach the Rack Slides
3.1
Secure the Front End
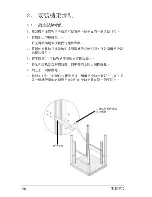
1. Select one unit of space (1U) on the rack where you desire to
install the server.
2. Remove the screws from the 1U space.
3. Align the holes on the bent end of a rack slide to the 1U space.
4. Drive in two screws on the outer holes of the slide to secure it.
Bent End with Three Screw
Holes
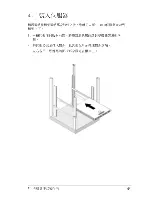
Each rack slide includes an extension piece attached to it with a
screw. You need to pull this extension so that the slide reaches the
rear end of the rack.
4-Post 19”
Rack
NOTE
Racks vary in depth and require different length of slides. The
extension was designed to serve this purpose.
Summary of Contents for AP1400R
Page 1: ...1U Rackmount Kit Installation Guide Installation Guide 1U Rackmount A631 English ...
Page 2: ...2 English Content English 3 11 19 27 ...
Page 11: ...11 Rack Installation ...
Page 12: ...12 ...
Page 13: ...13 ...
Page 14: ...14 ...
Page 15: ...15 ...
Page 16: ...16 ...
Page 17: ...17 ...
Page 18: ...18 ...
Page 19: ......
Page 20: ...20 ...
Page 21: ...21 ...
Page 22: ...22 ...
Page 23: ...23 ...
Page 24: ...24 ...
Page 25: ...25 ...
Page 26: ...26 ...
Page 27: ...27 Rack Installation ...
Page 28: ...28 ...
Page 29: ...29 ...
Page 30: ...30 ...
Page 31: ...31 ...
Page 32: ...32 ...
Page 33: ...33 ...
Page 34: ...34 ...
Page 35: ...35 R MEMO ...


