background image


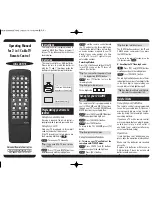
   By default, the commands executed by the remote are those of Group 1. To perform a command from Group 2, you 

must first press the    button (2 sec.), and then press the button(s) corresponding to the desired command. The 
remote control remains in Group 2 for 10 secondes (to execute the command). If the   button is pressed (2 sec.) 
when the remote is in Group 2, it switches to Group 1. 

   A : The system is ready for a start. B :  Start will not be possible.  C :  Start was successful. D : Start was not 

successful. In such a case, the remote beeps the number of time corresponding to the start fail code.  

   Horn sounds on each subsequent command (programming required at installation). 
   This command ends runtime, "Panic" mode and alarm status. 
   Temporary "Valet" mode if pressed a second time during rearming delay. 
   System can be programmed so that "Trunk" command is replaced by "Utility 1" command. 
  If the system is not ready to execute the command (ex.: engine kept running by ignition key). 
  Horn plays a short melody. 
  Buttons blink 1 to 4 times when remote is in silent mode.  
  Combination depending upon status of engine and status of locks. 

Confirmations emitted by vehicle 

The confirmations emitted by the vehicle are generated as soon as the start module receives the command. In most cases, 
your remote starter will confirm that the command has been received, by either sounding the horn or the siren, or by flashing 
the parking lights. 
The confirmations emitted by the parking lights are mandatory while those emitted by the horn or the siren are optional 
(programmable) and can require additional connections and components at time of installation. Many of these confirmations 
depend on the status of the system when the command is emitted. Refer to paragraphs relating to each command for more 
details on confirmations. 

O

THER CONFIRMATIONS


The system emits other types of confirmations. Unlike the confirmations shown in the command table and executed 
immediately after the emission of a command, the following confirmations can occur at any time. 
 

REMOTE CONTROL


V

EHICLE


C

ONFIRMATIONS


B

UTTON 


(LED) 

P

IEZO 


(B

EEP

M

ECHANICAL 


(V

IBRATION

L

IGHTS


S

IREN


R

UNTIME OVER


E

NGINE STALLED


E

NGINE STOP


S

TOP BY ALARM


2


‘


1 - - 

A

LARM 

*   


        A


‘


1 (3  ) 

E

ND OF ALARM 

*   

- - 

P

RE

-S

HOCK 


        B


‘


1 (3  ) 

S

EE 

S

ECURITY 


S

YSTEM ON  PAGE 

11. 

O

PEN  

> 5 

MIN

. 1

 1 

T

RUNK OR DOORS 

C

LOSED


2

 2 - - 

L

EFT ON 


1

 1 

L

EFT 

O

N

 - 

L

IGHTS


T

URNED OFF


2

 2 - 

T

URNED OFF

 - 

AND DOORS LOCKED


1

 1 

S

YSTEM ARMED 

AND DOORS UNLOCKED 


2

 2 - 

E

ND OF DELAY 

- O

UTPUT 

OR 

3  

2

X   

 2 - 1 

U

TILITY OUTPUT


E

ND OF DELAY 

- O

UTPUT 

OR 

4 2


 2  - 1 - 

A

CTIVATE


1


 1  -  4 - 

V

ALET MODE


C

ANCEL


2


 2  -  2 - 

R

EMOTE CODE MEMORIZED


‘


1 - - 

P

AGER


 30 

SEC

. - 

(30 

SEC

.  ) 1 

* C

ONFIRMATIONS FOLLOWED BY AN ASTERISK 

(*) 

APPLY ONLY TO COMMAND UNITS EQUIPPED WITH A SECURITY SYSTEM


S

YSTEM CAN BE CONFIGURED TO INDICATE AN ALARM STATUS FROM VEHICLE

S ORIGINAL SYSTEM


A

 : S

EQUENTIAL

REPEATING AS LONG AS ALARM CONDITION PERSISTS

B

 : S

EQUENTIAL

REPEATED FROM 

TO 

TIMES


W

HEN IN MUTE MODE

Summary of Contents for 2305A

Page 1: ...REMOTE CONTROL ENGINE STARTER U S E R M A N U A L FRAN AIS AU VERSO CONSULT SAFETY PRECAUTION SECTION BEFORE USING THIS PRODUCT SOME FEATURES MAY REQUIRE ADDITIONAL MATERIAL NOT INCLUDED MODEL2305A F...

Page 2: ...n against harmful interference in a residential installation This equipment generates uses and can radiate radio frequency energy and if not installed and used in accordance with the instruction manua...

Page 3: ...N 310 120 503 can be added to the control module to warn you of the access status of the vehicle and or and intrusion The functions relative to the safety system described in this manual apply only w...

Page 4: ...CHECKS on page 21 Make sure you comply with all local regulations which may prohibit leaving your engine running when vehicle is unattended in a public place To ensure continued safe operation of you...

Page 5: ...hold the pedal down 2 Move gearshift lever to neutral 3 Apply parking brake 4 Press button on your remote control 5 Remove key from ignition the system keeps the engine running 6 Exit the vehicle and...

Page 6: ...n as a beep is heard release the button for a moment then press it again and hold it down for two seconds The remote beeps twice to confirm transmission on channel 2 As soon as a command is sent the r...

Page 7: ...ess the button 2 sec and then within 10 seconds the button 2 sec The remote control which is being called will begin to chirp if it is located within the radio frequency range of the emitting remote c...

Page 8: ...2X 2 ACTIVATE MUTE REMOTE CONTROL CANCEL 2X 2 PAGER 16X 16 REMOTE PROGRAMMING See Pager on page 5 RANGE SETTING See Range setting on page 5 START TEMPERATURE 1 4 1X 1 4 DISPLAY START FAIL CODES 1 20 1...

Page 9: ...he horn or the siren or by flashing the parking lights The confirmations emitted by the parking lights are mandatory while those emitted by the horn or the siren are optional programmable and can requ...

Page 10: ...anual transmission vehicles To avoid turning the engine off when taking place behind the steering wheel do not apply the brakes until you have placed the key in the ignition and turned it to the RUN p...

Page 11: ...ust turn the key to RUN position and press the brake pedal TURBO MODE Activated at time of installation This mode allows the engine to be left running at idle speed for a short period of time so that...

Page 12: ...change preset temperature at which you want your Remote Starter to start engine press 2 sec then press 2 sec and buttons simultaneously lights 1 4 Parking lights will flash from 1 to 4 times to indica...

Page 13: ...ending on which is connected System can activate up to four deterrents simultaneously siren parking lights dome light and or horn PREVENTIVE Depending on how the system is configured indicator light s...

Page 14: ...cle Following table shows effect of each zone on rearming cycle Protection zone Effect on rearming cycle Hood Additional sensor trunk Shock sensor These three zones prolong rearming cycle as long as t...

Page 15: ...one chirp or flash if all zones are in normal condition three chirps or flashes if another zone is in violation If a zone is in violation when system is armed manually using remote and the cause of t...

Page 16: ...orary Valet Mode has been activated To cancel this mode place ignition key in RUN position then remove it passive rearming is reactivated when you open a door You can also arm the system using the rem...

Page 17: ...k function can be configured and connected in such a way that the first Unlock command only unlocks the driver s door while a following Unlock command unlocks the other door s Dome light will turn on...

Page 18: ...ut that controls a relay that cuts all circuits required to operate your vehicle optional connection There are two types of antitheft systems PASSIVE ARMING TYPE ANTITHEFT or This type of antitheft sy...

Page 19: ...t at time of installation The delay can be canceled by repeating the command When accessory is deactivated after the delay has expired the parking lights blink once then the remote control sends a con...

Page 20: ...ously 2 sec The number of times the parking lights flash corresponds to the start fail code The table below lists the various start fail codes Code Failure to start details 1 Module has received a Sto...

Page 21: ...rt chirps see table in CONFIRMATION section on page 13 This function is programmable as ACTIVE or INACTIVE during installation HORN Horn beeps intermittently short repeated beeps during an alarm condi...

Page 22: ...out the control module flashes parking lights 4 flashes You may then proceed to the next step Press the button 2 sec on the new remote control When access code of new remote control is memorized the...

Page 23: ...ignition proceed with this simple check Make sure that the parking brake is applied Put gearshift in gear D Remain in the vehicle and be ready to apply brakes Start vehicle with remote starter Repeat...

Page 24: ...and that the parking brake remains applied until step 4 3 Open then close only one door once the engine has stopped 4 Try to start the engine using the remote control The engine should not be able to...

Reviews: