INVENT3D
TM
Printer Operating Instructions and Troubleshooting Guide
AST2 © 10/26/16
Page 9
III. OVERVIEW OF PRINTER INTERFACE
The INVENT3D Printer is controlled by the user via the control knob on the front of the LCD. Rotate
the knob to the left or right to scroll through menu options. Push the knob in to select the highlighted
field. The first option in any menu is always go up a level, and it will always have an up arrow next
to it. Subsequent options are either actions or sub menus. Sub menus are indicated by an arrow
pointing to the left.
The following section outlines some firmware options. Printer settings and commands in the
firmware that should not be adjusted are highlighted in
red
. It is not recommended that the
user select or adjust the fields highlighted in red as doing so may prevent the printer from
functioning properly and can damage the printer.
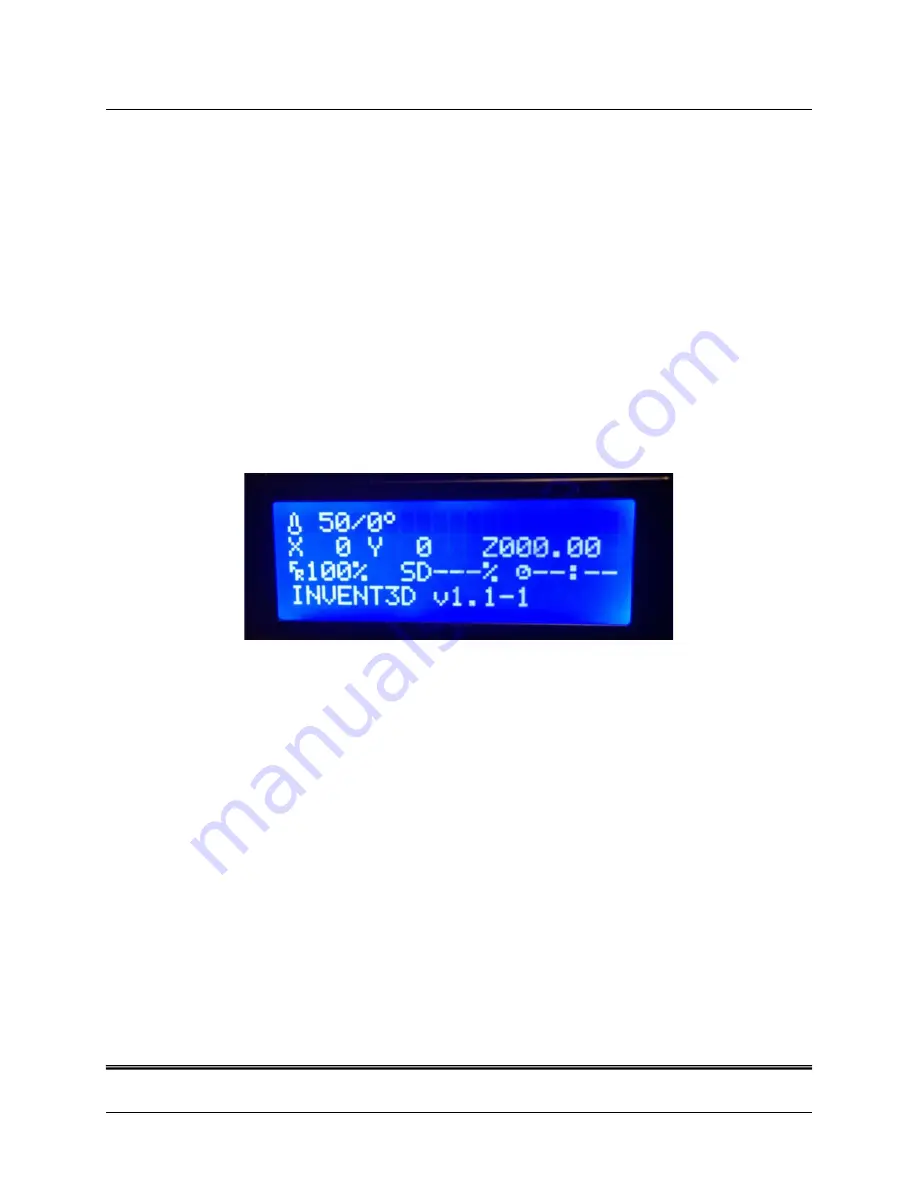
Info Screen
When INVENT3D printer is plugged in, the LCD will light up and the
Info
screen will be displayed.
The Info screen is the home screen, and after a short period of inactivity, will return to the Info screen.
The Info screen displays the following information:
Temperature
: Current temperature of hot end/specified temperature of hot end displayed
in Celsius. When not printing, the specified temperature should be 0 C. When printing, the
specified temperature should be 220 C. The fan turns on at 50 C when heating and turns off
at 50 C when cooling. When not operating, the left setting should show room temperature.
X
: Coordinate of hot end on X-axis
Y
: Coordinate of hot end on Y-axis
Z
: Coordinate of hot end on Z-axis
FR %
: Feed rate percentage which determines print speed. Default is 100%. Increasing from
100% will increase speed but slightly lower quality. Decreasing from 100% will decrease
speed but slightly improve quality.
Rotating the control knob will change the feed rate if the
rate has been changed in the “tune” menu on the LCD.
SD%
: Completion percentage of the part being printed in terms of number of layers
complete.
Info Screen


