7 8
7 8
7 8
7 8
7 8
ASRock
ALiveNF6P-VSTA
Motherboard
FFFFFrançaisrançaisrançaisrançaisrançais
2 . 4
2 . 4
2 . 4
2 . 4
2 . 4 Fonction Easy Multi Monitor
Fonction Easy Multi Monitor
Fonction Easy Multi Monitor
Fonction Easy Multi Monitor
Fonction Easy Multi Monitor
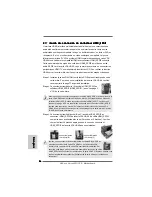
Cette carte mère prend en charge la mise à jour écrans multiples. Avec le VGA interne
intégré à la carte mère et la carte VGA supplémentaire externe PCI Express, vous
pouvez facilement apprécier les avantages de la fonction écrans multiples. Veuillez
vous référer aux étapes suivantes pour configurer un environnement à écrans
multiples:
1. Installez la NVIDIA
®
carte VGA PCI Express sur la fente PCIE2 (connecteur PCIE
x16). Consultez la page 77 pour plus d’informations sur l’installation correcte de
la carte d’extension.
2. Branchez le câble d’entrée D-Sub du moniteur sur le port VGA/D-Sub du
panneau E/S de la carte mère. Branchez le moniteur à connexion D-Sub sur la
sortie VGA/D-Sub de la carte PCI Express. Branchez le moniteur à connexion
DVI-D sur la sortie VGA/DVI-D de la carte PCI Express.
3. Rallumez votre ordinateur. Appuyez sur la touche <F2> pour ouvrir l’écran de
configuration du BIOS. Sélectionnez l’option “Share Memory (Mémoire Partagée)
”et réglez la taille de la mémoire sur [16MB], [32MB], [64MB], [128MB] ou
[256MB] pour activer la fonction VGA/D-sub. Assurez-vous que la taille
sélectionnée est inférieure à la taille de la mémoire totale du système. Si vous
ne configurez pas le BIOS, l’option “Share Memory (Mémoire Partagée) ” sera
réglée par défaut sur [Auto] et la fonction VGA/D-Sub sera automatiquement
désactivée lorsque vous installez la nouvelle carte VGA sur votre carte mère.
4. Installez le pilote VGA intégré sur votre ordinateur. Si vous avez déjà installé le
pilote VGA intégré sur votre ordinateur, il n’est pas nécessaire de les réinstaller.
5. Configurez l’affichage à plusieurs moniteur.
Pour Windows
®
2000 / XP / XP 64-bit OS:
Cliquez avec le bouton droit sur le bureau, choisissez “Properties (Propriétés)”et
allez sur l’onglet “Settings (Réglages)” pour ajuster les paramètres du multi-
moniteur en suivant les étapes décrites ci-dessous.
A. Cliquez sur le bouton “Identify (Identifier)”pour afficher un gros numéro sur
chaque moniteur.
B. Cliquez avec le bouton droit sur l’icône d’affichage dans la boîte de dialogue
“Display Properties (Propriétés d’affichage)”du moniteur que vous désirez
utiliser comme moniteur principal puis sélectionnez “Primary (Principal)”.
Lorsque vous utilisez plusieurs moniteurs avec une seule carte, un moniteur
doit être défini comme le moniteur principal; les autres moniteurs doivent être
définis comme des moniteurs secondaires.
C. Sélectionnez l’icône d’affichage avec le numéro 2.
D. Cliquez sur “Extend my Windows desktop onto this monitor (Ajouter mon
bureau Windows sur ce moniteur)”.
E. Cliquez avec le bouton droit sur l’icône d’affichage et sélectionnez “Attached
(Attaché)“ si nécessaire.
Summary of Contents for ALIVENF6P-VSTA
Page 25: ...2 5 2 5 2 5 2 5 2 5 ASRock ALiveNF6P VSTA Motherboard ...
Page 26: ...2 6 2 6 2 6 2 6 2 6 ASRock ALiveNF6P VSTA Motherboard ...
Page 27: ...2 7 2 7 2 7 2 7 2 7 ASRock ALiveNF6P VSTA Motherboard ...
Page 28: ...2 8 2 8 2 8 2 8 2 8 ASRock ALiveNF6P VSTA Motherboard ...
Page 29: ...2 9 2 9 2 9 2 9 2 9 ASRock ALiveNF6P VSTA Motherboard ...
Page 30: ...3 0 3 0 3 0 3 0 3 0 ASRock ALiveNF6P VSTA Motherboard ...
Page 31: ...3 1 3 1 3 1 3 1 3 1 ASRock ALiveNF6P VSTA Motherboard ...
Page 32: ...3 2 3 2 3 2 3 2 3 2 ASRock ALiveNF6P VSTA Motherboard ...
Page 33: ...3 3 3 3 3 3 3 3 3 3 ASRock ALiveNF6P VSTA Motherboard ...
Page 34: ...3 4 3 4 3 4 3 4 3 4 ASRock ALiveNF6P VSTA Motherboard ...
Page 36: ...3 6 3 6 3 6 3 6 3 6 ASRock ALiveNF6P VSTA Motherboard CD1 ...
Page 37: ...3 7 3 7 3 7 3 7 3 7 ASRock ALiveNF6P VSTA Motherboard 4 3 2 1 13 24 1 12 13 24 1 12 ...
Page 38: ...3 8 3 8 3 8 3 8 3 8 ASRock ALiveNF6P VSTA Motherboard C B A ...
Page 39: ...3 9 3 9 3 9 3 9 3 9 ASRock ALiveNF6P VSTA Motherboard ...
Page 40: ...4 0 4 0 4 0 4 0 4 0 ASRock ALiveNF6P VSTA Motherboard ...
Page 41: ...4 1 4 1 4 1 4 1 4 1 ASRock ALiveNF6P VSTA Motherboard ...
Page 42: ...4 2 4 2 4 2 4 2 4 2 ASRock ALiveNF6P VSTA Motherboard ...
Page 43: ...4 3 4 3 4 3 4 3 4 3 ASRock ALiveNF6P VSTA Motherboard ...
Page 44: ...4 4 4 4 4 4 4 4 4 4 ASRock ALiveNF6P VSTA Motherboard ...
Page 45: ...4 5 4 5 4 5 4 5 4 5 ASRock ALiveNF6P VSTA Motherboard ...
Page 46: ...4 6 4 6 4 6 4 6 4 6 ASRock ALiveNF6P VSTA Motherboard X O O O O O X O O O O O O X ...
Page 163: ...163 163 163 163 163 ASRock ALiveNF6P VSTA Motherboard ...
Page 164: ...164 164 164 164 164 ASRock ALiveNF6P VSTA Motherboard ...
Page 165: ...165 165 165 165 165 ASRock ALiveNF6P VSTA Motherboard ...
Page 166: ...166 166 166 166 166 ASRock ALiveNF6P VSTA Motherboard ...
Page 167: ...167 167 167 167 167 ASRock ALiveNF6P VSTA Motherboard ...
Page 168: ...168 168 168 168 168 ASRock ALiveNF6P VSTA Motherboard ...
Page 169: ...169 169 169 169 169 ASRock ALiveNF6P VSTA Motherboard ...
Page 170: ...170 170 170 170 170 ASRock ALiveNF6P VSTA Motherboard ...
Page 171: ...171 171 171 171 171 ASRock ALiveNF6P VSTA Motherboard ...
Page 172: ...172 172 172 172 172 ASRock ALiveNF6P VSTA Motherboard ...
Page 173: ...173 173 173 173 173 ASRock ALiveNF6P VSTA Motherboard ...
Page 175: ...175 175 175 175 175 ASRock ALiveNF6P VSTA Motherboard CD1 ...
Page 176: ...176 176 176 176 176 ASRock ALiveNF6P VSTA Motherboard 4 3 2 1 ...
Page 177: ...177 177 177 177 177 ASRock ALiveNF6P VSTA Motherboard C B A 13 24 1 12 13 24 1 12 ...
Page 178: ...178 178 178 178 178 ASRock ALiveNF6P VSTA Motherboard ...
Page 179: ...179 179 179 179 179 ASRock ALiveNF6P VSTA Motherboard ...
Page 180: ...180 180 180 180 180 ASRock ALiveNF6P VSTA Motherboard ...
Page 181: ...181 181 181 181 181 ASRock ALiveNF6P VSTA Motherboard ...
Page 182: ...182 182 182 182 182 ASRock ALiveNF6P VSTA Motherboard ...
Page 183: ...183 183 183 183 183 ASRock ALiveNF6P VSTA Motherboard ...
Page 184: ...184 184 184 184 184 ASRock ALiveNF6P VSTA Motherboard ...
Page 185: ...185 185 185 185 185 ASRock ALiveNF6P VSTA Motherboard ...


