background image

Reverb

Record

Press [ reverb ] button to enter  reverb  function.  In this 

menu, the digit on far left of  LED  will display letter  

'

R

'

.

The two digits on the right will display current reverb level. 

The button 


 can be used to adjust the reverb 

level (0-3, not loop). This value will be auto-saved after 

adjusted.

VALUE [+]/[ ]

-

 Prepare to Record

Select the desired song, drum kit, tempo, drum off setting, 

and reverb settings.

Start Recording

Press the [rec] button, the light start flashing.

Press the [start/stop] button or strike the pad, the light stop 

flashing and the recording process starts.

Stop Recording

To stop recording, press the [start / stop] button or [ rec ] 

button. The record indicator will turn off. If the memory is 

full, "FL" will appear on the display and recording process 

stops automatically. 

Note: When you start recording, the vocal metronome also 

starts to count. But the sound of the vocal will not be record. 

To stop the metronome, press the [click] button.

Playback

Press the [play

/

stop] button will start or stop playing 

recorded song.

Note: When you record a new song, it will replace the previous 

recording.

The song data recorded will be lost when you turn off the power.

12

Operation

12

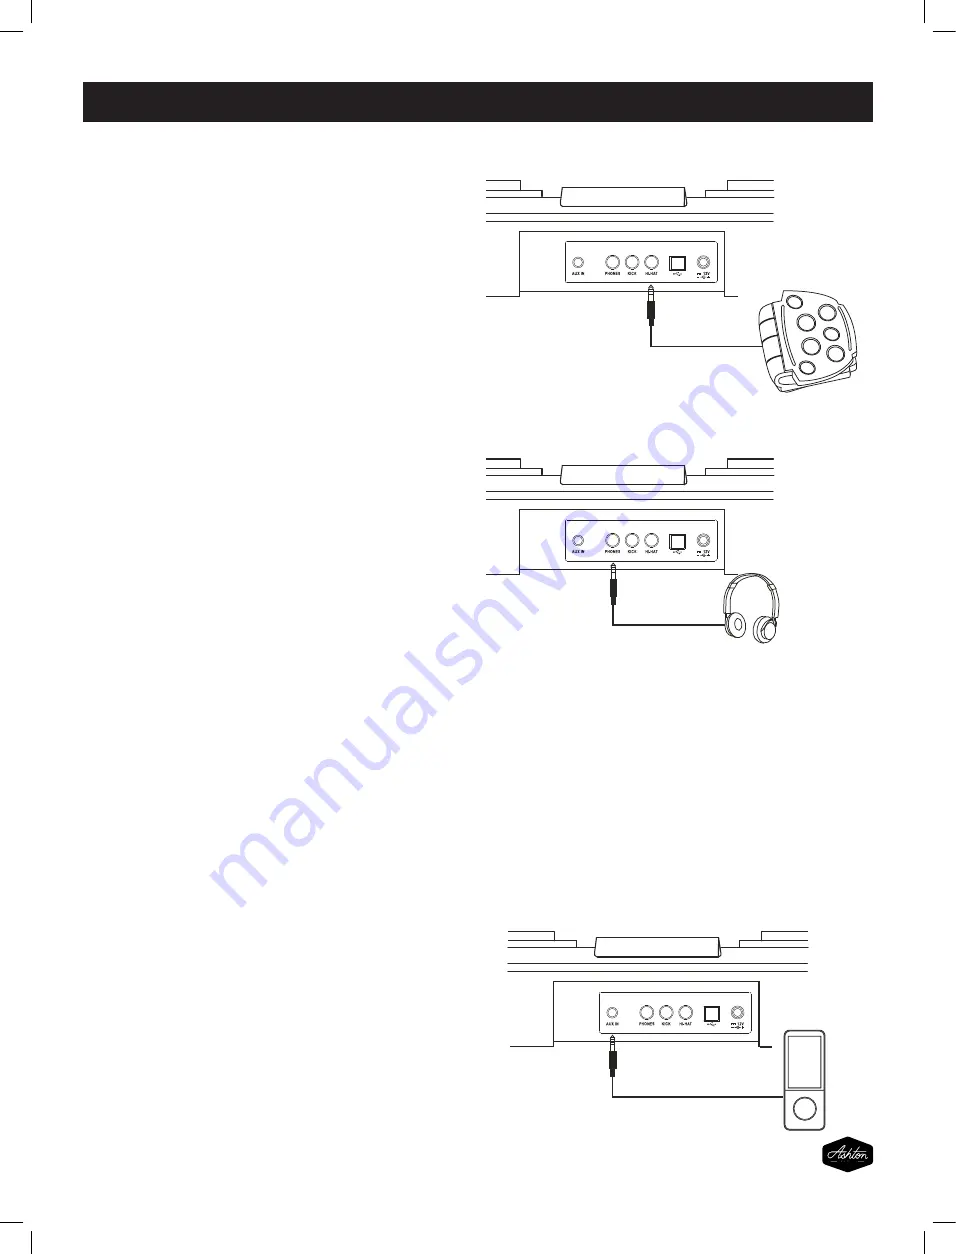
this appliance supports 1 hi-hat pedal and 1 kick pedal as 

input device.

The phones output supports a stereo headphones as 

output device.

this appliance will output all the MIDI codes generated by 

pads hitting or pedal stepping via the MIDI output connector. 

clicking and the MIDI codes in songs are excluded. It s 

also receive the MIDI data from external device.

'

Pedals

Phones output

USB jack

Input and Output 

AUX IN input

For connecting an extra audio player, for example, MP3

and so on via a stereo plug. You can enjoy playing the

drum along with your favorite songs.

13

INPUT AND OUTPUT

Pedals

The EDP450 supports 1 hi-hat pedal and 1 kick pedal as 
an input device.

Phones Output

The phones output supports a set of stereo headphones  
as an output device.

USB Jack

This appliance will output all the MIDI codes generated by
pads hitting or pedal stepping via the MIDI output connector.
clicking and the MIDI codes in songs are excluded. It will
also receive the MIDI data from external devices.

AUX IN input

For connecting an extra audio player, for example, an MP3 
player via a stereo plug. You can enjoy playing the EDP450 
along with your favorite songs.

13

Summary of Contents for EDP450

Page 1: ...OPERATING MANUAL ...

Page 2: ...in reduced sound quality operation errors and possibly damage Turn Power OFF When Making Connections To avoid damage to the instrument and other devices to which it is connected turn off the power switches of all related devices prior to connecting or disconnecting cables Handling andTransport Never apply excessive force to the controls connectors or other parts of the instrument Always unplug cab...

Page 3: ...ong Main Volume Accompaniment Volume Drum Off Tempo Metronome Hand Percussion Demo Reverb Record Playback Input and Output Pedals Phones output USB jack AUX IN input Appendix Voice list Kits list Song list MIDI implementation chart Specifications 5 5 6 7 7 7 7 8 9 9 10 10 10 10 11 11 11 11 12 12 12 13 13 13 13 13 14 14 16 16 18 19 INDEX 3 ...

Page 4: ...he headphone jack can also be used to connect the dightal drum to a stereo system of mixing console SETTING UP Power Supply The EDP450 will run on either batteries or power adaptor Follow the instructions below according to the power source you intend to use Using an AC Adaptor Connect the power adaptor to the DC IN Jack located on the rear panel of the unit and plug the AC power adaptor into an A...

Page 5: ...ther batteries or power adaptor Follow the instructions below according to source you intend to use 1 POWER BUTTON This button turns the EDP450 on or off 2 TEMPO These buttons are used to change current tempo 3 MASTER VOLUME These buttons can be used to change the master volumes 4 ACC VOLUME These buttons can be used to change the accompaniment volumes 5 REC AND LED INDICATOR This button can be us...

Page 6: ...input jacks 26 USB JACK This port is used to connect with external device 27 DC INPUT Connect to a DC 12V 23 AUXIN INPUT 25 24 26 27 23 6 PANEL CONTROLS REAR PANEL 23 AUXIN INPUT This port is used to connect external audio devices like CD player or MP3 player 24 PHONES JACK This jack is used to connect headphones 25 PEDAL INPUT JACKS Kick and hi hat pedal input jacks 26 USB JACK This port is used ...

Page 7: ...ing The button can be used to the volume 0 31 voice voice VALUE change of the current pad Set pad volume 7 OPERATION Select a Drum Kit Kit menu is the default menu after power on default value is 001 Press kit button to enter kit menu The 3 digit LED will show the current kit number with the corresponding menu indicator lit up The button can be used to select any kit VALUE preset kit 1 45 user kit...

Page 8: ...utton can be used to change the pan 8 8 of the current pad voice voice VALUE Set pad pan 8 Operation OPERATION Set Pad Pan Press the pan button to enter voice menu If voice menu is selected the corresponding menu indicator will be lit up In this menu the 3 digit LED will show the pan of current pad which can be selected by pad hitting The button VALUE can be used to change the pan 8 8 of the curre...

Page 9: ...ting The button VALUE can be used to change the midi note n00 n99 loop of the current pad 9 Operation Set Pad MIDI note Press note button to enter voice menu If voice menu is selected the corresponding menu indicator will be lit up In this menu the 3 digit LED will show the midi note of current pad which can be selected by pad hitting The button VALUE can be used to change the MIDI note N00 N9 loo...

Page 10: ...unction is quite useful for practicing Drum off button cannot be manipulated while play back record Play Song Press song button to enter song menu Default value is 001 The 3 digit LED will show current song number with corresponding menu indicator lit up The button VALUE can be used to select current song 1 100 loop First 80 styles are loop playing Press start stop to start or stop the song player...

Page 11: ...it LED will display dE you can also press start stop button to stop demo song playing 11 Operation Tempo Press the tempo and buttons to enter the tempo menu Button and can be used to change current tempo 30 280 not loop which affects the speed of clicking and song playing Pressing both and will reset current tempo to its default value current song tempo Metronome Press once on click button for hum...

Page 12: ...revious recording The song data recorded will be lost when you turn off the power 12 Operation OPERATION Reverb Press reverb button to enter reverb function In this menu the digit on the far left of LED will display letter R The two digits on the right will display current reverb level The button VALUE can be used to adjust the reverb level 0 3 not loop This value will be auto saved after adjusted...

Page 13: ... and so on via a stereo plug You can enjoy playing the drum along with your favorite songs 13 INPUT AND OUTPUT Pedals The EDP450 supports 1 hi hat pedal and 1 kick pedal as an input device Phones Output The phones output supports a set of stereo headphones as an output device USB Jack This appliance will output all the MIDI codes generated by pads hitting or pedal stepping via the MIDI output conn...

Page 14: ... om 1 Junkyard T om 2 Junkyard T om 3 Junkyard T om 4 Junkyard T om 5 Junkyard T om 6 Noise T om 1 Noise T om 2 Noise T om 3 Noise T om 4 Noise T om 5 Noise T om 6 T echno T om 1 T echno T om 2 T echno T om 3 T echno T om 4 T echno T om 5 T echno T om 6 Magic T om 1 Magic T om 2 Magic T om 3 Magic T om 4 20 Funk Ride 808 Ride Ride House Ride Lo Fi Ride Junkyard Ride Noise Ride 16 Acoustic Crash 16...

Page 15: ...phone Eb5 Vibraphone E5 Vibraphone F5 Vibraphone Gb5 Vibraphone G5 Vibraphone Ab5 Vibraphone A5 Vibraphone Bb5 Vibraphone B5 Vibraphone C6 Orchestra Timp C2 Orchestra Timp Db2 Orchestra Timp D2 Orchestra Timp Eb2 Orchestra Timp E2 Orchestra Timp F2 Orchestra Timp Gb2 Orchestra Timp G2 Orchestra Timp Ab2 Orchestra Timp A2 Orchestra Timp Bb2 Orchestra Timp B2 Orchestra Timp C3 Orchestra Timp Db3 Orc...

Page 16: ...d Funk Jazz Brush Dance Rock Jazz 808 909 Latin Room Percussion 1 Metal Vibraphone Electronic Reggae Fusion 1 Drum Bass Pop Brush World Orchestra Ska Songo Lo Fi 1970 s HipHop Big Band Old School R B Magic Live House Jazz Latin Fusion 2 Percussion 2 Teckno Vintage Junkyard Noise Studio 1 Studio 2 User 1 Standard User 2 Hard Rock User 3 Ballad User 4 Acoustic User 5 Funk Band Name 16 KIT LIST 16 ...

Page 17: ...n jazz1 latin jazz2 Dance 1 DiscoHouse Trance TripHop DrumNBass BreakBeat1 Dancefunk Hiphop Dance2 D N B1 D N B2 Break beat2 ClassicRock HeavyRock RockBallad RockNRoll Punk Rock 80 s Metal Shuffle 60 s rock Smaba1 BossaNova Salsa Ska Reggae1 Reggae2 Reggae3 LatinRock1 LatinRock2 Mambo Samba2 Latin pop Gtr Bossa LatinDance1 LatinDance2 R B1 R B2 JazzyFunk Blues Country CountryPop Country Blues Ball...

Page 18: ...d System Exclusive Pitch Bend Velocity Note on Note off Program Change true Control 0 1 5 7 10 11 20 64 65 66 67 80 81 91 93 120 121 123 System Song Position Song Select Common Tune System Song Position Song Select Common Tune Mode 1 OMNI ON POLY Mode 2 OMNI ON MONO 〇 YES Mode 3 OMNI OFF POLY Mode 4 OMNI OFF MONO NO Note Number True voice After key s Touch Ch s System Clock Real Time Commands Star...

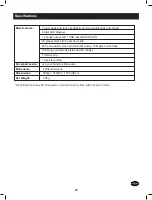
Page 19: ...rum kits 265 percussion voices and 128 GM voices 16M bytes voice data 100 songs include 80 styles and 20 songs 1 demo song 1 track recording use your hand to strike pads 2 different voices 500 L 370 W 157 4 H mm 3 3kg Main features Hand percussion Metronome Dimensions Net Weight 19 Specifications may be changed or modified at any time without prior notice Specifications 19 ...

Page 20: ...ashtonmusic com au ...

Reviews: