


7
Operating Manual - digiMIX18 Digital Mixer
2.9 Sends Mixer
Press this button to open the sends mixer overview screen, where the mixer's main L/R, aux1-8, and FX1-2 channel assignments
or send levels can be quickly viewed and changed.
2.10 Aux Faders
Press this button
when any aux1-8 output is selected
to view current aux1-8 fader position. The aux1-8 fader position will be
displayed on the ch1-8 input LED bars. The main L/R fader position will also be displayed on the main L/R out LED bars.
2.11 EZ Mode
Press this button to enter the mixer's EZ-Mode. EZ-Mode provides a simple and secure user interface for a non-technical person
to adjust basic mixer functions with ease, locking out most other mixer controls. See sec 6.4 for details.
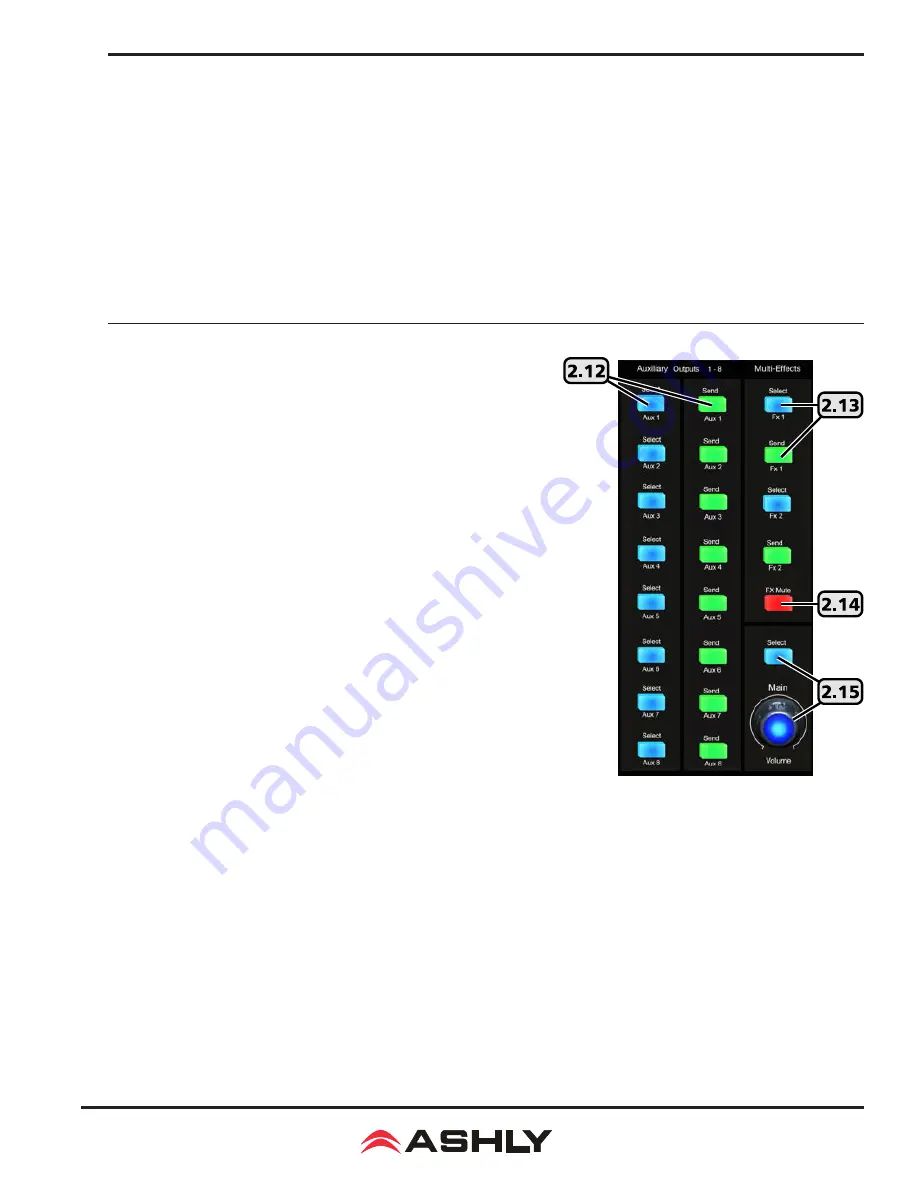
2.12 Aux1-8 Select and Send Buttons
Aux outputs are typically used for secondary mixes such as monitors, video
feed, assistive listening devices, subwoofers, etc. Aux outputs can be stereo
linked as 1-2, 3-4, 5-6, or 7-8.
Press an aux1-8
select
button to give that aux output the focus in the mixer.
Press an aux1-8
send
button to quickly view and adjust the level of all chan
-
nels currently available for sending to that aux output.
Adjust any channel's level to aux1-8 by first tapping the desired channel in
an aux1-8 sends screen to select it, then use the parameter adjust fader on
the touchscreen or adjust parameter knob on the mixer to set the level sent
to that aux.
Channel sends to aux1-8 can be selected as pre or post-fader, the default is
pre-fader.
2.13 FX1-2 Select and Send Button
This mixer has built in stereo effects including reverbs, delay, chorus, flanger,
tremolo, and several combinations. Press the FX Editor button below the
touchscreen to create and save up to 104 different custom effects, or use the
defaults. Only two effects can be used on the mixer at a time. See section 4.8
for more details on effects.
Press the FX1 or FX2
select
button
to give that FX the focus in the mixer.
Press
the FX1 or FX2
send
button to quickly view and adjust the level of all
channels currently available for sending to that FX.
Adjust any channel's level to the FX by first tapping the desired channel from within the FX sends window, then use the parameter
adjust fader on the touchscreen or adjust parameter knob on the mixer to adjust the level sent to that FX.
Channel sends to FX1-2 can be selected as pre or post-fader, the default is post-fader.
Each FX bus must additionally be routed to the main L/R or aux1-8 outputs as desired. To assign an FX to the main L/R output,
select the FX, then press the assign button, then tap the <Main> button on the touchscreen so that it turns blue. To send an FX to an
aux1-8 output from the assign window, tap any aux1-8 level control, then use the parameter adjust control to set the aux send level.
2.14 FX Mute
Press this button to mute FX1 and FX2. This is useful for comparing sound with and without effects.
2.15 Main Select and Volume Control
Press the <Main> select button to give the main L/R outputs the focus in the mixer. This level control always adjusts the signal level
to the main L/R outputs. When main L/R is selected, the volume control works together with the motorized fader and touchscreen.


