


Enter your user name and password, and then click
to enter the
Configuration Manager. Use the following defaults the first time you log
into this interface:
Default User Name:
admin
Default Password:
(no password)
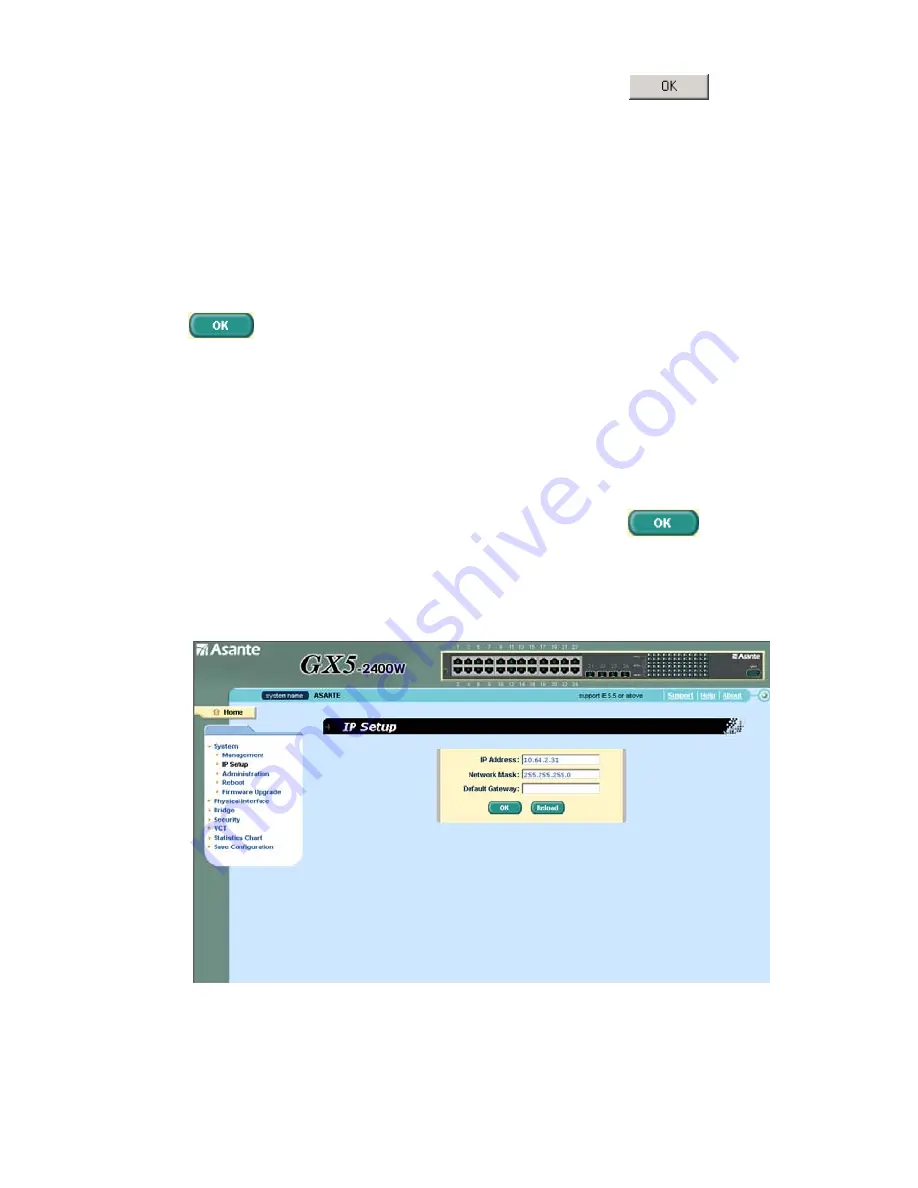
3. To setup a new IP address, click “
System
”, then “
IP Setup
” (see Figure
8). Fill in the IP address, network mask and default gateway, then click
.
4. If your new address is different from the default, the browser can not
update the switch status window or retrieve any page. This is normal.
You have to retype the new IP address in the address/location box, and
press
<Enter>
. The WEB link returns.
5. To enable authentication for Web access, click “
Administration
” on
the menu list, then select “
Enabled
” to start the protection.
A login window appears immediately after you click
. See the
figures on the next page.
Figure 3.
IP Setup
Page 11
GX5-2400W User’s Manual
Asante Technologies Inc
Summary of Contents for FriendlyNET GX5-2400W
Page 1: ...FriendlyNET GX5 2400W 24 Port Smart Gigabit Ethernet Switch User s Manual ...
Page 2: ......
Page 10: ......
Page 28: ...Page 18 GX5 2400W User s Manual Asante Technologies Inc Figure 8 Management ...
Page 32: ...Page 22 GX5 2400W User s Manual Asante Technologies Inc Figure 11 Firmware Upgrade ...
Page 34: ...Page 24 GX5 2400W User s Manual Asante Technologies Inc Figure 12 Physical Interface ...
Page 42: ...Page 32 GX5 2400W User s Manual Asante Technologies Inc Figure 18 Tagged VLAN ...
Page 48: ...Page 38 GX5 2400W User s Manual Asante Technologies Inc Figure 23 RADIUS ...
Page 52: ...Page 42 GX5 2400W User s Manual Asante Technologies Inc Figure 26 Error group ...
Page 77: ...Page 67 GX5 2400W User s Manual Asante Technologies Inc ...


