background image

EN - 19

Change Hydraulic Oil and Filter

NOTICE: 

Change the hydraulic oil and oil 

filter every season or 100 hours.

See Figure 22.

1. Clean area around hydraulic supply hose. 
2. Place container under oil filter and 

hydraulic supply hose to catch oil.

3. Remove hose clamp and disconnect 

hose from hydraulic tank.

4. Remove oil filter. See Figure 23.

5. Allow tank to drain.

6. Reinstall hydraulic supply hose


and 

tighten hose clamp.

7. Lubricate rubber gasket on new oil filter 

with clean hydraulic oil.

8. Spin new oil filter onto filter housing until it 

makes contact. Tighten oil filter another 
1/2 turn.

9. Add hydraulic oil.

10. Check hydraulic oil level.
11. Properly dispose of waste oil.

Purge Air From Hydraulic System

1. With the engine running, extend the 

hydraulic cylinder out fully and then 
retract fully. 

2. Repeat 4 – 5 times. Erratic movement in 

the hydraulic cylinder indicates that there 
is air in the system.

3. Stop the engine and check the hydraulic 

oil level. Add if necessary.

4. Repeat extending and retracting of 

hydraulic cylinder unit motion is 
consistent and smooth in both directions.

5. Ensure that hydraulic oil is at proper level.

IMPORTANT: 

At this point a large amount of 

hydraulic oil has been drawn into the 
hydraulic cylinder and hoses. Be sure to refill 
the oil reservoir to prevent pump damage.

CHECK TIRE PRESSURE

Check tire pressures and inflate to 
recommendation. See 

Specifications

 on 

page 23.

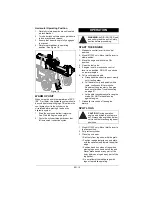
Figure 22

1. Hydraulic Tank
2. Hydraulic Supply Hose
3. Hose Clamp
4. Hydraulic Pump

1

2

3

4

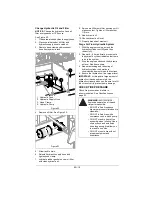
Figure 23

WARNING: 

AVOID INJURY. 

Explosive separation of tire and 
rim parts is possible.

• DO NOT inflate tires above 

maximum pressure listed on tire 
sidewalls.

• DO NOT inflate tires with a 

compressor; use a hand pump.

• DO NOT stand in front of tire 

assembly when inflating. Use a 
clip-on chuck and extension 
hose long enough to allow you 
to stand to one side.

• DO NOT mount a tire without 

proper equipment and 
experience.

Summary of Contents for 017000

Page 1: ...Operator s Manual Manuel du Utilisateur 05105800 1 17 Printed in USA ENGLISH FRAN AIS E10 Models 917031 27 Ton Log Splitter SN 017000 917032 34 Ton Log Splitter SN 017000 Log Splitter...

Page 2: ...abilizer 12 BEFORE OPERATION 13 Choose Work Site 13 Position Rear Stabilizer 13 Lower Jack Stand 14 Position Beam 14 Warm Up Unit 15 OPERATION 15 Start the Engine 15 Split Logs 15 Remove Logs From Wed...

Page 3: ...tely read the manuals provided with the unit They contain safety instructions and important information about unit controls The engine on this unit is covered by a separate manual Refer to the engine...

Page 4: ...and any other operators with all controls and the safe use of the features of this unit If you loan rent or sell this product to others provide them with all manuals If you have any questions please...

Page 5: ...unit are visual reminders of the important safety information in this manual All messages on your unit must be fully understood and carefully followed Safety decals on the unit are explained below ALW...

Page 6: ...r Hold logs on sides when loading Keep hands and feet away from cylinder wedge and partially split logs Do not split logs against the grain Split logs end to end in the direction of the grain only 2 W...

Page 7: ...adjusting fittings hoses tubing or other system components c Do not adjust the pressure settings of the pump or valve d Do not check for leaks with your hand Leaks can be located by passing cardboard...

Page 8: ...o stabilize logs with legs or feet while operating Moving parts can cut off or crush body parts Split logs end to end in the direction of the grain not against the grain Keep fingers and hands away fr...

Page 9: ...hildren under watchful care of a responsible adult Slope Operation Operate the log splitter on level surfaces Stay off slopes and slippery surfaces Fuel DO NOT run engine in an enclosed area Always pr...

Page 10: ...to bring system to operating level NOTICE Some hydraulic fluid may overflow from the cap breather as the system warms up and the fluid expands Do not operate the unit without the proper amount of oil...

Page 11: ...Lever 13 Air Filter 14 Front Jack Stand 15 Hitch Coupler 5 1 cm 2 0 Ball 16 Safety Chains 2 17 Rear Stabilizer 18 Hydraulic Pump 19 Hydraulic Tank 20 Hydraulic Tank Dipstick Breather 21 Beam Lock 22...

Page 12: ...Figure 7 Controls engine speed FUEL VALVE See Figure 8 Controls fuel flow to the engine RECOIL STARTER HANDLE When pulled handle will turn engine over IMPORTANT DO NOT let handle snap back against st...

Page 13: ...og is split Lever does not lock in this position Release as soon as log is split or cylinder is fully extended Neutral In this position the cylinder does not move even though the engine is running Ret...

Page 14: ...2 Front jack stand must be locked in the down position whenever the unit is in use and in the transport position when moving or towing the unit REAR STABILIZER See Figure 13 Rear stabilizer must be po...

Page 15: ...her tripping hazards Sufficient clearance for engine exhaust to not blow directly on combustible material 2 Disconnect the log splitter from the tow vehicle before operating If splitting logs in the h...

Page 16: ...eavy for the operator position the beam in the vertical position for splitting Vertical Operating Position IMPORTANT Rear stabilizer must be in the transport position before placing beam in vertical o...

Page 17: ...DO NOT use choke on a warm engine 6 Pull recoil starter handle a Grasp handle and pull rope out slowly until it pulls harder b Pull handle firmly and quickly with a rapid continuous full arm stroke Re...

Page 18: ...etracted position 2 Model 917032 only Move throttle control lever to slow position 3 Turn engine switch to off position 4 Close fuel valve TRANSPORT UNIT IMPORTANT Check local state and federal laws b...

Page 19: ...o keep operator zone free of tripping hazards When splitting logs that are not square place the longest portion of the log closest to the beam and the most square end against the splitter wedge CAUTIO...

Page 20: ...minutes 3 Cycle the hydraulic cylinder in and out two or three times 4 Stop engine See Stop the Engine on page 16 5 Remove any dirt that may be around the cap breather on the hydraulic reservoir 6 Rem...

Page 21: ...inder indicates that there is air in the system 3 Stop the engine and check the hydraulic oil level Add if necessary 4 Repeat extending and retracting of hydraulic cylinder unit motion is consistent a...

Page 22: ...first slot in castle nut aligns with hole in hub 4 Replace cotter pin and dust cap IMPORTANT Wheel should spin freely with no wobble SERVICE PARTS See your Ariens dealer to purchase service parts for...

Page 23: ...nd or retract when control lever is moved Low hydraulic oil level Refill hydraulic oil to proper level See Check Hydraulic Oil Level on page 18 Kinked or pinched hydraulic lines Repair or replace dama...

Page 24: ...remaining fuel b Operate engine outdoors for at least 5 minutes to allow stabilizer to reach the carburetor 6 Close fuel valve and allow engine to stop on its own 7 Turn engine switch to off position...

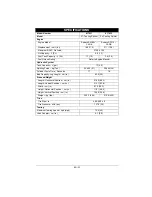
Page 25: ...lic System Tank Capacity L gal 17 4 5 Splitting Force kg Ton 24 490 27 30 844 34 Cylinder Cycle Time Seconds 17 18 Bed Capacity Log Length cm in 63 5 25 Size and Weight Length Horizontal Position cm i...

Page 26: ...in Such repair or replacement will be free of charge labor and parts to the original purchaser except as noted below Special Extensions The chart below details special extensions to this warranty Warr...

Page 27: ...tail All Exc SB Batteries 1 Year All Prorated All Belts Muffler Tires None Commercial These components are not covered when used commercially All Cloth Plastic and Rubber Components Including Belts an...

Page 28: ...e limits specified in the Owner Operator Manual Modifying the utility vehicle with parts and accessories that are not genuine or authorized Ariens or Gravely parts or accessories Modifying the utility...

Page 29: ......

Page 30: ...655 West Ryan Street Brillion WI 54110 ariensstore com ariens custhelp com parts ariens com PRINTED...

Reviews: