background image


User’s Manual                                                            

78


8.3.19


Stylus 


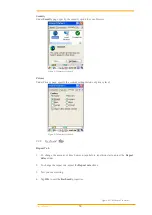
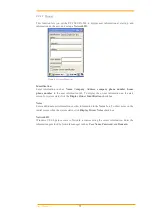
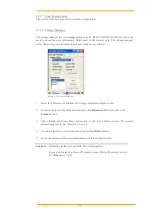
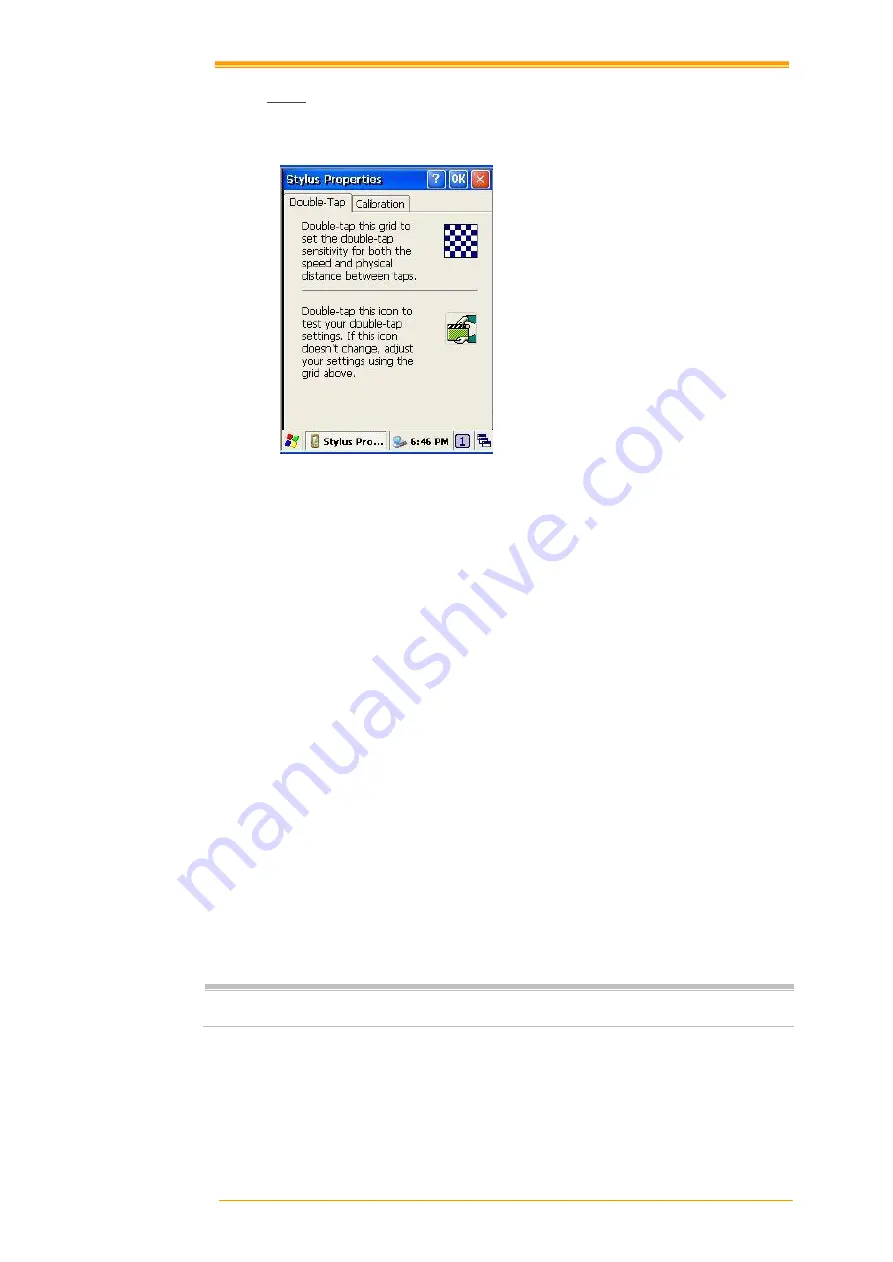
This screen sets 

Double-Tap

 sensitivity and calibration. 


Figure 8-30 Stylus Properties 


Double Tap 

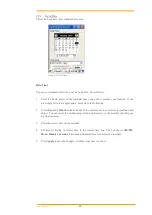
To set and test Double-Tap sensitivity: 
1.


Select Go to 

Start

 →

 Settings

 →

 Control Panel


2.


Activate the 

Stylus

 and select 

Double-Tap

. Tap the grid and the color of the grid changes. 


3.


It automatically records the speed of the 

Double-Tap


4.


Double tap the bottom icon to test the double-tap sensitivity. 


5.


If the bottom icon does not change, adjust the setting using the grid icon above. 


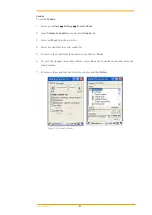
Calibration 

If  the  PT-9X30/PA-100  screen  does  not  respond  properly,  adjust  the  screen  with  the 

calibration function.  


To start 

Calibration

1.


Select Go to 

Start

 →

 Settings

 →

 Control Panel


2.


Activate the 

Stylus

 and select 

Calibration

 tap. 


3.


Press 

Recalibrate

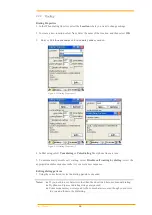
 button and the adjustment process begins. 


Caution: 


Sometimes  touching  the  screen  with  the  stylus  triggers  the  right  mouse  function. 
You can solve this problem by adjusting the double touch sensitivity. 


Summary of Contents for PA-100 Series

Page 1: ...User s Manual PT 90 PA 100 Series Mobile Computer WinCE 6 0 version DOC NO UM P9005 01 Version 2 4 Empower the Bar Code ...

Page 2: ...erial number appears on all Argox products This official registration number is strictly related to the device purchased Make sure that the serial number appearing on your Argox device has not been removed Servicing by our service department can only be carried out under warranty All Argox products are warranted for the legal warranty period after purchase covering defects in material and workmans...

Page 3: ...ct the interference by one or more of the following measures Reorient or relocate the receiving antenna Increase the separation between the equipment and receiver Connect the equipment into an outlet on a circuit different from that to which the receiver is connected Consult the dealer or an experienced radio TV technician for help CAUTION Any changes or modifications not expressly approved by the...

Page 4: ...3 1 KEYPAD DESCRIPTION 16 3 2 FUNCTION KEY DESCRIPTION 17 3 3 INSTALL MICRO SD CARD INTO PT 9X30 PA 100 18 3 4 CONFIGURING PT 9X30 PA 100 SETTINGS 19 3 4 1 Calibrating Touch Screen Alignment 19 3 4 2 Adjusting Brightness 20 3 4 3 Muting Sound 20 3 4 4 Using the Stylus 20 3 5 ENTERING INFORMATION 21 3 5 1 Entering Information Using a Keypad 21 3 5 2 Entering Information Using the Keyboard Input Pan...

Page 5: ... 56 6 5 TRANSCRIBER 56 6 6 WINDOWS EXPLORER 57 7 COMMUNICATION 58 7 1 MICROSOFT ACTIVESYNC 58 7 2 MICROSOFT MOBILE DEVICE CENTER 58 8 OVERVIEW OF MICROSOFT WINDOWS CE 6 0 59 8 1 MAIN WINDOWS 59 8 2 TASKBAR 61 8 3 SETTING UP THE PT 9X30 PA 100 63 8 3 1 Certificates 64 8 3 2 Date Time 65 8 3 3 Dialing 66 8 3 4 Display 67 8 3 5 Hot Function Key 68 8 3 6 Input Panel 68 8 3 7 Internet Options 69 8 3 8 ...

Page 6: ... Information 80 8 3 22 Timeout and Brightness 80 8 3 23 Volume and Sounds 80 9 TROUBLE SHOOTING 82 9 1 GENERAL CHECKS 82 9 2 READ OPERATION PROBLEMS 82 9 3 MOBILE COMPUTER PROBLEMS 82 10 APPENDIX UPDATING THE OS VIA MICRO SD CARD 84 ...

Page 7: ...LCD display Backlight keypad 1 1 About this Manual The chapters contained in this manual are Chapter 1 Introduction Presents general information about the PT 9X30 PA 100 Chapter 2 Getting started Describes basic use of the PT 9X30 PA 100 Chapter 3 Operating the Mobile computer Describes customizing the PT 9X30 PA 100 Chapter 4 Scanning Chapter 5 Useful Utilities Chapter 6 Software Applications Cha...

Page 8: ...e or due to a drained battery Lithium ion battery packs may get hot explode ignite and or cause serious injury if abused Please follow the safety warnings listed below Warnings Do not place the battery pack in fire or heat the battery Do not install the battery pack backwards so the polarity is reversed Do not carry or store battery pack together with metal objects Do not pierce the battery pack w...

Page 9: ... charging capacity Do not use water when cleaning the cradle This can cause malfunction of the chargers Using the Mobile Computer Avoid temperature changes Sudden temperature changes can cause condensation to form on the mobile computer Using the mobile computer while condensation is present can cause malfunction Always wait until the condensation clears naturally before attempting operation Do no...

Page 10: ...y Telepen UPCA UPCE Matrix 2 5 PDF 417 Code 16K China Post RSS 14 RSS Limited RSS Expanded Italian Pharmacode39 MicroPDF EAN UCC composite IATA 2 5 TRI OPTIC PosiCode CodablockF Code 49 TLC 39 Planet Code Postnet Australian Post British Post Canadian Post Japanese Post KIX Post Korea Post USPS UPU Aztec Code Data Matrix MaxiCode QR MicroQR Code and Chinese Sensible Code Keypad 29 keys 29 keys plus...

Page 11: ...ironmental Operation Temperature 10 50 C Storage Temperature 20 70 C Battery Charging Temperature 0 40 C Humidity Max 80 RH 30 C Weight Approx 380 g battery included Drop test 1 8 meters to concrete Handset 0 9 meters to concrete Cradle ESD 15kVDC air discharge 8kVDC direct discharge contact 8kVDC indirect discharge H V Sealed standard IP65 Agency Listing CE FCC BSMI NCC CCC SRRC Win CE AP MS Web ...

Page 12: ...remove all protective material from around the PT 9X30 PA 100 and save the shipping container for later storage and shipping Depending on the configuration ordered the PT 9X30 PA 100 shipping container may include 2 1 1 Compact Package PT 9X30 PA 100 Quick Reference Guide Battery pack CD ROM USB Sync cable Thread Power supply Stylus Hand strap Figure 2 1 Compact Package Battery pack Thread USB Syn...

Page 13: ... pistol grip Li ion battery 5000mAH Figure 2 3 Pistol grip Package Ethernet Cradle Package Power supply Ethernet Cradle Figure 2 4 Ethernet Cradle Package Inspect the package contents for damage If any item is missing or damaged please contact the Argox Technical Support Center immediately USB cable Cradle USB cable Ethernet Cradle ...

Page 14: ...nd other functions 2 2 1 PT 9X30 PA 100 Mobile Computer Dimensions of the PT 9X30 PA 100 159 mm L 80 8mm W 36mm H Figure 2 5 The Front of the PT 9X30 PA 100 Figure 2 6 The Back of PT 9X30 PA 100 Hand strap Docking Connector Micro SD Card slot Battery Cover Latch Scan Button Key pad Scan Window Stylus Scan Button Touch Screen Speaker ...

Page 15: ...escription Green Power on mobile computer not in cradle 3 Charging LED Indicator LED status Description Red Charging Green Charging complete Figure 2 8 The Back of the CRD 90 4 Charging Slot For charging a spare rechargeable battery pack 5 USB and Charging Connector Connects the multiple function socket on the mobile computer for data transmission and charging 6 Power Jack Input for AC adapter Pow...

Page 16: ... Power on mobile computer not in cradle 3 Charging LED Indicator LED status Description Red Charging Green Charging complete Figure 2 10 The Back of the CRD 90E 4 Charging Slot For charging a spare rechargeable battery pack 5 Switch Switch USB or LAN function 6 RJ45 For RJ45 connector 7 USB and Charging Connector Connects the multiple function socket on the mobile computer for data transmission an...

Page 17: ...hen either it is in the mobile computer or alone in the charging slot in the back of the cradle The life of a battery pack is limited and charging a battery pack causes it to gradually lose its ability to maintain a charge If your battery pack requires frequent charging it probably means it is time to purchase a new one A fully charged backup battery can maintain memory RAM contents for about 15 m...

Page 18: ...een when the battery is fully charged When to replace or recharge the main battery There are two conditions that you need to replace the main battery 1 As soon as possible after the battery indicator appears on the display 2 Before using the mobile computer when it has not been used for an extended period Notes Charging the Main and Backup Batteries for the First Time It may take up to 8 hours to ...

Page 19: ...ign the battery contacts and insert the battery 5 Reassemble the battery cover and Rotate the latches to the closed position 2 3 2 Charging the Battery Pack with a Power Adapter Using a RS232 Charging Cable or USB Charging Cable 1 Plug in the RS232 Charging cable or the USB Charging cable to the PT 9X30 PA 100 2 Connect the AC adapter to the cable s power jack and an electrical outlet Figure 2 12 ...

Page 20: ...e Cradle s spare battery charging slot 1 Connect the power adapter to a power source 2 Plug in the connector of the power adapter with Cradle 3 Insert the battery pack into the Cradle s spare battery slot Note When charging the battery pack in the Cradle s spare battery slot the Cradle charging LED is Red After the battery pack is fully charged the LED turns green Caution Do not remove the Battery...

Page 21: ... cases contact your supplier to purchase the right cables or technical support System Connection Data Communication The mobile computers let you link to a host computer through USB and RS 232 cable or the CRD 90 CRD 90E cradle for data communication 2 4 1 Via USB RS 232 Cable The mobile computer connects directly to a host computer via the USB RS 232 cable Figure 2 14 Communication through Cable 2...

Page 22: ...the Power key turns the unit on Alternatively when the unit is on this key must be pressed and held down for about two seconds in order to turn the unit off ESC Exit and back to the last layer TAB The Tab key is used to toggle between data fields or to place the cursor at pre determined places in a programming or word processing application BKSP The Backspace key is used to erase previously input ...

Page 23: ...on key twice function continue mode After press function key again function continue mode switches to normal Available function key combinations Key Define Function Reserve user define Reserve user define Reserve user define Reserve user define Reserve user define Reserve user define Reserve user define Reserve user define Reserve user define Reserve user define Touch screen calibration Volume Dow...

Page 24: ...rt a correctly oriented Micro SD card 3 Close the slot cover and fix two screws Note a If the micro SD card is inserted incorrectly the micro SD card unit and its internal data maybe damaged b When removing the micro SD card please press push first Insert Micro SD card face side down Figure 3 2 Inserting a micro SD Card ...

Page 25: ...in order of Start Settings Control Panel Stylus Calibration Figure 3 4 Calibration 1 Whenever the response of the touch screen is poor or the operations executed do not match your tapping on the touch screen please recalibrate the alignment of the touch screen using the following method 1 Press the stylus against the center of the target mark as indicated on the screen The screen shown to the righ...

Page 26: ... Press the key and then press the key to adjust for a louder sound Press the key and then press the key to adjust for a softer sound To continue making adjustments press the key twice to enter function continue mode Press the or key to adjust sound After finish setting press the key to exit function continue mode Sound settings are also be made by accessing the menu and tab in order of Start Setti...

Page 27: ...e 26 character alphabet A Z number s 0 9 function keys and assorted characters The keypads default characters functions are printed white 3 5 2 Entering Information Using the Keyboard Input Panel Use the keyboard input panel soft keyboard to enter information in any program To launch the keyboard input panel press the button on the taskbar Tap a key to enter a value Tap a key board input panel but...

Page 28: ...ug or Battery icon is displayed double tap this icon to bring up the Power Properties screen Or select Settings Control Panel from the Start menu and then double tap the Power icon to display Power Properties Figure 3 7 Control Panel To Check Battery Status The battery menu item shows the status of the main and backup batteries Figure 3 8 Power Properties ...

Page 29: ...9X30 PA 100 is either plugged in via the DC 5V 3A power adapter or in the cradle Charging Indicates that the battery is charging Battery Low Shows there is no external power supply the battery charge is low Battery Very low Indicates the battery is very low Stop operation and charge the PT 9X30 PA 100 immediately You must charge the battery when the Battery Very Low icon is displayed If the Batter...

Page 30: ...ime periods The available time periods for battery power are 1 2 3 4 5 10 30 minutes and never Activate this function when the PT 9X30 PA 100 is plugged into the power adapter or placed in its cradle by tapping the check box and then tapping the arrow to select from a list of time periods The available time periods for AC power are 1 2 5 10 15 30 minutes and never Figure 3 9 Power Properties 2 Bac...

Page 31: ...ht Available brightness for battery and AC power are Off Micro Fine Normal and Super Figure 3 12 Brightness Setting 3 6 3 Suspend Mode The PT 9X30 PA 100 will go into suspend mode when it is idle for a period of time Customize the idle duration using the Power control panel refer to Figure Schemes Tab Suspend mode appears just like you have turned the unit off Press the key to suspend the PT 9X30 ...

Page 32: ...ription Condition for Wakeup Power Off When the PT 9X30 PA 100 is set to suspend mode by pressing this action wakes the PT 9X30 PA 100 Press button Auto Off When the PT 9X30 PA 100 enters suspend mode by automatic power off this action wakes the PT 9X30 PA 100 Press button 3 7 Resetting the PT 9X30 PA 100 If the PT 9X30 PA 100 stops responding to the system you may need to rest it There are three ...

Page 33: ...T 9X30 PA 100 still does not respond perform a cold boot Perform a clean boot only if you want to reset PT 9X30 PA 100 to factory default setting Caution All data will be lost except User application folder The User application folder will lost when FW upgrading To perform a clean boot in OS 1 To perform a clean boot select Start Settings Control Panel and then double tap the System Information ic...

Page 34: ...ersists for warm cold reset conditions We strongly recommend that perform a clean reset only if you want to reset factory default setting 3 8 1 Flash Disk Location All storage disks are stored in Flash Disk in PT 9X30 PA 100 Figure 3 15 My Device 3 8 2 Flash Disk Size The size of the Flash Disk varies depending on the size of the system firmware Select Start Settings Control Panel and then double ...

Page 35: ...lity Bluetooth to enable Bluetooth like Figure 3 17 Figure 3 17 Enable Bluetooth 2 After enable Bluetooth please select Show BT like figure 3 18 Figure 3 18 Show BT 3 On Bluetooth manager screen select File New Connection like Figure 3 19 Figure 3 19 Bluetooth Connection ...

Page 36: ...vice after press next button It will start to search devices Select a device and press Pair button it needs to enter Bluetooth PIN code like Figure 3 21 Figure 3 21 Bluetooth Pairing 6 After PT 9X30 PA 100 check pin code with device PT 9X30 PA 100 will appear a pop window and show Success message like Figure 3 22 Figure 3 22 Bluetooth Pairing 1 ...

Page 37: ... com port like Figure 3 23 Figure 3 23 Bluetooth Explorer 8 After press Next button it will start to search device like Figure3 24 Figure 3 24 Bluetooth Serial Port 9 After press Connect button it will appear a connection with SPP mode like Figure 3 25 Figure 3 25 Bluetooth Serial Port ...

Page 38: ...ure 3 26 Bluetooth Explorer 11 After press Next button it will start to search device and it needs to enter PIN code like Figure 3 27 Figure 3 27 Bluetooth File Transfer 1 12 After checking pin code with the connect device PT 9X30 PA 100 will enter FTP mode like Figure 3 28 ...

Page 39: ...d a FTP connection like Figure 3 29 Figure 3 29 Bluetooth File Transfer 3 14 The latest function is ActiveSync connection The function can connect with computer via ActiveSync like Figure 3 30 Figure 3 30 Bluetooth Explorer 15 After press Next button it will start to search device like Figure 3 31 ...

Page 40: ...s Manual 34 Figure 3 31 Bluetooth ActiveSync 16 PT 9X30 PA 100 will add a ActiveSync connection on Bluetooth manager screen It will synchronize with computer like Figure 3 32 Figure 3 32 Bluetooth ActiveSync ...

Page 41: ...le click the Wireless icon on the screen bottom 3 Select new connection and press Connect button or double click the new connection BU01 WPA for instance it will appear the configuration window Figure 3 34 Then user can set wireless Encryption on this window Figure 3 34 Wireless Properties 4 After setting press OK to connect to AP server wireless AP server must setup completely before connection W...

Page 42: ...am Summit scu to open Summit Client Utility like Figure 3 35 FIGURE 3 35 OPEN SCU 2 Click Admin Login and input password SUMMIT to login like Figure 3 36 FIGURE 3 36 ADMIN LOGIN 3 In Profile Tab press Scan to find access point Select a access point and press Configure FIGURE 3 37 SCAN ...

Page 43: ... 38 CREATE A NEW PROFILE 5 Press Commit to save the profile setting FIGURE 3 39 COMMIT 6 In Main tab set Active Profile to RD02test WiFi will start connection with RD02test FIGURE 3 40 ACTIVE PROFILE 7 Wireless icon for SDCSD40N1 Icon Description Not Connected Signal Strength ...

Page 44: ...insert the SIM card in PT 9X30 PA 100 first Utility will ask PIN code if SIM card is lock 3 11 1 GPRS Connection 1 Tap Desktop Utility GPRS_RAS to enable GPRS_RAS like Figure 3 41 FIGURE 3 41 ENABLE GPRS_RAS 2 Tap Power On FIGURE 3 42 POWER ON GPRS 3 Select connection and tap Connect FIGURE 3 43 CONNECT ...

Page 45: ...S SIGNAL STRENGTH 3 11 2 GPRS SMS 1 Tap Desktop Utility GPRS_Demo The GPRS_Demo screen appears In the GPRS_Demo screen you can send or receive SMS setting phonebook security and SMS center The signal strength display on the taskbar FIGURE 3 45 GPRS_DEMO 2 In SMS tab you can operate SMS function FIGURE 3 46 SMS ...

Page 46: ... you can add modify and delete phonebook FIGURE 3 47 PHONEBOOK 4 In Security tab you can lock or unlock SIM card and change PIN code FIGURE 3 48 SECURITY 5 In Center tab you should setting SMS center before sending SMS FIGURE 3 49 CENTER ...

Page 47: ...top Utility GPS SYSTEM to enable GPS like Figure 3 50 FIGURE 3 50 ENABLE GPS 2 Tap Setup Connect to start GPS positioning PT 9X30 PA 100 will get position in a few minutes FIGURE 3 51 GPS POSITIONING 3 Tap Setup GPS Info or GPS Data to switch different information Figure 3 52 GPS Info and GPS Data ...

Page 48: ...tility RFID_Demo to enable RFID like Figure 3 53 FIGURE 3 53 ENABLE RFID 2 In Inventory tab tap 15693 14443A or 14443B to select tag type Press trigger key to read tag ID FIGURE 3 54 INVENTORY 3 In 15693 tab you can get UID read block and write block from ISO15693 tags Figure 3 55 15693 ...

Page 49: ...get UID from ISO14443A tags You can also read and write block from Mifare S50 S70 and Mifare Ultralight Figure 3 56 14443A 5 In 14443B tab you can get chip ID from ISO14443B tags You can also read and write block from SRIX4K Figure 3 57 14443B ...

Page 50: ...1 1 Tap Desktop Utility CameraDemo to enable Camera like Figure 3 58 FIGURE 3 58 ENABLE CAMERA 2 Tap Preview Start to start preview FIGURE 3 59 START CAMERA 3 Tap Capture JPEG Image to take picture The capture pictures place in default folder My Documents Figure 3 60 Take picture ...

Page 51: ...User s Manual 45 4 Tap Preview Stop to stop preview You can tap Display Show image to display picture Figure 3 61 Display picture ...

Page 52: ... the AC adapter and connect the RJ45 connector 2 Put the mobile computer in the cradle slot for LAN connection like Figure 3 62 FIGURE 3 62 LAN CONNECTIO 3 If AC adapter isn t available there exists a message for AC Power Required Please connect AC adapter and press retry to establish LAN connection FIGURE 3 63 AC POWER REQUIRED ...

Page 53: ...ner engine has different barcode settings The configurations and scan SDK settings are also different between Laser and 2D scanner 4 1 Scan Configuration When it is necessary to change the default barcode symbology for a different application use Scan Configuration to change default symbology place delimiter characters behind scanned data and save the settings Run this program from Desktop Utility...

Page 54: ...User s Manual 48 Figure 4 2 Laser Scan Configuration 2 ...

Page 55: ...User s Manual 49 Figure 4 3 Laser Scan Configuration 3 2D Scanner Engine Figure 4 4 2D Scan Configuration 1 Figure 4 5 2D Scan Configuration 2 ...

Page 56: ...o configure or press Restore Default to return to the scan default settings 4 2 Scan driver Scan driver lets you put data into Microsoft WordPad Open scan driver and the scan module powers on the scanner You can then scan barcode To turn off the power press Exit on the task bar Figure 4 7 Scan Driver ...

Page 57: ...s Make sure the mobile computer is installed according to instructions Never remove the main batteries or battery pack while the mobile computer is turned on Doing so can cause loss of data in the mobile computer Avoid looking directly into the LED light beam emitter or pointing the LED light beam directly into someone s eyes Position the LED light beam over the bar code from margin to margin and ...

Page 58: ... to the instructions When reading a small bar code decrease the distance between the mobile computer and the bar code For larger bar codes position the mobile computer so that the bar code fits into the LED light beam When reading a very high density bar code decrease the distance between the mobile computer and the bar code For a low density bar code increase the distance between the mobile compu...

Page 59: ...nd P1 P4 hot keys Function Key exe is located in directory Desktop Utility Function_Key 1 Choose F1 F10 or P1 P4 from list 2 Tap Define to define application or virtual key 3 Tap Apply or OK to set function key setting 4 Tap the Default to return to default setting Figure 5 1 Function Key Setting Figure 5 2 Function Key Define ...

Page 60: ...ess setting is a tool for changing the LCD backlight and keypad LED If you wish to save power use this program to change LCD backlight and keypad LED settings This application supports battery power and external power settings Figure 5 3 Timeout Brightness ...

Page 61: ...view Web or intranet Web pages on your device You will need to use WLAN to connect to an Internet server provider ISP or network Figure 6 2 Internet Explorer 6 2 Media Player The PT 9X30 PA 100 comes with Media Player for Windows CE installed Open Media Player by selecting Start Programs Media Player from the desktop Select File Open to open a new media file Please refer to www microsoft com for a...

Page 62: ...uter Server and use all programs installed on this server For example instead of running Microsoft Pocket Word you can run the desktop version of Microsoft Word Figure 6 5 Remote Desktop Connection 6 5 Transcriber Features Microsoft Transcriber is the natural handwriting recognition solution for your Windows CE device It recognizes words from its integrated dictionary and allows you to write in cu...

Page 63: ...7 6 6 Windows Explorer Windows Explorer works almost the same on your PDA as it does on your PC See the topics below for information about the difference in Windows Explorer on your device Figure 6 7 Windows Explorer ...

Page 64: ...A 100 and your computer Limited backup restore functionality Install uninstall programs on PT 9X30 PA 100 Note ActiveSync is only compatible with Windows XP or earlier The detail description of ActiveSync can be found in Microsoft s Website 7 2 Microsoft Mobile Device Center Download and install Microsoft Mobile Device Center if you run Windows Vista or Windows 7 on your computer and you want to s...

Page 65: ...tings 8 1 Main Windows When you turn on PT 9X30 PA 100 you will see the main Windows of Window CE 6 0 which is similar in appearance to Windows XP The main window consists of a background screen and taskbar Figure 8 1 Main Window The screen shows short cut icons for the main programs of Microsoft Windows CE 6 0 A description of the icons follows My Device Shows the internal configuration of PT 9X3...

Page 66: ...gned to be simple and user friendly The picture below shows the configuration of the taskbar Figure 8 3 Taskbar Start Icon Start icon is the starting point for the PT 9X30 PA 100 program If you point at the start menu with the stylus pen you can see various menus including program bookmark document setting help and operation If you choose each menu detailed executable programs appear as in the pic...

Page 67: ... deactivate input method press icon and select Hide input Panel To change the features of the input method select input method in Start Settings Control Panel Input Panel and click the option you wish to setup Figure 8 5 Input method Transcriber When you want to key in characters when making a document or setting start Transcriber Using the stylus to draw characters you want on the input panel thi...

Page 68: ...u select upper case capital letters and characters appear on the number key pad It serves the same function with the Shift key Figure 8 8 Keyboard Input Panel 1 Status Indicator Icon The following is a list of icons that appear in the taskbar s status area Icon Description Battery capacity is low Battery is charging Linked to desktop PC through USB WLAN not connected Signal strength for WLAN conne...

Page 69: ...rk Display Volume and Sounds Power System etc at the control panel Figure 8 9 Setting up To Tap Start Settings Control Panel the control panel window appears In the View option in the menu you can change the view mode into large icons small icons details or to arrange icons The control panel appears as below Figure 8 10 Control Panel ...

Page 70: ...rrecting through the storage tap list Trusted Authorities Includes the top quality certificates My certificate This saves the user s personal certificate to identify the user Other Authorities Middle certificate providers establish chains of reliability 3 To add certificates or secret keys in the selected storage press the Import button then select the way to bring certificates or keys You can sel...

Page 71: ...propriate move on to the following 2 Select Year and Month in the calendar If the current year is not correct press Year and adjust You can select the month using left and right arrows or the monthly tab that pops up when pressed 3 Press the correct date on the calendar 4 Set time by keying in correct time in the current time box The box shows AM PM Hour Minutes Seconds Press each and adjust time ...

Page 72: ...al using select Tone dialing or Pulse dialing Most phone lines are tone 5 To automatically disable call waiting select Disable call waiting by dialing select the appropriate number sequence in the list or enter a new sequence Editing dialing patterns 1 Using the codes listed revise the dialing patterns as needed Notes If you need to use characters other than the ones listed here use manual dialing...

Page 73: ...ackground screen Call up the right button menu from desktop and select Properties and you can check the Display Properties window Figure 8 15 Display Properties Display Change the desktop image of the background screen as follows 1 Select the Background tab 2 Click Browse to select an image file 3 Press OK to apply the setting ...

Page 74: ...ions Figure 8 16 Input Panel Properties 1 Select keyboard and press Options The Soft Keyboard Options window appears 2 Select the Size of the keys 3 To Use gestures for Space Backspace Shift and Enter click the gestures check box 4 Click OK to save the changes of Soft Keyboard Options 5 Click OK to save the setting of Input Panel Properties ...

Page 75: ... or history Figure 8 17 Internet Options 1 Connection Click the Connection tab and set Internet connection methods 1 To use a proxy server click Internet Connection by Proxy Server check box and enter the proxy address and port 2 To ignore the proxy server when making access to local address click No proxy server for local address check box This option is available only for the proxy server use If...

Page 76: ... the cookies setting include of privacy level Figure 8 20 Internet Options 4 8 3 8 Keyboard Repeat Tab 1 To change the amount of time between taps before repetition starts adjust the Repeat delay slider 2 To change the repeat rate adjust the Repeat rate slider 3 Test your new setting 4 Tap OK to exit the Keyboard properties Figure 8 21 Keyboard Properties ...

Page 77: ... OK to exit the Mouse properties Figure 8 22 Mouse Properties 8 3 10 Network and Dial up Connection You can directly link to the network via network Ethernet LAN or phone modern connection You can send or receive emails or access available files on the network server or search the Internet or Intranet Figure 8 23 Network and Dial UP Connection ...

Page 78: ...r in the user information tab To display the owner information on the start screen for system start click the Display Owner Identification check box Notes Enter additional user information or other information in the Notes box To show notes on the initial screen when the system starts click Display Owner Notes check box Network ID Windows CE 6 0 gains access to Network resources using the owner in...

Page 79: ... To enable the password protection when the power on click on the Enable password protection at power on You may encounter a request to enter the password if resume or warm cold boot PT 9X30 PA 100 If you forget the password and enter the system you may have to do a clean boot A clean boot erases all files data as well as programs Please consider using a password that is easy to remember and leave...

Page 80: ...ble an Internet connection through the USB connection Figure 8 26 PC Connection 1 Create a new connection in Go to Start Settings Network and Dial up Connections Choose the direct connection as connection type For detailed information refer to the Network and Dial up Connections section Page 57 2 Select Go to Start Settings Control Panel PC connection 3 Select Change Connection icon 4 Select the c...

Page 81: ...re 8 27 Regional Setting Properties You can set up region numbers currency time and date 1 Select Go to Start Settings Control Panel 2 Open Regional Settings icon 3 Select the tab for information to change 4 Select the Preferred option Available features are dependent on which region you have chosen in the region tab REMOVE ...

Page 82: ...6 Remove Programs Figure 8 28 Remove Programs To remove installed programs 1 Select Go to Start Settings Control Panel 2 Open the Remove Programs icon 3 Select the program and click Remove to uninstall program 4 Click Remove ...

Page 83: ... Select the SD memory card from the storage information dropdown list 2 To format the partitions of the selected disk click Dismount button and then click Format button 3 After clicking the Create New button key in the new partition names The system automatically creates new partitions to set up 4 To delete a partition select a partition and press the Delete button 5 To see the features of the sel...

Page 84: ...bottom icon to test the double tap sensitivity 5 If the bottom icon does not change adjust the setting using the grid icon above Calibration If the PT 9X30 PA 100 screen does not respond properly adjust the screen with the calibration function To start Calibration 1 Select Go to Start Settings Control Panel 2 Activate the Stylus and select Calibration tap 3 Press Recalibrate button and the adjustm...

Page 85: ... can see the size of the memory cache used for running programs or storing data To check the Memory 1 Select Go to Start Settings Control Panel 2 Run the System and select the Memory tab 3 The blue bar of the slider indicates the available memory capacity 4 Left side is storage memory and the right is program memory The device name indicates the PT 9X30 PA 100 s partnership relation when linked to...

Page 86: ...age allow users to clean registry and format user partition Figure 8 32 System Information 8 3 22 Timeout and Brightness Please refer to the previous section on Timeout and Brightness 8 3 23 Volume and Sounds Adjust volume and select sound Volume To adjust the Volume of the system 1 Select Go to Start Settings Control Panel 2 Open Volume Sounds icon and select the Volume tab 3 Press the left right...

Page 87: ...s tab 3 Select an Event from the event list 4 Select a sound from the event sound list 5 To remove the sound from the selected event choose None 6 To save the changes in another scheme select Save As in another name and name the sound scheme 7 To remove the sound scheme select the scheme and then Delete Figure 8 33 Volume Sounds ...

Page 88: ... below do not resolve the problem please contact your local supplier or Argox for technical support http www argox com If the PT 9X30 PA 100 mobile computer needs repair please ensure that the label with the serial number is present If sending the mobile computer or cradle back to your local supplier or Argox please use the original package to minimize the chances of damage during shipping 9 2 Rea...

Page 89: ... Make sure mobile computer is powered on Adjust screen brightness Mobile computer either doesn t respond or responds inaccurately to touch screen input Calibrate touch screen Perform a warm boot WARNING Unsaved data will be lost Perform a cold boot WARNING Unsaved data will be lost Perform a clean boot WARNING The mobile computer is reset to default settings and data will be lost Battery life is s...

Page 90: ...e file name must be P9XCE60R bin P9XUtility cab and P9X2DUtility cab do not rename it Caution Users files will be erased 1 Copy file P9XCE60R bin P9XUtility cab and P9X2DUtility cab from the PC to the root directory of the Micro SD card 2 Insert the Micro SD Card into the PT 9X30 PA 100 3 Plug the power adapter into the PT 9X30 PA 100 4 Cold boot and press hot key function to update FN Dot 5 Press...

Reviews: