EN
27
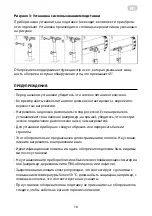
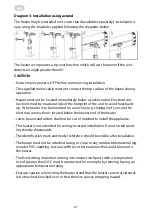
Diagram 3: Installation using a stand
The heater may be installed on its own stand (available separately). Installation is
easy using the brackets supplied following the diagrams below.
The heater incorporates a tip-over function which will cut the power if the unit
detects an angle greater than 45°.
CAUTION:
• Ensure mains power is OFF before commencing installation.
• The supplied mains cable must not contact the top surface of the heater during
operation.
• Heater must not be located immediately below a socket outlet. Electrical con-
nections must be made outside of the footprint of the unit to avoid heat build-
up. If the heater is to be mounted on an incline (e.g. sloping roof), ensure the
electrical connection is located below the lowest end of the heater.
• Joists, beams and rafters shall not be cut or notched to install the appliance.
• This heater is not intended for ceiling-recessed installation. Do not install point-
ing directly downwards.
• The identification mark and model reference should be visible after installation.
• The heater must not be attached facing or close to any combustible material (eg,
wood or PVC cladding, fascia or soffit) or other materials that could blow onto
the heater.
• The fixed wiring insulation coming into contact with parts with a temperature
rise of greater than 50°C must be protected, for example, by sleeving having an
appropriate temperature rating.
• Exercise caution when siting the heater stand that the heater cannot accidental-
ly be touched, knocked-over or that the wire causes a tripping hazard.


