background image

Operation Instructions

Temperature Recorders

The appliance is equipped with a six inch recorder, which starts operation after the appliance is 
connected to power supply.

1. Installation and Operation

Following are procedures for correct operation of the temperature recorder.

1. Open the door of the temperature recorder cabinet.
2. Connect the temperature recorder to the battery (9V) as spare power source.
3. Load new pressure-sensitive chart paper.
4. Remove the plastic cap of the ink market pens, and close the cabinet door.

Caution:

 The recorder does not until the temperature in the appliance reaches the value within the 

operation range of recording.

2. Power Supply

The temperature recorder requires an AC power supply (220V/50Hz). If AC power supply is interrupted, 
the LED of the recorder blinks and the warning indicator turns on. The temperature recorder can also be 
operated with DC from spare source battery which lasts about 30 hours. (Caution: The battery should 
remain fully charged. If the appliance is not in operation, the battery should be switched off. Ensure that 
the battery is in good status as a spare power source.) If power fails, the LED of the temperature 
recorder blinks until AC power is supplied or spare power source is connected. The LED indicator will 
blink when the power in the battery is low.

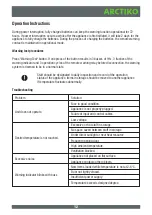
Maintenance and replacement of temperature recorder

Following are inspection procedures when the green LED blinks.

1. If LED extinguishes and the recorder does not operate, check to see if AC power supply is

interrupted, the circuit shorted or cables are not connected. After AC power supply is recovered,
install the battery. If the battery is in good condition, the green LED indicator turns on but does not
blink. Low voltage of the battery may result in the LED flashing. Replace the battery.

2. If the battery is removed, the power indicator LED blinks. The temperature recorder operates with

AC power supply. The green LED indicator blinks until a good battery is reinstalled.


13

Summary of Contents for BBR 950

Page 1: ...OPERATING INSTRUCTIONS Refrigerator BBR 950 ...

Page 2: ...2 ...

Page 3: ...Table of Contents PAGE Safety Precautions 4 Accessories 7 Location 8 Installation 9 Operation instructions 10 Cautions 15 Maintenance and repair 16 Technical information 17 3 ...

Page 4: ...nd to avoid potential hazards In this manual and on labels attached to this product the words WARNING and CAUTION mean the following A potentially hazardous situation which if not avoided may result in minor or moderate injury or damage to the equipment A potentially hazardous situation which if not avoided could result in serious injury or death CAUTION WARNING Label indications for example This ...

Page 5: ...ection The appliance must be installed on a solid and flat surface or the appliance may fall or tilt The electrical plug should be kept clean and be tightly inserted into the socket or fires mayresult The electrical socket must be grounded by a qualified technician to avoid electrical shocks After installation the socket should beaccessible Follow the instructions on the type plate and use a dedic...

Page 6: ...Light switch Control panel Inner light Glass door Casters Rack Auto temperature chart recorder 6 ...

Page 7: ...isplay the current temperature and warning data 2 Light Switch Control of the lights inside the appliance 3 Casters Casters designed for free movement of the appliance 4 Automatic temperature chart recorder A seven day temperature chart recorder is standard on all models 5 Rack The racks can be loaded with 320 blood bags of 200ml 6 Inner light 7 ...

Page 8: ...ing Appliance must be grounded to prevent electrical hazards 8 Ensure that no article can fall on the top of the appliance Location The appliance should be located in an area where the following requirements can be satisfied Plug with a grounding pin should be used for the appliance to prevent electrical shock Do not ground the appliance to water pipes as frequently PVC pipes are used for water su...

Page 9: ...ws for dismounting the test bottle 4 Fill the test bottle with 10 glycerin or other solution such as glycol to the scale 200 5 Replace the capped test bottle in its original position 6 Set the sensor on the test bottle and replace the sensor fixing panel Operation Instructions Temperature adjusting Press and hold both SENSOR SELECT button and CALIB CANCEL button for more than 3s until original set...

Page 10: ...ng This defrosting process does not affect the temperature in the appliance 2 Automatic defrosting When frost accumulates on the cooling coils as a result of high ambient temperature and a large amount of loaded wet items the defrosting process will be set automatically The defrosting process will stop when the designed condition is reached In such a case the temperature of 200ml blood bags will r...

Page 11: ... Temperature detected by upper or lower sensor 6 C Temperature detected by upper or lower sensor 2 C Temperature detected by sensor 8 C or 1 C Power interruption or switch off External door ajar or open Control panel off control within 90 seconds Upper sensor open or short Lower sensor open or short Defrosting circuit open or short Over temperature open or short Rechargeable battery voltage low or...

Page 12: ... state Staff should be designated to daily inspection and record of the operation status of the appliance Items in storage should be moved to another appliance if temperature fluctuates abnormally Troubleshooting Problem Unit does not operate Desired temperature is not reached Excessive noise Warning indicator blinks with buzz Solution Fuse in good condition Appliance is not properly plugged Failu...

Page 13: ...e source battery which lasts about 30 hours Caution The battery should remain fully charged If the appliance is not in operation the battery should be switched off Ensure that the battery is in good status as a spare power source If power fails the LED of the temperature recorder blinks until AC power is supplied or spare power source is connected The LED indicator will blink when the power in the...

Page 14: ... pauses over the marginal scale which does not represent a certain temperature value If the pen does not stop over the said position the arrows 1 and 2 can be used to adjust the pen s position within 5 seconds 4 Temperature calibration The temperature recorder is preset during the manufacturing process The following are procedures for resetting 1 Set the recorder in operation for at least 2 hours ...

Page 15: ...om the test bottle 3 Fully stir the solution of broken ice cubes and cold water in a vacuum flask 4 Place the sensor in the solution 5 Continue to stir the icy solution until the temperature of the solution is 0 C measured by a precise thermometer Test the temperature displayed on the sensor to be calibrated 6 Wait until displayed temperature stabilizes If the displayed temperature is not 0 C cali...

Page 16: ... Unplug the appliance 2 Remove the starter 3 Tightly install the new starter 4 Connect the appliance to the power source Recording paper The pressure sensitive paper for the temperature recorder provided when the appliance is purchased can be used for about six months Additional recording paper can be ordered and provided within one or two months thereafter Ordered recording paper will be shipped ...

Page 17: ...950 936L 320bags 450ml Sprayed steel sheet Sprayed stainless sheet Electrical heated glass door Styrene polyurethane foam Freon free 12 Forced air circulation Sealed Finned pipes Finned pipes R134a Automatic Electronic control system Indicator blinks for buzzer and remote warning Indicator blinks without deferred buzzer alarm Door war ning indicator on and buzzer signal 1 minute later Permanent st...

Page 18: ...18 ...

Page 19: ...19 ...

Page 20: ...WWW ARCTIKO COM 50 80 005 0 GB LAMMEFJORDSVEJ 5 DK 6715 ESBJERG N DENMARK TEL 45 70 20 03 28 FAX 45 70 20 03 29 INFO ARCTIKO COM WWW ARCTIKO COM ...

Reviews: