


12
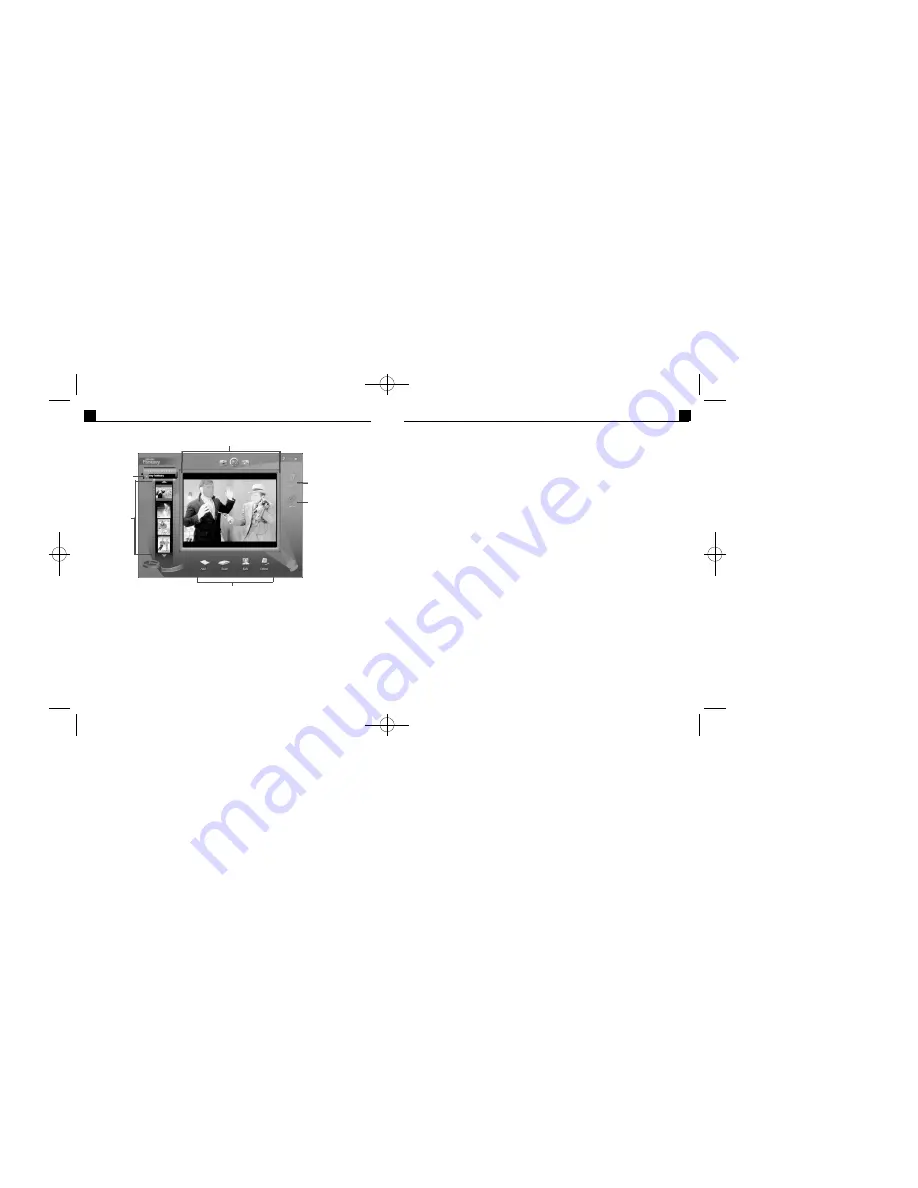
“fantasy slides”
- small thumbnail images of your fantasy backgrounds. Slides make it
easy for you to find and view your fantasies. To browse through the cur rently
displayed slides, click the up/down arrows. To select a fantasy, click on the
corresponding slide. The selected fantasy will ap pear in the Fantasy Display Area.
“My Fantasy” Buttons
- allow you to create, edit and delete your own fantasy
backgrounds. To make these buttons available, choose “My Fantasy”from the Fantasy
Category Menu. All created fantasies will be stored in this category.
•
Add Button
- lets you create a fantasy ba ckground from one of your own images.
(PhotoFantasy supports BMP, TIF, JPG,GIF, PCD, PCX, TGA and FlashPix file
formats.) To do this, click the Add Button from the Get Fantasy Screen. In the Open
dialog box that appears,locate the image you want to use and click “Open”. The
Create Fantasy Background Screen will open,along with your image in the Create
Display Area. Use the Masking Tools to create your masks and enhance the b rightness
and contrast. When you are done, you will return to the Get Fantasy Scr een with your
newly created fantasy in the Fantasy Display Area.
•
Scan Button
- lets you create a fantasy background from a scanned or acquired image.
To do this, click the Scan Button from the Get Fantasy Screen. In the Select
Source dialog box that appears, choose the digital camera or scanner you want to use
and click “Select”. Acquiring options specific to that device will appear. (For further
instruction, consult the manual that came with the device.) Once the image is acquired,
it will automatically appear in the Create Display area in the Create Fantasy
Background Screen. Use the Masking Tools to create your masks and enhance the
brightness and contrast. When you are done, you will return to the Get Fantasy
Screen with your newly created fantasy in the Fantasy Display Area.
•
Edit Button
- opens the Create Fantasy Background Screen,so you can edit the masks
in your selected fantasy background and enhance the brightness and contrast.
PhotoFantays 2000 Quick Start Guide
11
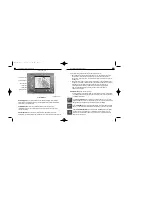
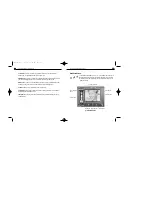
Fantasy Display Area
- displays your selected fantasy background.
Fantasy Category Menu
- provides a list of available fantasy categories. This list includes
categories contained on your CD-ROM and a “My Fantasy”category for adding your
own fantasy backgrounds. To select a category from this list, click on the down arrow in
the menu,then click on the desired title.
Tip: Remember to insert your PhotoFantasy CD in your CD-ROM drive to access
the full selection of fantasy backgrounds.
PhotoFantasy 2000 Quick Start Guide
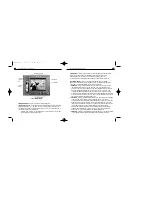
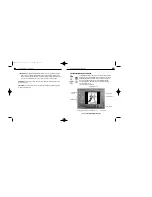
Fig.2
Get Fantasy Screen
“fantasy
slides”
Okay Button
Cancel Button
“My Fantasy” Buttons
Fantasy Display Area
Fantasy
Category
Menu
PFANTASY.200 3/14/01 10:28 AM Page 13


