
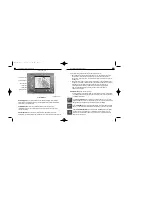

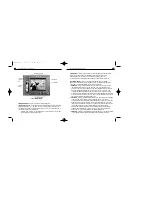

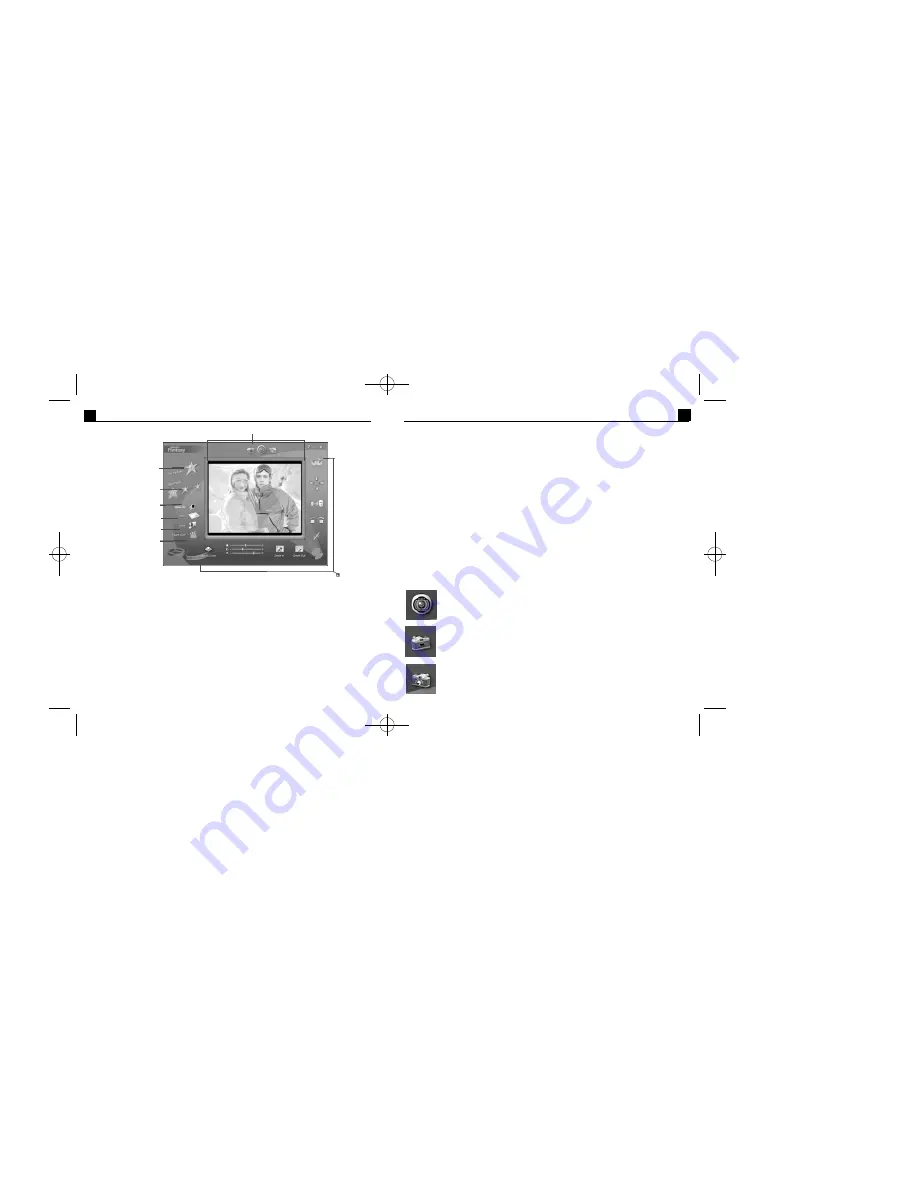
Main Display Area
- provides a preview of your selected fantasy or the combined
photo fantasy. This area also allows you to view adjustments and enhanc ements that
you make to your photo fantasy.
Get Fantasy Button
- opens the Get Fantasy Screen,so you can select the
fantasy background for your photo fantasy. From this screen, you can also create
your own fantasies.
Get Photo Button 1,2 or 3
- Each of these buttons corresponds to a par ticular
mask/photo in a fantasy background.(Notice the color of each button matches the color
8
PhotoFantasy 2000 Quick Start Guide
7
PhotoFantasy 2000 Quick Start Guide
of its corresponding mask.) The Get Photo Buttons allow you to:
1. Open the Get Photo Screen to select the photo for your photo fantasy. To do this,
double-click on the button that corresponds to your desired mask. In the Get
Photo Screen,select your photo. You will return to the Main Display Area with your
chosen photo.
2. Specify the photo (within a photo fantasy containing 2 or 3 photos) that you want
to adjust. You will need to do this each time you adjust a different photo. To specify,
highlight (or click on) the b utton that corresponds to your desired photo.
A highlighted button shows you the mask/photo that is currently selected.
Tip: You may also highlight a b utton by clicking on the a ctual photo in
the Main Display Area.
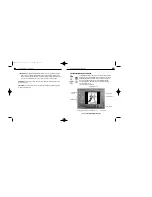
Live Video Buttons
(for Windows users only)
PhotoFantasy Live Video buttons allow you to capture your picture "Live" directly
into a fantasy template using a desktop video camera or other Video-for-Windows
compatible video device.
Click the
Live Preview
button to toggle your live video camera on or off. If the
selected fantasy allows for more than one photo, you can switch the live video feed
among them by clicking directly on the desired mask in the fantasy.
Click the
Snap Photo
button to capture a photo from your video camera or digital
camera. You can then use the M ove buttons to position your image in the fantasy.
Click the
Select Video Source
button to select from available Video-for-Windows
drivers if you have more than one. You may also modify the settings for your
camera.(Consult the documentation for your camera for more information on
VFW support and drivers.)
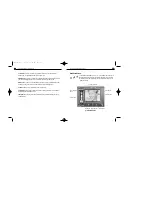
Fig.1
Main Screen
Main Display Area
Get Fantasy Button
Get Photo Buttons
Save As Button
Print Button
Send Button
Start Over Button
Adjustment Tools
PFANTASY.200 3/14/01 10:28 AM Page 9


