


PhotoFantasy 2000 Quick Start Guide
4
PC System Requirements
MAC System Requirements
•
Windows 95/98/ME/2000/NT
•
Power PC
•
Pentium-based PC or equivalent
•
Mac OS 7.5-9.1
•
60 MB free hard disk space
•
25 MB free hard disk space
•
32 MB RAM
•
64 MB RAM
(32 MB with vir tual memory)
•
16-bit (or higher) color display
•
16-bit (or higher) color display
•
CD-ROM drive
•
CD-ROM drive
•
Mouse
•
Mouse
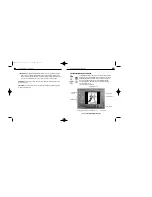
Installing and Starting PhotoFantasy
To install
, insert the PhotoFantasy CD in your CD-ROM drive. Click Start/Run and type
D:\SETUP.EXE (where “D” is your CD-ROM drive). Click OK. Follow the instructions
on the Screen.
To start
, go to Start/Programs/ArcSoft PhotoFantasy/PhotoFantasy.
(To uninstall, go to Start/Programs/ArcSoft PhotoFantasy/Uninstall.)
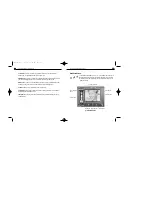
MAC users:
To install
,
1. Insert the PhotoFantasy 2000 CD in your CD-ROM dr ive.
A PhotoFantasy 2000 CD icon automatically pops up on your screen.
2. Double-click the PhotoFantasy 2000 CD icon.
A PhotoFantasy 2000 Installation window appears.
3. Double-click the PhotoFantasy 2000 icon.A Readme File window appears. Use the
scroll bar to browse through the file. Press Print to print a hard copy of the file, click
Save As to save it, or choose Continue to open the PhotoFantasy Installation window.
4. Use the down arrow and the Switch Disk button to select a location for installing the
program. Press Install to start installation, or click Quit to abort.
PhotoFantasy 2000 Quick Start Guide
3
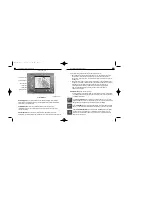
INTRODUCTION
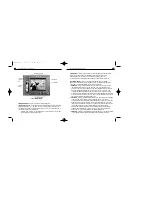
Welcome to ArcSoft PhotoFantasy 2000
, the imaging entertainment application that lets
you turn your favorite photos into your wildest fantasies! This program gives you all the
tools you’ll need to send your boss on a white-water rafting adventure,place your face on
the cover of a popular magazine,and even let your kids travel back to the time of
dinosaurs.First choose your fantasy from over 200 included fantasy backgrounds. Then
pick a photo of yourself or someone else. With just a few more clicks of a button, your
chosen fantasy and photo will be combined together seamlessly. Finished photo fantasies
make entertaining greeting cards, websites,calendars, posters,invitations,signs, buttons,
banners and much more.
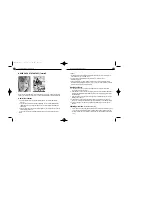
Special features allow you to:
•
Choose
from over 200 hilarious fantasy backgrounds included on your CD-ROM
•
Create
customized fantasy backgrounds using your personal or scanned images
•
Use
up to three photos in your photo fantasy
•
Make
adjustments to your photo fantasy using the Flip, Rotate, Move, Resize
and Zoom In/Out Tools
•
Instantly match
the color of your photo with that of your fantasy background
using the one-click Match Color Tool
•
Adjust
the brightness, contrast and saturation of your photo fantasy, in real time
•
Personalize
your photo fantasy by adding a title or other text caption
•
Acquire
images from digital cameras,scanners and other TWAIN-compliant devices
•
Save
your photo fantasies in popular file formats, such as BMP, TIF, JPG,GIF, PCX,
TGA,EPS (write-only) and FlashPix
•
Capture live video
using any video-for-Windows device including camcorders,
VCRs and digital cameras.
PFANTASY.200 3/14/01 10:28 AM Page 5


