background image

Installation Instructions 
 

1. 

Disconnect the negative cable from the car battery. Tape up the end  


so it is isolated form the battery. 


2. 

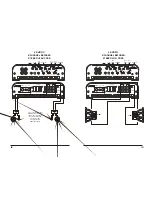
Run an 4 AWG wire from the battery to the amplifier. Plan this part of  


the installation carefully. This cable will carry very high current. If it  


should short to the body and it is not properly fused it could catch fire. 

 
3. 

Connect the power wire to the battery using a fuse capable of the  


total current load of all amplifiers connected. Don’t install the fuse  


yet. Wait until the end. Locate the fuse as close as possible to the  


battery. If the fuse is further that 18 inches (wire length) from the  


battery you should reevaluate the wire and fuse placement. 

 
4. 

Find the closest clear metal area to the amp for a ground. Sand,  


grind or scrape all paint and undercoating from the body and screw  


the ground securely to the body.  


It is advisable to test the ground with an ohmmeter between the  


ground cable and the negative battery cable to insure a good low  


resistance connection. Some alloys used in modern cars do not  


offer the best ground. If you believe this is the case consult with the  

  vehicle 

manufacturer. 

 
5. 

Run the speaker wire to the speakers. It is advised that you leave  


some extra wire at this point. You can “clean it up” later. 

 
6. 

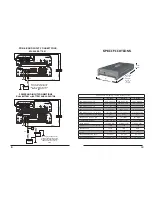
If you haven’t already done so, mount the amp now. 

 
7. 

Connect the power and ground to the amplifier.  


Only after this step should you install the fuse at the battery. 

 
8. 

Connect the remote wire from the head unit to the amplifier. Now  


is a good time to turn on the amp for the first time. Make sure it  


turns on properly and does not go into protection. 


9. 

Connect the speaker wires to the amp and speakers (make sure  


the amp is off first). Make sure the polarity (+ and-) is correct. 

 
10. 

Connect the RCA’s to the amp. 

 
11. 

Double check the amplifier controls at this time. Make sure    


everything is set correctly for your system. 

 
12. 

Now you’re ready to play it for the first time. It is best to leave the  


gain all the way down at first. Start with the head unit volume low  


and work your way up. 

 
13. 

Now you can tune the amp. Take your time and make only one  


adjustment at a time. It may take some time to get the system  


fully adjusted. During this time the amp is drawing current from  


the battery. You should check the battery voltage from time to time  


and re-charge it if it gets low. Battery voltage can affect the way  


the amplifier performs. 

 
14. 

You’re done. Now have fun. 


This amplifier is equipped with an advanced diagnostic system 
controlled by the microprocessor. In the event that this unit goes 
into protection for any reason it will flash the status light found on 
the control end of the amplifier. The different sequences indicate 
the “Code”  for faster trouble shooting. 

THERMAL PROTECTION (Turn the volume 
down and wait for the amplifier to cool)

CODE 11 

Red Green Flashing

OVERVOLT 

(This is a charging system 

failure. DO NOT START THE ENGINE.) 

CODE 14 

1 Flash, Pause, 4 Flashes

SHORT 

(Turn the amplifier off and check 

for a shorted speaker or wire.)

CODE 12 

1 Flash, Pause, 2 Flashes

REPEATED SHORT

(Correct the short 

and leave the amp off for 5 minutes.)

CODE 13 

1 Flash, Pause, 3 Flashes

NORMAL TURN ON

BLUE FLASHING

Summary of Contents for KS 300.2

Page 1: ...D WITH OR MODIFIED OR IF ANY SERIAL NUMBERS HAVE BEEN REMOVED WILL NOT BE COVERED BY ANY PART OF THE MANUFACTURES WARRANTY All warranty returns should be sent to ARC AUDIO freight prepaid and must be accompanied by proof of purchase a copy of the original sales receipt Direct returns from consumers or non authorized retailers will be refused unless specifically authorized by ARC AUDIO with a valid...

Page 2: ...fer much lower THD and higher Damping factors then Full Range Class D designs ARC Audio SOLID CONSTRUCTION for SOUND Car Audio Systems Setting the Gains So you re worried that your 8 Volt output head unit will be too much for the ARC Audio s 4 Volt input stage Don t Be ARC Audio Amplifiers input stage is rated to 4 volts RMS 1KHz without clipping Music is very dynamic Nothing like a 1KHz test tone...

Page 3: ...ofer position or the enclosure size Input Mode Switch All ARC Audio amplifiers include an input mode switch This switch controls the signal being sent to the amplifier sections Most 2 channel amplifiers can be bridged into a single channel however if the signal to the channels is not exactly the same the distortion will increase significantly The mode switch solves this problem by offering 3 modes...

Page 4: ...to the amplifier Now is a good time to turn on the amp for the first time Make sure it turns on properly and does not go into protection 9 Connect the speaker wires to the amp and speakers make sure the amp is off first Make sure the polarity and is correct 10 Connect the RCA s to the amp 11 Double check the amplifier controls at this time Make sure everything is set correctly for your system 12 N...

Page 5: ...EO BRIDGED R IN L R MONO HIGH LOW FULL FREG RANGE X 1 X 10 FREQ Hz 55 110 240 330 550 BASS BOOST 0 15 dB GAIN MIN MAX INPUT L R BRIDGED 4 W MIN L 2W R 2W MIN MIN 3 X 25 AMP MAX ARC AUDIO INC USA GND TURN ON 12V 4 0HMS MIN 8 9 OPTIONAL SECOND SET 2 OHM STEREO Set to LOW Set to L R SUM Set to HIGH or FULL Set to STEREO KS 300 2 KS 600 4 STEREO FULLRANGE OR HIGH PASS 2 OR 4 OHMS KS 300 2 KS 600 2 BRI...

Page 6: ... 1 X 10 FREQ Hz 55 110 240 330 550 FRONT HIGH LOW FULL POWER STEREO BRIDGED F L IN L R MONO FREG RANGE X 1 X 10 FREQ Hz 55 110 240 330 550 BASS BOOST 0 15 dB GAIN MIN MAX INPUT L R STEREO BRIDGED F R IN L R MONO GAIN MIN MAX REAR FRONT 2 CH IN REAR HIGH LOW FULL SOURCE SELECT 4 CH 2 CH 2 CH BB FRONT REAR FRONT REAR FREG RANGE X 1 X 10 FREQ Hz 55 110 240 330 550 FRONT HIGH LOW FULL LOW 2 CH or 4 CH...

Page 7: ...RONT HIGH LOW FULL POWER STEREO BRIDGED F L IN L R MONO FREG RANGE X 1 X 10 FREQ Hz 55 110 240 330 550 BASS BOOST 0 15 dB GAIN MIN MAX INPUT L R STEREO BRIDGED F R IN L R MONO GAIN MIN MAX REAR FRONT 2 CH IN REAR HIGH LOW FULL SOURCE SELECT 4 CH 2 CH 2 CH BB FRONT REAR FRONT REAR FREG RANGE X 1 X 10 FREQ Hz 55 110 240 330 550 FRONT HIGH LOW FULL HIGH NOT USED BRIDGED BRIDGED X1 NOT USED NOT USED L...

Page 8: ...attery between the battery and the body It should be Upgraded to 4 AWG from the factory 8 or 10 AWG RCA CABLE RCA CABLE 4 AWG 4 AWG 8 205 mm 2 3 8 60 mm C D V 4 4 1 Z H 0 0 1 D H T 1 S M R R E W O P T U P T U O 2 0 0 3 S K 4 T U P T U O R E W O P S T T A W 2 X 0 8 1 2 T U P T U O R E W O P S T T A W 0 X 2 5 3 1 T U P T U O R E W O P D E D N E M M N O C E R T O N 4 T U P T U O R E W O P D E G D I R...

Reviews: