


- 49 -
Installation & Maintenance
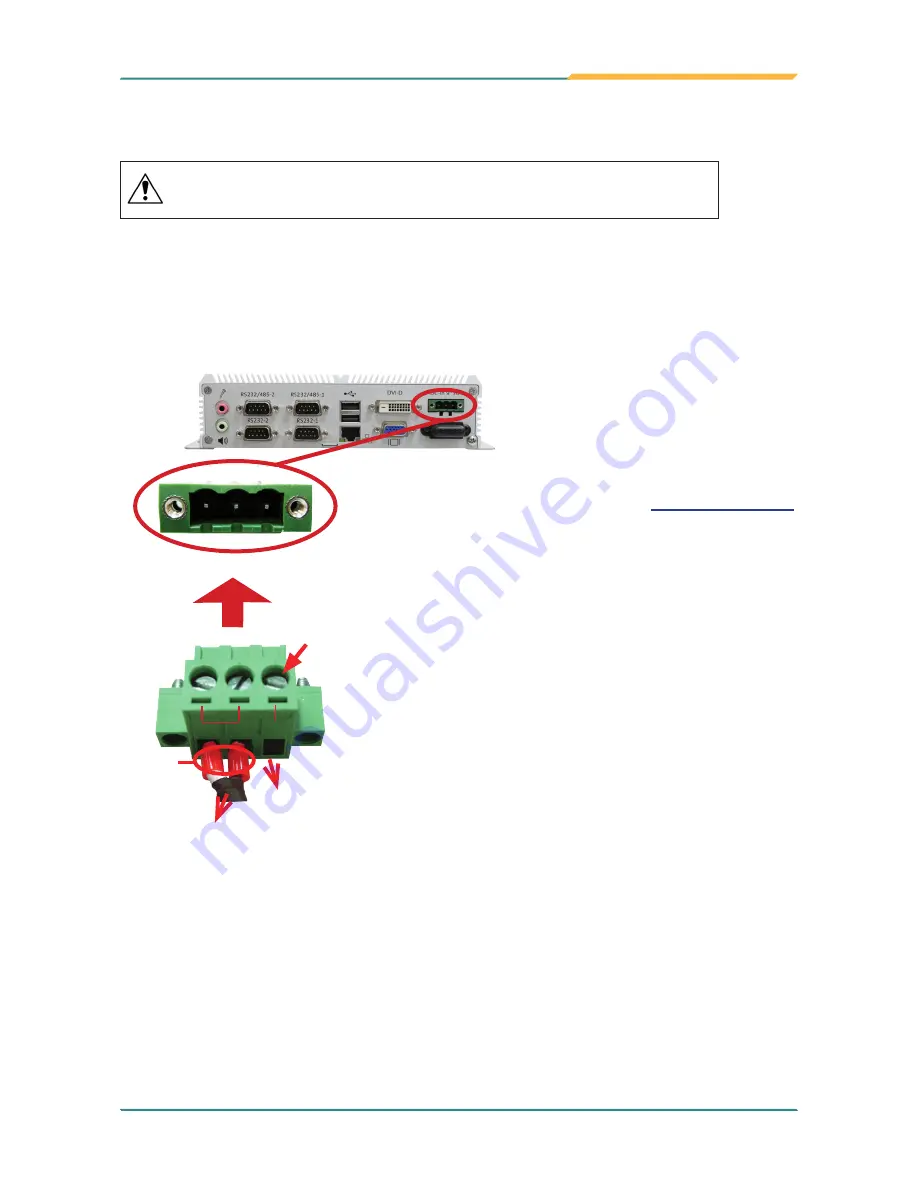
4.3. Wire DC-in Power Source
Warning
Only trained and qualified personnel are allowed to install
or replace this equipment.
Follow the instructions below for connecting the computer to a DC-input power source.
4.31 Vehicle Application
For Vehicle Application
, DC power Input wiring pin definition is as follow,
1. To turn on the Vehicle Acc for Vehicle application,
please refer to Jumper setting of
JACON1 on page 49
2. Before wiring, make sure the power source is
disconnected.
3. Find the terminal block in the accessory box.
4. Use the wire-stripping tool to strip a short insulation
segment from the output wires of the DC power
source.
5. Identify the positive and negative feed positions
for the terminal block connection. See the symbols
printed on the rear panel indicating the polarities and
DC-input power range in voltage.
6. Insert the exposed wires into the terminal block
plugs. Only wires with insulation should extend from
the terminal block plugs. Note the polarities between
the wires and the terminal block plugs must be
positive to positive and negative to negative.
7. Please connect the Acc pin with your car Acc, and
the device will be activated when you turn your
ignition key to Acc.
8. Use a slotted screwdriver to tighten the captive
screws. Plug the terminal block firmly, which wired,
into the receptacle on the rear panel.
+
-
Acc
receptacle
connect
+ -
Vcc GND Acc
Power
Source
Car Key
Acc Signal
protective
cap
captive
screw
Summary of Contents for ARTS-1450
Page 2: ...2 Revision History Version Release Time Description 1 0 March 2015 Initial release...
Page 10: ...viii This page is intentionally left blank...
Page 11: ...1 1 Chapter 1 Introduction Chapter 1 Introduction...
Page 17: ...7 2 Chapter 2 Getting Started Chapter 2 Getting Started...
Page 22: ...12 This page is intentionally left blank...
Page 23: ...13 3 Chapter 3 System Configuration Chapter 3 System Configuration...
Page 49: ...39 4 Chapter 4 Installation and Maintenance Chapter 4 Installation and Maintenance...
Page 61: ...51 5 Chapter 5 BIOS Chapter 5 BIOS...
Page 72: ...62 This page is intentionally left blank...
Page 73: ...63 Appendices Appendices...


