background image

The SWA6+ re12V DC to both the red and yellow wires. When both of these wires have 
power the SWA6+ is always powered on, and the green Power On LED will remain illuminated. 
Ground is connected to the black wire.

In a spa application this requires the red and yellow wires to be jumped together and then 
connected to the +12VDC output of the power source. In this set up the SWA6+ will always be 
on, with a very low current draw when idle.

In a boat, ATV or other application requiring power from a battery, the yellow wire (constant 
power) should be connected to the battery, and the red wire should be connected to the ignition 
or a switch. 

For detailed instructions you can check out our online video:

‘How to wire your Aquatic AV stereo system’

http://www.aquaticav.com/support/videos

1.7 Power On

1.6 Power Attenuation Wires

The SWA6+ Combined Stereo Subwoofer’s 
power can be reduced or increased to suit 
different applications. An output level 
of -3dB or -6dB should be used to avoid 
blowing very small speakers, often used in 
spa applications.

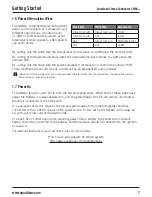
By cutting only the white wire the output level will decrease to -6dB below the nominal 0dB.
By cutting both the white and black wires the power/volume will increase to +6dB above the 
nominal 0dB.
By cutting only the black wire the power/volume will increase from -3dB to the nominal 0dB.
These modifications should only be carried out by an experienced audio installer.

Black Wire

White Wire

Output Level

Intact (not cut)

Intact (not cut)

-3dB

Intact (not cut)

Cut

-6dB

Cut

Intact (not cut)

0dB (reference)

Cut

Cut

+6dB

Should you cut the wrong wires or wish to reconnect them to further alter the attenuation, the Power Attenuation 

Wires can be crimped back together.

Getting Started

Combined Stereo Subwoofer SWA6+

7

www.aquaticav.com

Summary of Contents for SWA6+

Page 1: ...EAD THIS INSTRUCTION MANUAL BEFORE INSTALLATION AND OPERATION USER INSTALLATION MANUAL SWA6 COMBINED BLUETOOTH STEREO SUBWOOFER with Full Range Speaker Outputs CHARGING R A D I O FM R A D I O FM DSP E...

Page 2: ...o Device 3 2 3 Bluetooth Multi link 3 3 Listening via Auxiliary Input 3 4 Adjust Volume Level 3 5 Automatic Standby Mode 4 Listening to FM Radio 4 1 Enter FM Radio Mode 4 2 Scan or Seek FM Radio Chann...

Page 3: ...mum performance Halo Aerial Technology provides unrivalled Bluetooth range and signal strength Automatic Standby mode will engage when the SWA6 does not see any input from either the RCA s or Bluetoot...

Page 4: ...lighting or relays to be triggered 3A max load 6 USB Input For connection of USB thumb drives with MP3 and or WMA files Charges compatible USB devices when connected via USB cable 7 Wired Remote 8 pi...

Page 5: ...ng term performance Retail packaged models only 2 FM Radio Antenna Jack 1 12 pin Watertight Harness 3 RCA Auxiliary Outputs Red White 4 RCA Auxiliary Inputs Red White 5 12V DC Triggers Brown 6 USB Inp...

Page 6: ...able length make sure this is coiled and not bent as bending may cause damage to the cable For spa or hot tub installation the antenna should be located above the waterline otherwise Bluetooth range w...

Page 7: ...1 7 Power On 1 6 Power Attenuation Wires The SWA6 Combined Stereo Subwoofer s power can be reduced or increased to suit different applications An output level of 3dB or 6dB should be used to avoid bl...

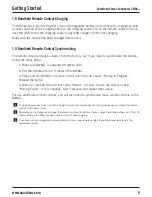
Page 8: ...ery has been drained and will need charging If you have lost or damaged your remote control and buy a new remote control follow the above steps to pair the new remote control 1 9 Handheld Remote Contr...

Page 9: ...2 1 RF6 Wireless Handheld Remote Control USB Save Exit Audio Menu Next Folder Random Playback Previous Folder Remote Control Functions Combined Stereo Subwoofer SWA6 9 www aquaticav com...

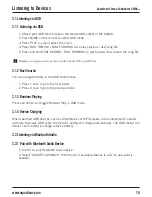
Page 10: ...your USB thumb drive to the female USB socket of the SWA6 2 Press MODE on the remote to select USB mode 3 Press PLAY to play or pause the music 4 Press FAST REWIND FAST FORWARD once play previous next...

Page 11: ...ti link A second Bluetooth Audio device can pair to the SWA6 even when music is playing from the first Bluetooth Audio device Once paired playing music from device 2 will override device 1 and the SWA...

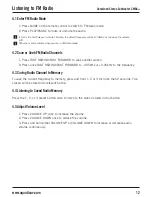
Page 12: ...the current frequency to memory press and hold 1 2 or 3 for more than 2 seconds The station will be stored into relevant button 4 4 Listening to Saved Radio Memory Press the 1 2 or 3 preset button onc...

Page 13: ...ble settings will be overridden The SWA6 includes two independent 12V accessory triggers activated from the remote control These could activate any 12V based device like 12V lights or 12V motors In an...

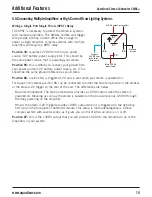
Page 14: ...te wire in the harness or the brown 12V trigger on the rear of the unit The differences are below Blue recommended The blue remote wire provides a 12VDC output when the stereo is powered on Meaning as...

Page 15: ...otection Stainless Steel Mountings Bluetooth Audio USB MP3 FM AUX via USB Handheld RF Remote Control included Wired Remote Control WR6 sold separately via cable 1x stereo pair RCA 1x USB 1x stereo pai...

Page 16: ...ic AV dealer Limit on implied warranties Any implied warranties including warranties of fitness for use and merchantability are limited in duration to the period of the express warranty set forth abov...

Page 17: ...ception which can be determined by turning the equipment off and on the user is encouraged to try to correct the interference by one of the following measures 1 Reorient or relocate the receiving ante...

Page 18: ...E mail info aquaticav com US Canada 1 877 579 2782 International 1 408 559 1668 Fax 1 408 559 0125 www aquaticav com Aquatic AV 282 Kinney Drive San Jose CA 95112 USA...

Reviews: