background image

Aquatic  

17 

Elements Series Owner's Manual & Installation Guide

 FINAL SYSTEM TEST & CLEAN-UP

System Test

To test system, follow these steps in order listed:

1.  Fill clean tub with water to a point no less than 3" above the highest jet.

2.  To test the Ground-Fault Circuit-Interrupter (GFCI), push the test button. The GFCI should interrupt power. Push the 

reset button. Power should be resorted. If the GFCI fails to operate in this manner, there is a ground current flowing, 

indicating the possibility of an electric shock. Do not use this unit. Disconnect the unit and have the problem corrected 

by a licensed electrician before using.

3.  Turn on integral on/off switch.

4.  Push on/off button on the whirlpool.

5.  Allow system to run a full 10 minutes. 

6.  Through access door or removable skirt, check for leaks in whirlpool plumbing system. Make sure half-unions at both 

ends of pump are hand-tight. If leakage is occurring at any other points, notify distributor.

7.  If any electrical malfunctions occur, immediately unplug the unit and consult a licensed electrician. Malfunctions of 

the pump/motor, whirlpool controls or the circulating system should be reported to the distributor who supplied the 

whirlpool tub.

Clean-up

1.  Remove all construction residue and foreign materials. Wipe unit clean with a damp rag, otherwise staining may 

occur.

2.  Plaster may be removed by scraping with the edge of a piece of wood or rigid plastic. DO NOT use metal scraper. 

For spots left by plaster or grout: rub lightly with a liquid detergent (Spic-N-Span

®

* or similar) on a damp cloth or 

sponge.

3.  

DO NOT

 use abrasive cleaners, scouring powders, steel wool, wire brushes or anything else that may harm or dull 

the surface.

4.  Paint, tar or stubborn stains may be removed with paint thinner, turpentine or rubbing alcohol. To avoid discoloration, 

cleaners containing petroleum distillate must not remain on surfaces. NEVER use lacquer thinner or chlorinated 

solvents.

5.  Dulled areas can be restored to a high gloss with white or cream-colored automotive rubbing compound, followed by 

application of carnauba wax or white or cream automotive paste wax and buffing.

6.  Major gouges require professional repair. Contact Aquatic to arrange factory-authorized repair services.

*Note: See page 20 for trademark information.

INSTALLATION INSTRUCTIONS

Summary of Contents for ACRYLX

Page 1: ...SERIES INSTALLATION AND OWNER S MANUAL TO BE REMOVED FOR USE BY THE OCCUPANT Note Read all instructions before proceeding with installation All specifications are 1 4 and are subject to change withou...

Page 2: ......

Page 3: ...INSTRUCTIONS 11 17 Framing Diagrams 11 Deck Cutouts 12 Framing Installation Procedures 14 Electrical Connections 15 16 Final System Test Clean Up 17 OPERATION INSTRUCTIONS 18 Your whirlpool bathtub w...
Page 4: ...nformation below and reference when contacting the distributor to expedite warranty claims OWNER INFORMATION Model Name Serial Number Purchase Date Distributor AQUATIC Product Registration Information...

Page 5: ...ranty If you have any questions concerning installation operation maintenance or any other aspect of your whirlpool please contact AQUATIC CUSTOMER SERVICE CENTER 800 945 2726 The Troubleshooting Guid...

Page 6: ...er Push the reset button Power should be restored If the GFCI fails to operate in this manner there is a ground current flowing indicating the possibility of an electric shock Do not use this unit Dis...

Page 7: ...rate the whirlpool system if The bathtub isn t filled to required levels above jets You re pregnant until you ve consulted your doctor You re taking medications or drugs that may make you drowsy You r...

Page 8: ...lation system as this may affect the performance or safe operation of the whirlpool and will VOID ALL WARRANTIES 4 For an Aquatic jetted tub supplied with a motor that has an integral pneumatic on off...

Page 9: ...g a Ground Fault Circuit Interrupter GFCI is required See ELECTRICAL CONNECTIONS on pages 15 16 3 It is your responsibility To contact a qualified electrical installer To assure that electrical instal...

Page 10: ...nity toilet etc must not obstruct skirt removal b Island or Pier Installations Provide access panel at motor end See FRAMING DIAGRAMS on page 11 c Sunken Installations Provide access panel in floor or...

Page 11: ...ub Tile 100 Silicone Sealant 1 x 3 Ledger Tile Bed Wood Shim Wall Stud Tub Tile bed 100 Silicone Sealant Tile Tub Alcove Integral Skirted Models ISLANDS ALCOVES OVAL MODELS A 6 x 12 Box outs B Leveled...

Page 12: ...e to match the dotted center line on the template with the center line on the plywood Trace again to outline Quadrant 2 Repeat until the remaining quadrants of the cutout have been traced CORNER MODEL...

Page 13: ...If necessary shim feet until unit just rests on leveled ledges or framework Secure the unit by fastening the bottom feet to the subfloor with any construction adhesive The use of casting plaster or p...

Page 14: ...loor materials To remove skirt panel Simply pry loose at the top corners and pull outward away from frame To reinstall skirt panel Simply set panel in frame bottom side first and push forward Lightly...

Page 15: ...ave the problem corrected by a licensed electrician before using 4 Grounding Motors have a three prong electrical plug A ground should be run from J box receptacle to electrical house panel per code 5...

Page 16: ...atic 16 Elements Series Owner s Manual Installation Guide ELECTRICAL CONNECTIONS Elements Series Whirlpool Component Breakdown Electrical Requirements 120VAC 15 Amp GFCI outlet INSTALLATION INSTRUCTIO...

Page 17: ...n Malfunctions of the pump motor whirlpool controls or the circulating system should be reported to the distributor who supplied the whirlpool tub Clean up 1 Remove all construction residue and foreig...

Page 18: ...l unless water is at least this high 3 Optional remote power switch A separate switch on your bathroom wall may control power to the whirlpool bathtub For your safety it should not be within reach of...

Page 19: ...t water 4 6 tablespoons of low foaming detergent such as liquid Cascade and 24 48 oz of liquid household bleach use lesser amounts shown for 5 foot bathtubs greater amounts for larger bathtubs 3 Run t...

Page 20: ...For soap scum general black grime or algae chlorine bleach may be used with moderate scrubbing In both instances the unit should be rinsed carefully with cold water Scrubbing is never recommended as...

Page 21: ...es of bacteria causing the problem would require lengthy and costly laboratory testing however most experts believe the bacteria responsible is Serratia Marcescens These bacteria thrive on moisture du...

Page 22: ...uble form that is especially noticeable with white tubs If high manganese in the water is present you may also notice black stains on white laundry If this occurs you need to contact the water supplie...

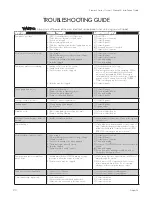
Page 23: ...haft seal requires replacement 1 Contact Aquatic Leaking unions 1 O ring missing or damaged 2 Loose unions 1 Contact Aquatic 2 Tighten unions Vibration noise 1 Tub or tub plumbing is touching tile wal...

Page 24: ...B TEE 8413180FTG FTG 90 DEG 1 2 SPG X 3 8 BARB ADP 8425022FTG 3 8 SB X 1 SPG ADP 8425107FTG A C ELBOW 1 2 LOW PRO 1078 SUCTION LOW PRO 1126XX TEE BULLHEAD 1 X 1 X 11 2 810250FTG FTG 1 CHECK VALVE 8441...

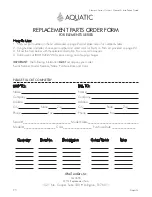
Page 25: ...atic at 800 945 2726 for parts pricing and shipping charges IMPORTANT The following information MUST accompany your order Serial Number Model Number Name Purchase Date and Color BILL TO Name Company A...

Page 26: ...Aquatic 26 Elements Series Owner s Manual Installation Guide...

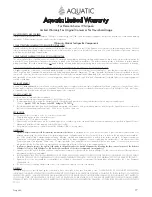
Page 27: ...ained in accordance with good industry practice and the specific Aquatic directions contained in the Owner s Manual and Installation Guide Write for one if you don t have one EXCLUSIONS These warranti...

Page 28: ...28 Aquatic Customer Service 800 945 2726 www aquaticbath com 8MANELE 07 10 18...

Reviews: