background image

7

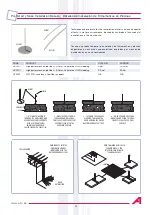
Figure 10

PLUMBING
SYSTEM
SCHEMATIC

With a roof vent pipe of 3” (8cm) in diameter, the collec-
tors can be positioned on either side of the vent.  Two sys-
tem connector hoses (Part #60649-1/-2) can be employed
to couple the collectors together for vent pipes or other
obstacles up to 7” (17cm) in diameter.  Mark your 51”
(1.3m) centers wherever the outlet header brackets ‘fall’
on the upper chalk line.  With obstructions of over 7”
(17cm), such as attic fans and skylights, lay out the col-
lectors on either side of the obstruction using a Row
Spacer Kit 
(Part #12017-1 for 1 1/2”; #12017-2 for 2”).

System Piping

Refer to Figures 10 & 11, throughout this section.  The
most common piping configurations use a pressure filter.
The pump draws the water from the skimmer and/or a
main drain, forcing it through the filter and sending it back
to the pool through the return lines.  

If a fuel-fired heater is installed, it is located between the fil-
ter and the return line to the pool.  The pipes to and from the
solar collectors are connected to the return line to the pool
before the water enters the fuel-fired heater, if one is used.

Whenever there is more than 40 gpm (151.6

l

) required

flow rate to the collectors or more than 100’ (12m) of pip-
ing used in a system, install 2” (63mm) piping to and from
the collectors.

Piping to and from the collectors should be the same type of
plastic piping and fittings approved for use with swimming
pool filters and pumps.  It is recommended to always use
Schedule 40 PVC pipe and fittings.  Although PVC pipe is
generally white, black is also available but may be difficult to
find locally.  If for aesthetics black pipe is desired it can
always be painted black.  Use a PVC cutter or a PVC wide-
blade saw (not a hacksaw) for cutting pipe.  It is important to
use both a quality cleaner/primer and solvent in gluing a PVC
joint.  For more detailed information on PVC gluing refer to
Engineering Bulletin No. 8701.  Finally, use a cloth while
either gluing or painting to keep the job a clean one.  Piping
should also be supported at intervals of 5’ (1.5m) for hori-
zontal pipe and 8’ (2.5m) for vertical pipe.  Use either galva-
nized or plastic pipe clamps.  Aquatherm Industries outlet
header bracket assemblies (Part #10008-1/-2), which are
made of stainless steel, are also excellent pipe hangers.

Summary of Contents for 10001-1

Page 1: ...VERY FAMILIAR WITH WORKING ON ROOFS AND HAVE THE PROPER LADDERS AND SAFETY EQUIPMENT FOR SUCH WORK YOU SHOULD HIRE SOMEONE WITH THE NECESSARY EXPERIENCE TO DO THE INSTALLATION FAILURE TO OBSERVE SAFE PRACTICES ON A ROOF OR OTHER ELEVATED STRUCTURE MAY RESULT IN FALLING LEADING TO SERIOUS INJURY TO YOU SAVE INSTALLATION TIME AND AVOID CALL BACKS READ THIS MANUAL BEFORE MOUNTING COLLECTORS SWIMMING ...

Page 2: ...4 __ Hose clamp stainless steel 60546 2 __ 4 Hose clamp stainless steel The System Kit Part 12135 1 for 1 1 2 kit 12135 2 for 2 kit contains additional hold down hardware connec tion parts and adapters needed to complete water connec tions from the collectors to the system feed and return line The pipe adapters that connect the system piping to the col lectors are high temperature CPVC The system ...

Page 3: ... tional mounting hardware to be anchored into rafters or beams Part No Qty 1 1 2 Qty 2 Description 10003 1 1 __ Vacuum Relief Valve 10003 2 __ 1 Vacuum Relief Valve 10008 1 1 __ Outlet header hold down bracket assembly 10008 2 __ 1 Outlet header hold down bracket assembly 10011 4 4 Hold down strap clamp assembly 30061 1 1 __ End cap 30061 2 __ 1 End cap 30089 1 2 __ Pipe adapter 30089 2 __ 2 Pipe ...

Page 4: ...h row of collectors must be connected diagonally opposite the inlet pipe Refer to Figure 2 Collector Panel Size in feet _________ 12 10 8 6 4 Collector A Distance inches cm _________ 60 152 48 122 36 91 24 60 _____ Collector B Distance inches cm _________ 16 40 Figure 2 Header Inserts Part 50055 1 for 1 1 2 50055 2 for 2 are used in special situations where unusually high stagnation temperatures a...

Page 5: ...n strap brackets until after the collec tors are installed so as not to damage the collectors when you are bringing them to the roof for installation 5 Bring the first collector to the roof and slip the proper hoses over both ends of the inlet and outlet headers on the last return collector Make sure that the side of the collector with the serial number label on it is facing down The long hoses go...

Page 6: ... face passing through both slots in the bracket located on the other side of the collectors Pull the straps taut against the face of the collector Repeat this procedure for the remaining hold down strap Refer to Figure 9 8 Install the vacuum relief valve in the outlet header of each row This will be located at the opposite end of the row that is connected to the collector outlet pipe Refer to figu...

Page 7: ...ool before the water enters the fuel fired heater if one is used Whenever there is more than 40 gpm 151 6l required flow rate to the collectors or more than 100 12m of pip ing used in a system install 2 63mm piping to and from the collectors Piping to and from the collectors should be the same type of plastic piping and fittings approved for use with swimming pool filters and pumps It is recommend...

Page 8: ... collectors per row should be followed When the system is running all the collectors should feel uniformly cool to the touch and there should be no resid ual air left in the pool return lines If either of these two conditions persist chances are that the flow rates thru the collectors are inadequate or the system is not prop erly balanced A flow meter can be installed in the col lector feed line t...

Page 9: ...eaters often create a large pressure drop By placing a heater in a by pass loop pump size and electrical energy requirements may be reduced SYSTEM START UP AND TEST System Start up and Checkout for Automatic Systems To check out the system for proper operation turn on the filter system Set the temperature control to its highest level Switch the control to the flow through collector mode The flow t...

Page 10: ... the temperature readings If they are not identical make a notation of the difference and add or subtract as appropriate this difference to or from the reading taken while you are testing This is necessary in order to pro vide an accurate indication of the temperature rise of the water passing through the solar collectors Turn the pump on and move the flow switch to the COLL position Observe valve...

Page 11: ...irculating system off and allow solar collectors and piping to drain Isolate collectors with gate or ball valve in collector feed line and a check valve in the col lector return line Switch the solar control to the bypass position The pool filtering system may then be turned back on When freezing conditions have passed open isolation valves and switch the solar control to AUTO 2 Switch the solar c...

Page 12: ...40 Rutgers University Blvd Lakewood New Jersey 08701 1 732 905 9002 2005 Aquatherm Industries Solar Pool Heating Systems Part No 19001 Rev 12 05 Figure 14 BOOSTER PUMP SYSTEM DIAGRAM FOR OUTDOOR POOLS 12 ...

Reviews: