background image


ENGINE

3 - 55

ENGINES C361M / C364M 

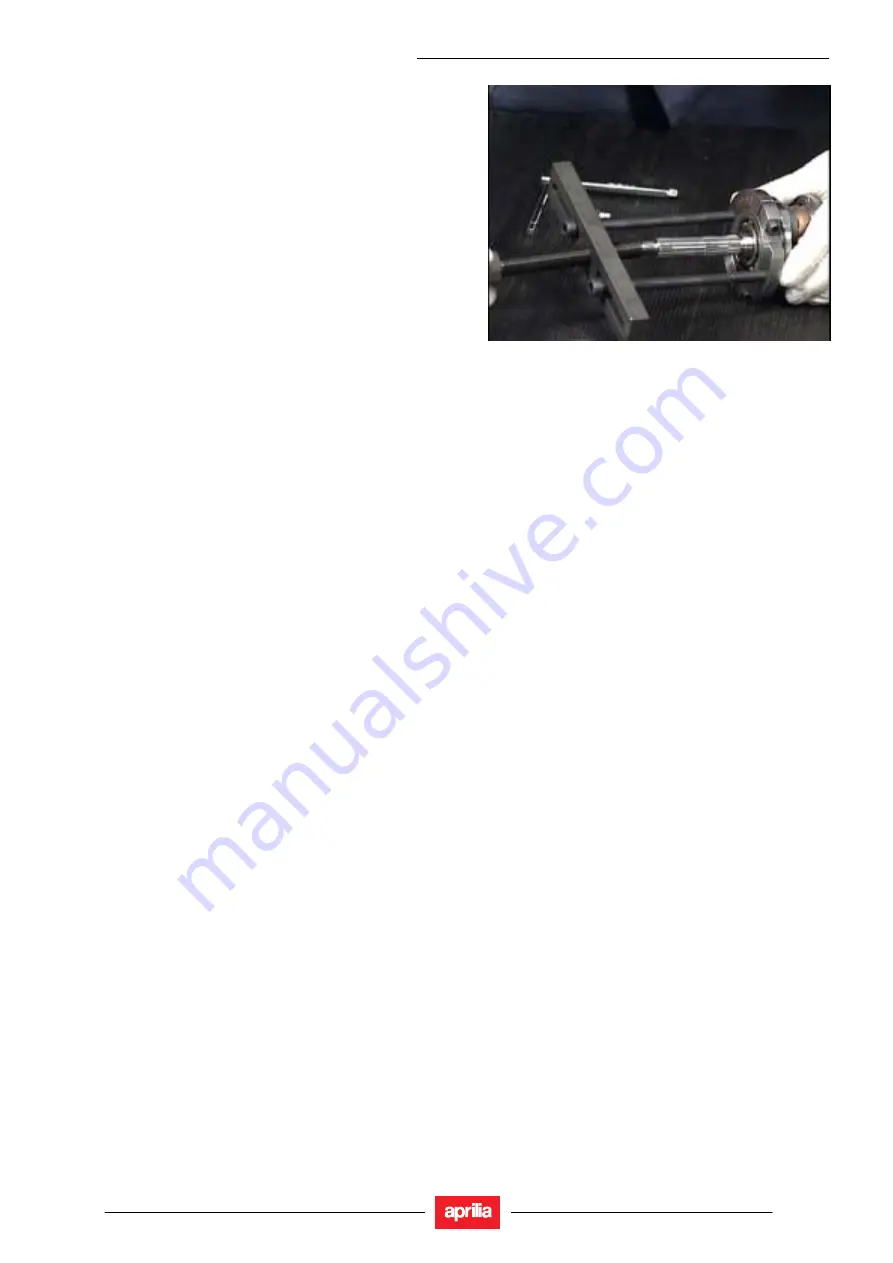
• 

Repeat this operation on the second bearing using the 
tool bolts.  


Summary of Contents for C216M

Page 1: ...www serviceaprilia com workshopmanual Engines C361M C364M C216M 1234 4 00 2004 10 8140822 UK ...

Page 2: ...INTRODUCTION 0 1 ENGINES C361M C364M INTRODUCTION 0 GENERAL INFORMATION 1 TECHNICAL INFORMATION 2 ENGINE 3 UPDATES ENGINE C364M 4 UPDATES ENGINE C216M 5 ...

Page 3: ...INTRODUCTION 0 2 ENGINES C361M C364M SUMMARY 0 1 INTRODUCTION 3 0 1 1 INTRODUCTION 3 0 1 2 REFERENCE MANUALS 4 0 1 3 ABBREVIATIONS SYMBOLS CONVENTIONS 5 ...

Page 4: ...agencies worldwide Such modifications will be entered in subsequent edi tions of the manual In case of doubt regarding specific repairs or checks contact the aprilia SERVICE DEPART MENT we will be pleased to provide all necessary information and assistance as well as keeping you updated on changes and modifications to the vehicle aprilia s p a reserves the right to make changes to its products at ...

Page 5: ...ODUCTION 0 4 ENGINES C361M C364M 0 1 2 REFERENCE MANUALS ENGINE WORKSHOP MANUALS aprilia part description 8140731 8140732 8140733 8140734 8140735 8140736 SPECIAL TOOLS MANUALS aprilia part description H001 ...

Page 6: ...erhead Camshaft ECU Electronic Control Unit rpm revolutions per minute HC unburnt hydrocarbons ISC Idle Speed Control ISO International Standardization Organization Kg kilograms Kgm kilogram metre 1 kgm 10 Nm km kilometres kph kilometres per hour kΩ kilo Ohm kPa kiloPascal 1 kPa 0 01 bar KS clutch side from the German Kupplungseite kW kiloWatt l litres LAP racetrack lap LED Light Emitting Diode LE...

Page 7: ...DE right side SAE Society of Automotive Engineers TEST diagnostic check T B E I crown head Allen screw T C E I cheese head Allen screw T E hexagonal head TP flat head screw TSI Twin Spark Ignition UPSIDE DOWN inverted fork V Volt W Watt Ø Diameter ...

Page 8: ...GENERAL INFORMATION 1 1 ENGINES C361M C364M GENERAL INFORMATION 1 ...

Page 9: ...OF THE MANUAL 3 1 1 1 CONVENTIONS USED IN THE MANUAL 3 1 1 2 SAFETY WARNINGS 4 1 2 GENERAL RULES 5 1 2 1 BASIC SAFETY RULES 5 1 3 DANGEROUS ELEMENTS 7 1 3 1 WARNINGS 7 1 4 RUNNING IN 8 1 4 1 RUNNING IN RECOMMENDATIONS 8 1 5 IDENTIFICATION DATA 9 1 5 1 ENGINE NUMBER 9 ...

Page 10: ...t and left are referred to the rider seated on the vehicle in the normal riding position Motorcycle operation and basic maintenance are covered in the OWNER S MANUAL In this manual any variants are identified with these symbols optional catalytic version all versions MP national certification SF European certification EURO 1 limits VERSION Italy Greece Malaysia United Kingdom Holland Chile Austria...

Page 11: ...te a personal injury hazard Non compliance with the indications given in the messages preceded by this symbol may result in grave risks for your and other people s safety and for the vehicle WARNING Indicates a potential hazard which may result in serious injury or even death CAUTION Indicates a potential hazard which may result in minor personal injury or damage to the vehicle IMPORTANT The word ...

Page 12: ...ic Unless expressly specified otherwise motorcycle assemblies are refitted or re assembled by reversing the removal or dismantling procedure Where a procedure is cross referred to relevant sections in the manual proceed sensibly to avoid disturbing any parts unless strictly necessary Never attempt to polish matte finished surfaces with lapping compounds Never use fuel instead of solvent to clean t...

Page 13: ...ly a light coat of lithium grease along the edges of oil seals Fit oil seals and bearings with the marking or serial number facing outwards in view ELECTRICAL CONNECTORS To disconnect the electrical connector follow the procedures below Failure to comply with these procedures may lead to irreparable damages to the connector and the wiring as well If present press the special safety hooks WARNING D...

Page 14: ...ecoming a serious dan ger for your safety In case of leaks do not use the vehicle Check and trace the cause of leaks and proceed to repair ENGINE OIL DANGER Prolonged or repeated contact with engine oil may cause severe skin damage Wash your hands thoroughly after handling engine oil Do not release into the environment Dispose of engine oil through the nearest waste oil reclamation firm or through...

Page 15: ...0 62 mi During the first 100 km 62 mi put on the brakes with caution avoiding sharp and prolonged brakings This ensures a correct bedding in of the pads on the brake disc 0 300 km 0 187 mi Do not keep the throttle grip open more than one half for long stretches 300 500 km 187 312 mi Do not keep the throttle grip open more than three fourths for long stretches WARNING After the first 500 km 312 mi ...

Page 16: ...UMBER The engine number 1 is stamped on the rear side of the engine NOTE Do not alter the identification numbers if you do not want to incur severe penal and administrative sanctions In particular the alteration of the frame number results in the immediate invalidity of the warranty ...

Page 17: ...TECHNICAL INFORMATION 2 1 ENGINES C361M C364M TECHNICAL INFORMATION 2 ...

Page 18: ...TECHNICAL INFORMATION 2 2 ENGINES C361M C364M SUMMARY 2 1 GENERAL TECHNICAL INFORMATION 3 2 1 1 TECHNICAL DATA 3 2 1 2 TABLE OF LUBRICANTS 4 2 1 3 TIGHTENING TORQUE SETTINGS 5 2 1 4 SPECIAL TOOLS 6 ...

Page 19: ... l Transmission oil 130 cm 3 Mixer oil reserve included 1 6 l Mixer oil reserve 0 5 l TRANSMISSION Speed change gear automatic and stepless Primary V belt RATIOS minimum for stepless change 3 07 maximum for stepless change 0 78 Secondary gears FUEL SYSTEM Type ELECTRONIC FUEL INJECTION Injector gasoline SIEMENS DEKA II Injector air SINERJECT Choke Ø 20 mm FUEL SUPPLY Fuel unleaded petrol according...

Page 20: ...specifications Mixer oil recommended GREEN HIT 2 As an alternative to the recommended oil use high quality oils with charac teristics in compliance with or superior to the ISO L ETC A P I TC specifications Bearings and other lubrication points recommended AUTOGREASE MP As an alternative to the recommended product use high quality grease for rolling bearings working temperature range 30 C 140 C dri...

Page 21: ...Y NUT 1 40 44 CLUTCH CASE NUT 1 40 44 CLUTCH CLUTCH NUT 1 55 60 ENGINE HEAD ENGINE HEAD BOLT 4 10 11 COOLANT OUTLET UNION ATTACHMENT BOLT 2 3 4 TEMPERATURE SENSOR 1 18 22 PLUG ATTACHMENT 1 11 14 ATTACHMENT BOLT INJECTION HEAD 2 3 4 FLYWHEEL FLYWHEEL NUT 1 40 44 ENGINE CASE CASE CLOSING BOLT 8 12 13 REAR HUB HUB COVER BOLT 5 11 13 FUEL SUPPLY SYSTEM THROTTLE BODY MANIFOLD BOLT 2 7 8 AIR COMPRESSOR ...

Page 22: ...ON Before using the special tools consult any documents attached SUPPORT STANDS LÉGENDA POSITION TOOLS NAME CODE 1 Flywheel extractor 8140276 2 Crankcase bearing extractor 8140715 3 Separator guard in kit 8140399 8106698 4 Multiuse tool for engines 8140252 5 Flywheel and clutchdrum stop 8106702 6 Clutch assembly and disassembly tool 8140259 7 Comparator holder 8140266 8 Assembly tool Inj group gas...

Page 23: ...ENGINE 3 1 ENGINES C361M C364M ENGINE 3 ...

Page 24: ... THE CYLINDER AND PISTON 33 3 6 3 CHECKING THE CYLINDER AND PISTON 35 3 6 4 CYLINDER PISTON MATING CATEGORIES 36 3 6 5 SELECTION OF THE CYLINDER GASKET 37 3 7 STARTER MOTOR 38 3 7 1 DISASSEMBLY 38 3 7 2 REPLACEMENT 38 3 8 MIXER 39 3 8 1 DISASSEMBLY 39 3 8 2 REPLACEMENT MIXER 40 3 9 COOLANT PUMP 41 3 9 1 DISASSEMBLY COOLANT PUMP 41 3 9 2 REPLACEMENT COOLANT PUMP 43 3 10 REAR HUB 45 3 10 1 DISASSEMB...

Page 25: ...SASSEMBLY OF THE CARBURETTOR BODY 70 3 13 2 REPLACEMENT OF THE CARBURETTOR BODY 72 3 13 3 CHECKING THE FUEL FEED SYSTEM 74 3 13 4 TIGHTENING TORQUE SETTINGS 75 3 14 POSITIVE DISPLACEMENT BLOWER 76 3 14 1 DISASSEMBLY OF THE POSITIVE DISPLACEMENT BLOWER 76 3 14 2 REPLACEMENT OF THE POSITIVE DISPLACEMENT BLOWER 77 3 14 3 CHECKING THE BLOWER 78 ...

Page 26: ...ENGINE 3 4 ENGINE C361M 3 1 TRANSMISSION COVER 3 1 1 REMOVAL OF TRANSMISSION COVER Take out the mounting bolts and ease off the cover by means of light taps with a mallet ...

Page 27: ...ENGINE 3 5 ENGINE C361M 3 1 2 REPLACEMENT OF TRANSMISSION COVER Position the transmission cover and tighten the mount ing bolts ...

Page 28: ...ENGINE 3 6 ENGINE C361M 3 1 3 TIGHTENING TORQUE SETTINGS NAME QUANTITY TIGHTENING TORQUE Nm TRANSMISSION COVER TRANSMISSION COVER BOLT 12 12 13 ...

Page 29: ...Y Hold the pulley firm with the specific tool Unscrew the central nut plus washer remove the drive take off and the plastic fan Remove the fixed half pulley Remove the belt and stop washer and slip off the mov ing half pulley with its bush Make sure the free rollers do not come out ...

Page 30: ...ENGINE 3 8 ENGINES C361M C364M Remove the starter motor pinion Remove the rollers lock plate and guide shoes Take off the rollers ...

Page 31: ... the moving half pulley and rollers lock plate Position the assembly complete with bush on the drive shaft Remount the stop washer insert the starter motor pin ion in its seat and position the transmission belt Remount the half pulley and cooling fan with their spacers and the nut ...

Page 32: ... 3 10 ENGINES C361M C364M Prevent the pulley from turning with the specific tool and tighten the lock nut to the correct torque value with a torque spanner N B Use a new nut every time the pulley is remounted ...

Page 33: ...rd diameter 20 021 mm Measure the outside diameter of the pulley running bush Minimum permitted diameter 19 95 mm Standard diameter 19 959 mm Check the state of wear of the belt contact surfaces and the roller recesses Make sure the rollers are not damaged or worn Minimum permitted diameter 18 5 mm Standard diameter 18 9 mm Make sure the driving belt is not damaged and check its width Minimum widt...

Page 34: ...MOTORE 3 12 ENGINE C361M 3 2 4 TIGHTENING TORQUE SETTINGS NAME QUANTITY TIGHTENING TORQUE Nm DRIVING PULLEY DRIVING PULLEY NUT 1 40 44 CLUTCH CASE NUT 1 40 44 ...

Page 35: ... 1 REMOVAL OF DRIVEN PULLEY CLUTCH Hold the clutch cover firm with the specific tool Remove the nut and clutch cover Slip the complete driven pulley clutch assembly off the driving belt N B The assembly can also be removed with the driving pul ley mounted ...

Page 36: ...THE DRIVEN PULLEY Use the specific tools to slip off the pulley pins retainng collar Remove the three retaining pins Separate the moving from the fixed half pulley Remove the two outer O rings and the two inner seal ing rings of the moving half pulley ...

Page 37: ...ller bearing with a mallet and an appro priately sized punch Support the half pulley suitably to prevent deformation of its driving belt running surface Remove the ball bearing snap ring Use a 20 mm guide punch handle to drive out the ball bearing ...

Page 38: ...ing on the fixed driven half pulley Insert the ball bearing snap rings Mount the roller bearing with its outside writing visible Support the half pulley suitably to prevent damage to its threaded end when mounting the bearings Change and insert the two outer O rings and the two inner sealing rings of the moving half pulley ...

Page 39: ... 3 17 ENGINES C361M C364M Carefully lubricate the moving driven half pulley Fit the half pulley on the bush Make sure no damage is done to the oil shields Remount the three retaining pins Reinsert the collar ...

Page 40: ...N B When the complete driven pulley assembly is attached check that the belt is free so as to prevent the risk of false tightening that might cause damage to the drive shaft knurl ing It is also a good idea to always mount the belt with its writing visible if no assembly direction is indicated Insert the clutch cover and the corresponding nut Insert the clutch cover locking tool and tighten the nu...

Page 41: ...ULLEY Use the specific tool to position the clutch moving pul ley assembly Apply force to the central bolt Do not overtighten it as this could damage the tool Remove the clutch locking nut Slacken the central bolt Take the strain off the driven pulleys assembly and separate its components ...

Page 42: ... 08 mm Standard diameter 19 959 mm Make sure the half pulley is not warped or scored and check the pins Measure the free length of the moving driven half pulley spring Standard length 110 mm Check the thickness of the friction material of the clutch pads and that the pads are free from traces of lubri cants Minimum permitted thickness 1 mm During the running in period the clutch pads must have a c...

Page 43: ...ENGINE 3 21 ENGINES C361M C364M Measure the inside diameter of the clutch cover and checl its state of wear Standard value 107 0 2 0 mm Max value 0 20 mm ...

Page 44: ...he pressure spring sheath and centrifugal clutch Place the components in the tool and load the spring Make sure no damage is caused to the plastic sheath and the threaded end of the tang To position and to stop the hexagonal nut of the clutch Use a socket key with a reduced bevel to prevent damage to the clutch nut ...

Page 45: ...ENGINE 3 23 ENGINE C361M 3 4 4 TIGHTENING TORQUE SETTINGS NAME QUANTITY TIGHTENING TORQUE Nm CLUTCH CLUTCH NUT 1 55 60 ...

Page 46: ...delivery pipe to the injection head and remove the pipe Unscrew the head attachment bolts and remove the assembly including the petrol injector and pressure regulator Remove the plug and carefully unscrew the tempera ture sensor Slip off the dust cover Use the specific tool to remove the injector taking care not to damage its plastic sup port ...

Page 47: ...361M Unscrew and remove the coolant outlet union with its 0 ring from the head Disconnect the pipe holding clamp and remove the in side recirculation duct Undo the four bolts and remove the head cover along with its gasket ...

Page 48: ...s of its mating surface Make sure the ring seals are not damaged and replace if necessary Position the head and cross tighten its nuts to the cor rect torque value Replace the dust cover on the air injector and replace the injecor in the head Replace the temperature sensor and tighten it to the correct torque value ...

Page 49: ... its bolts to the correct torque value Remount the inside recirculation duct and replace the clamp Replace the injector assembly and tighten its bolts to the correct torque value Mount the plug and tighten it to the correct torque value Remount the air piping union on the injection head ...

Page 50: ...e injector ring seal must be broken to remove it Make sure the ring seals are not worn and replace if necessary Clean the air injector and its seat thoroughly and re move any carbon residues Use the specific tool to insert the ring seal in several stages to make sure it spreads out correctly ...

Page 51: ...ENGINE 3 29 ENGINE C361M Use the specific tool to tighten the ring seal in its seat Replace the injector on the head quickly to make sure the seal does not dilate again ...

Page 52: ...4 TIGHTENING TORQUE SETTINGS NAME QUANTITY TIGHTENING TORQUE Nm ENGINE HEAD ENGINE HEAD BOLT 4 10 11 COOLANT OUTLET UNION ATTACHMENT BOLT 2 3 4 TEMPERATURE SENSOR 1 18 22 PLUG ATTACHMENT 1 11 14 ATTACHMENT BOLT INJECTION HEAD 2 3 4 ...

Page 53: ...der with its gasket Support the piston to make sure it is not damaged Protect the cylinder seat and then use the specific tool to remove the two pin retainers from the cavities in the piston Use an appropriate punch to push out the pin Remove the piston Next remove the roller lane from the small end of the con rod ...

Page 54: ...NGINE 3 32 ENGINES C361M C364M Remove the piston circlips Make sure they do not get damaged when reassembled N B Make a note of the position of the segments so that they are not inverted when reassembled ...

Page 55: ...sure their notches are in the right position Insert the roller lane in the foot of the con rod Mount the piston and the pin on the small end of the con rod Position the piston with the arrow pointing to wards the exhaust aperture Insert the pin retaining ring in the specific tool with the opening indicated on the tool ...

Page 56: ...ENGINE 3 34 ENGINES C361M C364M Use a punch to position the pin retaining ring Mount the ring with the peg Fit a new gasket Lubricate the cylinder and replace it ...

Page 57: ... 0 005 0 001 mm Measure the diameter of the contacts on the piston with a bore gauge Standard diameter 12 0 007 0 012 mm Calculate the pin piston coupling play Standard play 0 002 0 011 mm Check that the surface of the cylinder is not scored and check its wear with a centesimal comparator Zero the comparator on a ring gauge and use it to measure the inside diameter of the cylinder Use the piston t...

Page 58: ...iston Ø 40 0 02 0 057 P 40 011 40 018 39 964 39 971 M1 40 19 40 197 40 143 40 15 Cylinder 1a Over size Ø 40 2 0 01 0 018 N1 40 197 40 204 40 15 40 157 O1 40 204 40 211 40 157 40 164 Piston 1a Oversize Ø 40 2 0 029 0 057 P1 40 211 40 218 40 164 40 171 M2 40 39 40 397 40 343 40 35 Cylinder 2a Over size Ø 40 4 0 01 0 018 N2 40 397 40 404 40 35 40 357 O2 40 404 40 411 40 357 40 364 Piston 2a Oversize ...

Page 59: ...he cylin der without altering the position of the comparator Block the tool with the original head attachment nuts Turn the drive shaft to the top dead centre and meas ure the shift S from the bedding value Identify the thickness of the cylinder gasket to be used when reassembling Identification of the exact thick ness will result in maintenance of the correct compres sion ratio SHIFT S GASKET THI...

Page 60: ...C364M 3 7 STARTER MOTOR 3 7 1 DISASSEMBLY Remove the attachment bolts and take off the motor Use an appropriate tool to remove the ring seal 3 7 2 REPLACEMENT Insert the gasket Position the motor and tighten its attachment bolts ...

Page 61: ...GINE 3 39 ENGINES C361M C364M 3 8 MIXER 3 8 1 DISASSEMBLY Take off the clamp and disonnect the pipe from the pump housing oil inlet union Undo the bolts and extract the mixer with the housing pipes gasket ...

Page 62: ...1M C364M 3 8 2 REPLACEMENT MIXER Replace the pump housing oil inlet union Insert the pipes gasket in the housing Position the mixer and tighten its bolts It is advisable to bleed the reassembled mixer through the central bolt ...

Page 63: ...hread retaining tool Be careful not to overload the plastic impeller during the locking stages Remove the drive belt together with the two toothed crown wheels Remove the pump bearing retaining ring and its washer Removal of the pump shaft is easier if the area around the coolant pump bearings is heated ...

Page 64: ...INE C361M C364M Use ths specific tool to unscrew the shaft by turning the spanner clockwise left hand thread Take out the shaft with the appropriate tool Use an appropriate tool to remove the pump shaft seat ring seal ...

Page 65: ... bearing noise If necessary change the shaft and the bearings Clean the housings Position the new lubricated oil seal on the specific tool and bring it into contact with the specific tool 030902_02 jpg Use a stream of hot air to heat the seat of the pump bearings Keep the stream away from the oil seal ...

Page 66: ...by pushing and at the same time turning the spanner anticlockwise Be care ful not to damage the thread of the bronze insert or separate the insert of the plastic impeller Fit the collar and the ring retainer Position the two toothed crown wheels and the drive belt ...

Page 67: ...L BEARING Drain the oil from the hub and remove the mounting bolts Remove the hub cover complete with the driven pulley shaft by means of light taps with a mallet Remove the idler and the wheel shaft complete with the gearing Pay attention to the shim adjustments when removing the idler ...

Page 68: ...ENGINE 3 46 ENGINES C361M C364M Remove the oil seal and circlip Remove the bearing by driving it in from the outside with an appropriate punch ...

Page 69: ...cific pipe on the inner race of the bear ing and on the side of the pulley shaft toothing Use a press to force out the driven pulley shaft Remove the outer oil shield Remove the two centring pins and place the cover on a flat surface Position the specific tool on the inner race of the bear ing and force the bearing out with a press ...

Page 70: ...G THE WHEEL SHAFT Make sure that the three shafts are free from wear or deformation on the toothed surfaces and the bearing and oil shield contacts Make sure the mating surfaces are free from abnor malities and deformation Replace any damaged parts ...

Page 71: ...insert a new bearing with its screen facing the oil shield Mount the circlip with its concave or radiate part on the bearing side Support the inner race of the bearing from the outside of the hub cover with the specific tool positioned under the press and insert the driven pulley shaft Refit the oil shield flush with the cover ...

Page 72: ...dapter Use the adapter and its handle to replace the circlip and oil shield Replace the idler Pay attention to the two shim ad justments Apply Loctite for surfaces on the hub cover Replace the hub complete with the driven pulley shaft Insert the bolts and tighten them to the correct torque value N B Remove the residues of the previous gasket from the hub cover and half casing contact surfaces befo...

Page 73: ...ENGINE 3 51 ENGINE C361M 3 10 6 TIGHTENING TORQUE SETTINGS NAME QUANTITY TIGHTENING TORQUE Nm REAR HUB HUB COVER BOLT 5 11 13 ...

Page 74: ...he half case on the flywheel side Place the guard on the drive shaft and correctly centre the specific tool for removal of the half case on the fly wheel side Use a hex spanner to remove the half case on the fly wheel side If the separation proves difficult use a heat gun to heat the case in the area of the main bearings ...

Page 75: ...GINE 3 53 ENGINES C361M C364M Install the specific tool with its guard on the half case on the transmission side Use the hex spanner to separate the drive shaft from the half case on the transmission side ...

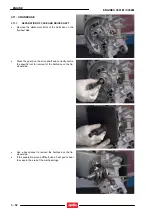
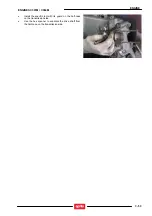
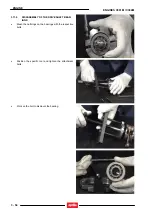
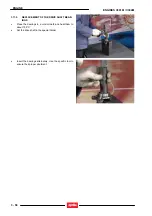
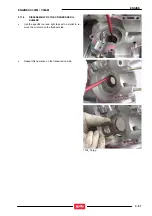
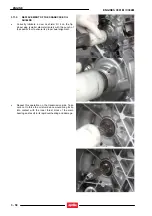
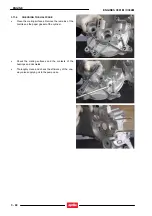
Page 76: ...C361M C364M 3 11 2 DISASSEMBLY OF THE DRIVE SHAFT BEAR INGS Mesh the half rings on the bearings with the respective bolts Position the specific tool and tighten the attachment bolts Work on the bolt to dismount the bearing ...

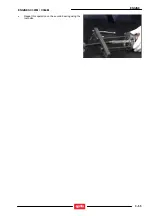
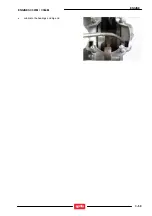
Page 77: ...ENGINE 3 55 ENGINES C361M C364M Repeat this operation on the second bearing using the tool bolts ...

Page 78: ... 3 REPLACEMENT OF THE DRIVE SHAFT BEAR INGS Place the bearings in a cold oil bath and heat them to about 150 C Set the drive shaft in the special holder Insert the bearings alternately Use the specific tool to ensure their proper abutment ...

Page 79: ...ES C361M C364M 3 11 4 DISASSEMBLY OF THE CRANKCASE OIL SHIELDS Use the specific tool and light taps with a mallet to re move the oil shield on the flywheel side Repeat this operation on the transmission side 1104_02 jpg ...

Page 80: ... fly wheel side smaller diameter solely with the punch of the specific tool to ensure its proper axial alignment Repeat this operation on the transmission side Take care not to force the oil shield since would bring its lip into contact with the inner thrust block of the main bearing and result in its rapid overheating and damage ...

Page 81: ...ENGINE 3 59 ENGINES C361M C364M Lubricate the bearings and big end ...

Page 82: ...lean the mating surfaces Remove the remains of the Loctite and the paper gasket of the cylinder Check the mating surfaces and the contacts of the bearings and oil shields Thoroughly clean and check the efficiency of the one way valve supplying oil to the pump case ...

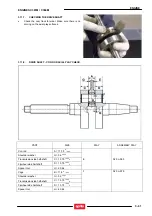
Page 83: ...OD AXIAL PLAY CHECK PART SIZE PLAY ASSEMBLY PLAY Con rod A 11 75 0 0 05 Shoulder washer G 0 5 0 03 Transmission side half shaft C 13 75 0 04 0 Flywheel side half shaft D 13 75 0 04 0 Spacer tool H 40 64 E 0 25 0 50 Cage B 11 8 0 0 35 Shoulder washer G 0 5 0 03 Transmission side half shaft C 13 75 0 04 0 Flywheel side half shaft D 13 75 0 04 0 Spacer tool H 40 64 F 0 20 0 75 ...

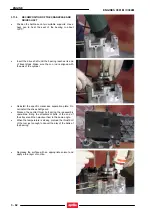
Page 84: ...s aligned with the axis of the cylinder Reinstall the specific crankcase separation plate Do not install the drive shaft guard Slacken the central thrust bolt during the reassembly operations Bring the attachment bolts ot the end of their travel and then slacken them to the same angle When the temperature is steady preload the thrust bolt of the tool just enough to cancel the play of the balls of ...

Page 85: ...n side Mate the surfaces of the flywheel side and transmis sion side half cases Do not use alcohol during this operation Insert three or more attachment bolts and tighten them quickly Insert the remaining bolts and tighten them to the correct torque value Insert the remaining bolts and tighten them to the cor rect torque value ...

Page 86: ...pport with comparator on the end of the drive shaft Check the axial play of the drive shaft It should be 0 10 0 12 mm when the case is hot 0 06 0 08 mm when the case is cold The limit value is 0 02 to 0 03 mm when the case is cold If this limit is not met the case must be taken to pieces and reassembled ...

Page 87: ...ENGINE 3 65 ENGINE C361M 3 11 11 TIGHTENING TORQUE SETTINGS NAME QUANTITY TIGHTENING TORQUE Nm ENGINE CASE CASE CLOSING BOLT 8 12 13 ...

Page 88: ... take off the flywheel cover Pay attention to the connector Hold the flywheel firm with the specific compass wrench and remove the flywheel attachment hex nut Insert the specific extractor and work the wrenches to remove the flywheel Take out the screws of the rev sensor and coolant inlet pipe ...

Page 89: ...ENGINE 3 67 ENGINE C361M Remove the coolant inlet pipe Unscrew the attachment bolts and remove the stator complete with the cables and rev sensor ...

Page 90: ...sor and tighten the bolts to the correct torque value Reposition the coolant inlet pipe and rev sensor and tighten their screws Position the flywheel insert the specific flywheel block ing tool and tighten the attachment nut to the correct torque value Fit the flywheel cover and connector and tighten the bolts ...

Page 91: ...ENGINE 3 69 ENGINE C361M 3 12 3 TIGHTENING TORQUE SETTINGS NAME QUANTITY TIGHTENING TORQUE Nm FLYWHEEL FLYWHEEL NUT 1 40 44 ...

Page 92: ... THE CARBURETTOR BODY Use a Torx spanner to loosen the manifold bolts and remove the carburettor body complete with the induc tion manifold from the case Loosen the clamp bolt and separate the carburettor body from the manifold Remove the diaphragm and its paper gasket ...

Page 93: ...ENGINE 3 71 ENGINE C361M Remove the fins support ...

Page 94: ... BODY Insert the fins support on the case Insert the diaphragm and paper gasket with the rims turned towards the fins support Mount the carburettor body on the induction manifold Make sure the two reference notches of the two seats meet and then tighten the clamp ...

Page 95: ...ENGINE 3 73 ENGINE C361M Replace the manifold complete with the carburettor body and tighten the bolts to the correct torque value ...

Page 96: ...UEL FEED SYSTEM Check that the movement of the gas valve does not show abnormal play or slackening Make sure the fins support is not worn and that the support surfaces of the petals are not warped Make sure there is nothing wrong with the diaphragm ...

Page 97: ...ENGINE 3 75 ENGINE C361M 3 13 4 TIGHTENING TORQUE SETTINGS NAME QUANTITY TIGHTENING TORQUE Nm FUEL SUPPLY SYSTEM THROTTLE BODY MANIFOLD BOLT 2 7 8 AIR COMPRESSOR BOLT 4 3 4 ...

Page 98: ... 3 14 1 DISASSEMBLY OF THE POSITIVE DISPLACE MENT BLOWER Remove the manifold Use an appropriate spanner to remove the air piping union from the injection head Unscrew the blower attachment bolts from the housing and take out the blower Remove the O ring gasket ...

Page 99: ...cover and set the shaft with the cam at its bottom dead centre point Fit the O ring gasket and insert the blower in the hous ing Check that the reference pins are in the correct positions Tighten the blower attachment bolts to the correct torque value Replace the air piping union on the injection head ...

Page 100: ... Check the contact roller for signs of abnormal wear or overheating Use a feeler gauge to measure the axial play of the driver roller Place its blade between the roller and one of the two shim adjustments Make sure the ring seal is not broken or crushed ...

Page 101: ...UPDATES ENGINE C364M 4 1 ENGINES C364M UPDATES ENGINE C364M 4 ...

Page 102: ...E SECTOR GEAR AND PINION 11 4 4 2 REPLACEMENT OF THE SECTOR GEAR 12 4 5 AIR CLEANER 13 4 5 1 REMOVAL OF AIR CLEANER BOX 13 4 5 2 REMOVAL OF AIR CLEANER 14 4 5 3 RECOMPOSITION OF THE AIR CLEANER 15 4 5 4 REPLACEMENT OF THE AIR CLEANER BOX 16 4 6 SECONDARY AIR SYSTEM 17 4 6 1 REMOVAL OF THE SECONDARY AIR SYSTEM 17 4 6 2 REPLACEMENT OF THE SECONDARY AIR SYSTEM 19 4 7 CARBURETTOR BODY 20 4 7 1 1 REMOV...

Page 103: ...reserve 2 l Transmission oil 130 cm 3 Mixer oil reserve included 1 6 l Mixer oil reserve 0 5 l TRANSMISSION Speed change gear automatic and stepless Primary V belt RATIOS minimum for stepless change 3 07 maximum for stepless change 0 78 Secondary gears CARBURETTOR Type Dell Orto PHVA17 5 Choke tube Ø 17 5 mm Max jet 56 Max air hole 150 100 Min secondary air hole 250 Diffuser type 209 HA Taper need...

Page 104: ...UPDATES ENGINE C364M 4 4 ENGINES C364M IGNITION Type C D I Spark advance 20 3 before TDC Resistance 5 KW SPARK PLUG Standard CHAMPION RG6YC Spark plug gap 0 6 0 7 mm ...

Page 105: ...ENGINE HEAD 4 2 1 DISMOUNTING THE HEAD Unscrew and take out the plug Slacken the clamp and remove the inside recirculation duct Unscrew and carefully remove the temperature sensor Unscrew the four nuts and take off the head with its two gaskets ...

Page 106: ...amaged Insert the head with its gaskets and cross tighten the four bolts to the correct torque value Spread sealant over the seat of the temperature sensor and tighten it to the correct torque value Insert the plug and tighten it to the correct torque value Replace the recirculation duct in the head and close the clamp ...

Page 107: ...M 4 2 3 TIGHTENING TORQUE SETTINGS NAME QUANTITY TIGHTENING TORQUE Nm ENGINE HEAD ENGINE HEAD BOLT 4 10 11 COOLANT OUTLET UNION ATTACHMENT BOLT 2 3 4 TEMPERATURE SENSOR 1 18 22 PLUG ATTACHMENT 1 11 14 ATTACHMENT BOLT INJECTION HEAD 2 3 4 ...

Page 108: ...Remove the cover hold the flywheel firm with the spe cific compass wrench and remove the flywheel attach ment hex nut Insert the specific extractor and work the wrenches to remove the flywheel Take out the screws of the rev sensor and coolant inlet pipe Remove the coolant inlet pipe ...

Page 109: ...UPDATES ENGINE C364M 4 9 ENGINE C364M Unscrew the attachment bolts and remove the stator complete with the cables and rev sensor ...

Page 110: ...es and rev sensor and tighten the bolts to the correct torque value Reposition the coolant inlet pipe and rev sensor and tighten their screws Position the flywheel insert the specific flywheel block ing tool and tighten the attachment nut to the correct torque value Fit the flywheel cover and tighten its bolts ...

Page 111: ...OF THE SECTOR GEAR AND PINION Remove the pedal starter pinion Remove the pedal starter lever then remove the circlip and ring seal Ease off the sector gear and spring with a mallet N B The spring is kept loaded by the sector gear Be careful since this could cause an accident ...

Page 112: ...4 2 REPLACEMENT OF THE SECTOR GEAR Lubricate and load the spring with the specific tool then replace the sector gear Replace the pedal starter return pinion Insert the ring seal and circlip Replace the pedal starter lever and tighten its screw ...

Page 113: ...4M 4 5 AIR CLEANER 4 5 1 REMOVAL OF AIR CLEANER BOX Loosen the air cleaner manifold clamp screw Take out the attachment bolts Cut the outside air intake sleeve clamp Separate the air cleaner box from the carburettor bidy and intake sleeve ...

Page 114: ...UPDATES ENGINE C364M 4 14 ENGINE C364M 4 5 2 REMOVAL OF AIR CLEANER Take out the attachment bolts Open the air cleaner box remove the grille and the filtering part ...

Page 115: ...UPDATES ENGINE C364M 4 15 ENGINE C364M 4 5 3 RECOMPOSITION OF THE AIR CLEANER Change the filtering part and reinsert the grille Tighten the air cleaner box attachment bolts ...

Page 116: ...C364M 4 5 4 REPLACEMENT OF THE AIR CLEANER BOX Position the air cleaner box and connect it to the carburettor body and air intake sleeve Tighten the air cleaner box attachment bols and the carburettor body and air intake sleeve clamps ...

Page 117: ...IR SYSTEM Unscrew the two attachment bolts and removal the aluminium secondary air system cover Remove the plastic cover and sponge cleaner Remove the seat of the one way valves Check the soundness of the valves and replace them in their seat Wash the sponge filter and blow it with compressed air ...

Page 118: ...UPDATES ENGINE C364M 4 18 ENGINE C364M ...

Page 119: ...UPDATES ENGINE C364M 4 19 ENGINE C364M 4 6 2 REPLACEMENT OF THE SECONDARY AIR SYSTEM Replace the sponge filter and insert the plastic cover Insert the aluminium cover and tighten the attachment bolts ...

Page 120: ...ARBURETTOR Slacken the clamps and detach the coolant pipes and the mixer carburettor union pipe from the carburettor Stopper the three pipes Use a Torx spanner to loosen the manifold bolts and remove the carburettor body complete with the induc tion manifold Remove the fins support ...

Page 121: ...NG THE CARBURETTOR Loosen the clamp bolt and separate the carburettor from the manifold Unscrew the bolts and remove the protection the bracket and the choke Unscrew the air petrol dispenser cover and remove it Remove the spring and its cable retaining cup ...

Page 122: ...nd remove the bowl of the car burettor Make sure the carburettor is properly supported and remove the float complete with the needle valve by sliding out the float retaining pin Separate the needle valve from the float Remove the main jet and the slow running jet ...

Page 123: ...64M 4 23 ENGINE C364M Remove the dispenser complete with needle and then the diffuser Remove the idling adjustment screw and the mixture adjusting screw Remove the idling adjustment screw and the mixture adjusting screw ...

Page 124: ...ND CHECKING OF THE CAR BURETTOR Check that all the passages are free from dirt and then clean the jets and the diffuser Replace the idling adjustment screw and the mixture adjusting screw Insert the diffuser and screw in the main jet and the slow running jet ...

Page 125: ...the plane of the bowl with the carburettor upside down Clean the bowl and fix it in place with its two bolts Insert the metering device on the groove Insert the cable retaining cup Position the spring then replace the air petrol dispenser cover and tighten its bolts N B Make sure the clip of the dispenser is on the last notch and that the retaining cup is in the right place ...

Page 126: ...he bearing Use a gauge to measure the protrusion of the plunger and check that the value is correct Check that the plunger seal is not warped Remount the choke on the carburettor insert the mounting bracket tighten the two bolts and attach the cover Join the manifold to the carburettor by matching the two reference notches and tighten the clamp screw ...

Page 127: ...ins bearing is not worn and the support surfaces of the petals are not deformed4 Position the fins support and the carburettor body complete with manifold and tighten the respective bolts Connect the mixer carburettor union pipe and the two coolant pipes and position the respective clamps ...

Page 128: ...UPDATES ENGINE C216M 5 1 ENGINE C216M UPDATES ENGINE C216M 5 ...

Page 129: ...CTION 3 5 1 1 REFERENCE MANUALS 3 5 2 GENERAL TECHNICAL INFORMATION 4 5 2 1 TECHNICAL DATA 4 5 2 2 TIGHTENING TORQUE TABLE 5 5 3 ENGINE 6 5 3 1 REMOVING COOLING CASE 6 5 3 2 REMOVING THE HEAD 8 5 3 3 FLYWHEEL DISASSEMBLY 9 5 3 4 TIGHTENING TORQUE SETTINGS 11 ...

Page 130: ...E C216M 5 3 ENGINE C216M 5 1 INTRODUCTION 5 1 1 REFERENCE MANUALS ENGINE WORKSHOP MANUALS aprilia part description 8140818 8140821 8140819 8140820 8140822 8CM0067 SPECIAL TOOLS MANUALS aprilia part description H001 ...

Page 131: ...gearbox 3 07 maximum for stepless gearbox 0 78 Final gears CAPACITIES Gearbox oil 85 cu cm Mixer oil reserve included 1 2 l CARBURETTOR Type Dell Orto PHVA17 5 RD Throttle Ø 17 5 mm Maximum jet 53 Maximum air jet on the body Ø 1 5 mm Emulsifier type 209 HA Tapered needle type A22 Needle position marks from the top 1 Choke jet 50 Idle speed mixture screw starting opening 1 1 2 Minimum jet 32 Fuel i...

Page 132: ...lutch housing nut 1 40 44 Clutch nut 1 55 60 Cylinder head nuts 4 10 11 Spark plug fastener 1 11 14 Injection head securing screw 2 3 4 Flywheel nut 1 40 44 Case fastening screw 8 12 13 Hub cover screw 5 11 13 Throttle body manifold screw 2 7 8 Air compressor screw 4 3 4 FUEL SYSTEM CYLINDER HEAD FLYWHEEL CRANKCASE REAR HUB TRANSMISSION COVER ENGINE DRIVE PULLEY CLUTCH ...

Page 133: ...UPDATES ENGINE C216M 5 6 ENGINE C216M 5 3 ENGINE 5 3 1 REMOVING COOLING CASE Release and remove the four screws Move secondary air valve and remove fan cover Release and remove the two screws ...

Page 134: ...UPDATES ENGINE C216M 5 7 ENGINE C216M Slide the oil hose to remove the cooling case ...

Page 135: ...ing case Remove the exhaust system Unscrew and remove the spark plug Loosen and remove the two nuts collect the two studs Remove the head Remove the cylinder CAUTION When reassembling replace the seals with new ones of the same kind lubricate the cylinder and fit it in its place ...

Page 136: ...ISASSEMBLY Remove the cooling case Release and remove the three screws Remove the cooling fan Lock flywheel by means of the specific wrench and remove flywheel hexagonal securing nut Fit the suitable puller and remove the flywheel by means of the wrenches ...

Page 137: ...PDATES ENGINE C216M 5 10 ENGINE C216M Loosen and remove rpm sensor screws coolant inlet hose Remove the coolant inlet duct from its housing Loosen the screws and remove stator with wiring and rpm sensor ...

Page 138: ...UPDATES ENGINE C216M 5 11 ENGINE C216M 5 3 4 TIGHTENING TORQUE SETTINGS Cylinder head nuts 4 10 11 Spark plug fastener 1 11 14 Injection head securing screw 2 3 4 CYLINDER HEAD ...

Page 139: ...aprilia s p a via G Galilei 1 30033 Noale VE Italy tel 39 041 5829111 fax 39 041 5829190 www serviceaprilia com www aprilia com ...

Reviews: