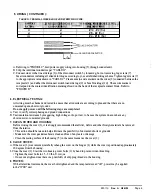
D. RECEPTACLE ASSEMBLY SCREW COVER INSTALLATION
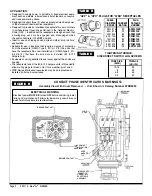
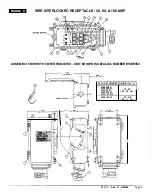
• Referring to "FIGURE C", loosen the three flip cover assembly mounting screws which fasten the flip cover assembly
to the receptacle housing (1 ). Remove the flip cover assembly by carefully lifting it off of the receptacle housing.
Retain for future use, if desired.
• Remove one of the five receptacle housing mounting screws. Thread receptacle assembly screw cover (21) onto the
receptacle housing (1) until screw cover gasket is firmly seated against the receptacle housing face. Replace
previously removed receptacle housing screw into unit, making sure to secure free end of receptacle assembly
screw cover (21) chain to housing by passing screw through the hole in the lug at the end of the chain.
'E. RECEPTACLE ASSEMBLY
Electrical contacts eventually wear out, due to the amount of use the unit they are installed in experiences or due to
environmental conditions .. The receptacle assembly can, therefore, be replaced. The receptacle assemblies can be
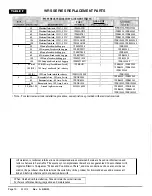
replaced with the same type and brand as factory installed. Doing so will not affect the U/L listing. Refer to "TABLE F"
for replacement parts.
To replace the receptacle assembly -
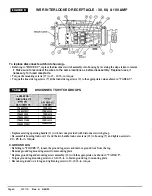
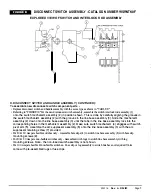
• Referring to "FIGURE C", loosen the load side lug screws (9) of the disconnect switch (1.5) or fuse base (16), if
applicable, and remove wires.
• Remove the four (4) receptacle assembly mounting screws (14) that fasten the assembly to the housing (5).
Support the assembly so that it does not fall from unit.
• Remove the old receptacle assembly and replace it with the new unit Replacing the unit can be accomplished
by reversing the steps needed to remove it. Tighten the four (4) receptacle assembly mounting
screws (14) to 19 - 25 lb.-in. to secure unit to housing.
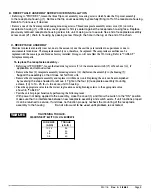
• Place the appropriate wires into the correct lug locations and tighten lug screws to the appropriate value
shown in "TABLE C".
• Test the unit for proper function by performing the following tasks:
With power not being applied to the assembly, close the cover (3) and throw the switch to the "ON" position
make sure that no interference between new receptacle assembly and switch exists. If unit functions proper!
it can be returned to service. If unit does not function properly, recheck the mounting of the receptacle
assembly to the housing..
Do not allow unit to be used until problem is corrected
TABI.EC
TIGHTENING TORQUE
DIBCONNECTSW ITCHLUGSCREWS
WIRE SIZE
TORQUE
(AWG)
(LB.-IN.)
10-14
35
8
40
4-6
45
0-·3
50
330118
Rev. A 3/28/95
Page 9


