


5
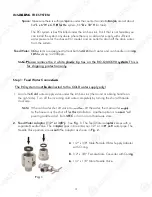
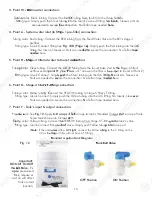
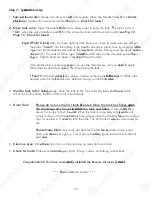
Fig. 2
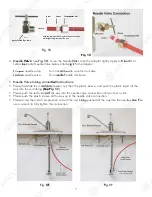
- Needle Valve Installation.
Attach the needle valve (C) to water supply adapter (A). Please apply 5-6 wraps of
teflon tape to needle valve prior to connecting it to the water supply adapter (A).
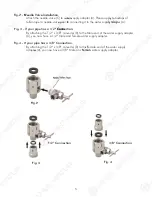
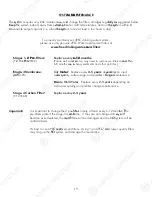
Fig. 3
- If your pipe has a 1/2” Connection.
By attaching the 1/2” x 3/8” converter (B) to the Male end of the water supply adapter
(A), you now have a 1/2” Male and Female water supply adapter.
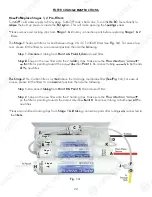
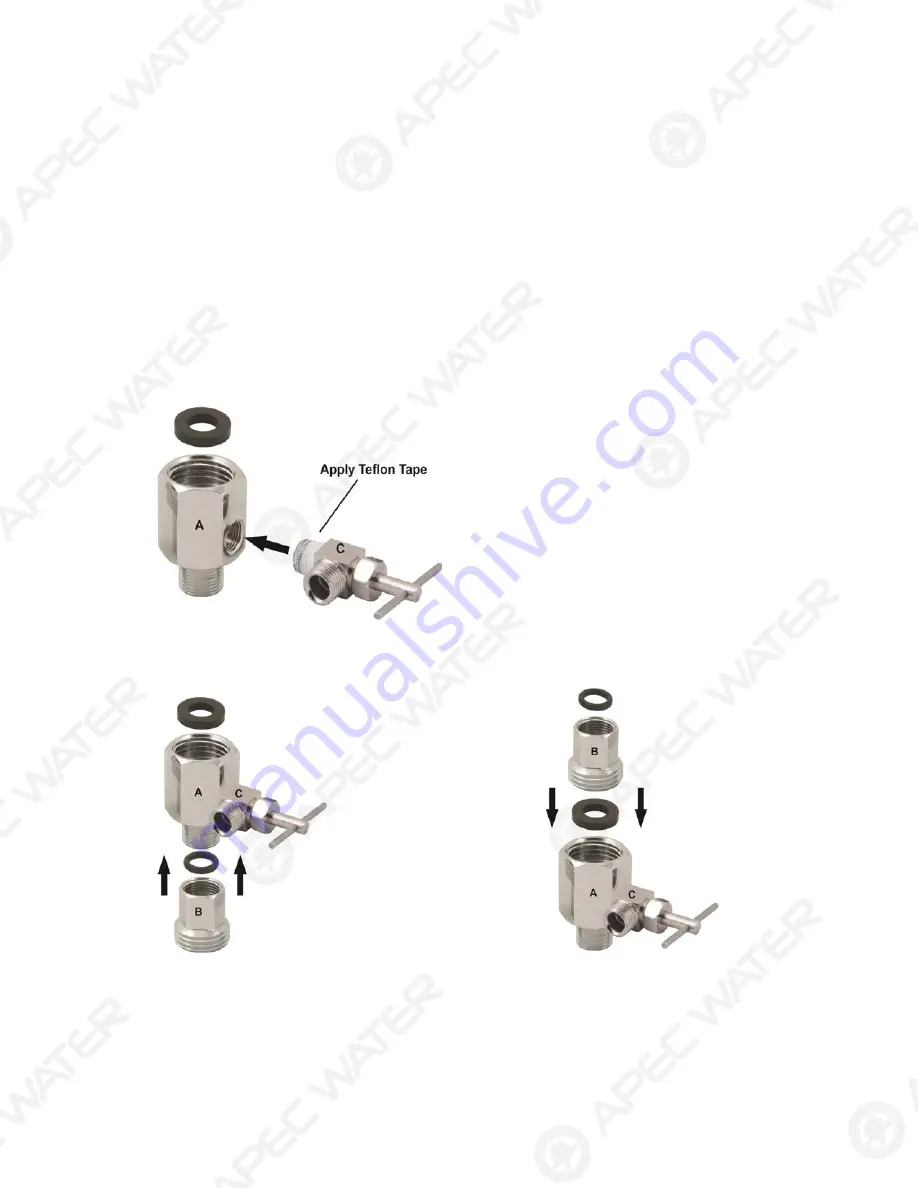
Fig. 4
- If your pipe has a 3/8” Connection.
By attaching the 1/2” x 3/8” converter (B) to the Female end of the water supply
adapter (A), you now have a 3/8” Male and Female water supply adapter.
Fig. 2
Fig. 3
Fig. 4
1/2” Connection
3/8” Connection
5
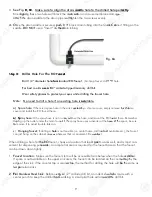
Fig.
.
2
2
-
N
Needle Valve Installation.
Attach the needle valve (C) to w
w
at
at
er
er
s
s
upply adapter (A). Please appl
pl
y
y
5-
5-
6
6
wr
wr
aps of
teflon tape to needle valve
e
pr
pr
ior
to
to connecting it to the water supp
p
ly
ly a
a
da
dap
pter (A).
Fig. 3 - If your pipe has a 1/2”
” Co
Co
nn
nn
ec
e
tion.
By attaching the 1/2” x 3/
/
8”
8” converter (B) to the Male end of the water supply adapter
(A), you now have a 1/2” Male and Female water supply adapter.
Fig. 4 - If your pipe has a 3/8” Connection.
By attaching the 1/2” x 3/8” converter (B) to the
e
Fe
F
male end of the water supply
adap
p
te
te
r
r
(A), you now have a 3/8” Male and Fe
Fe
ma
ma
le
le
water supply adapter.
Fig. 2
Fig 2
Fig. 3
Fig. 4
Connection
1
1/2”
onnection
3/8” Co
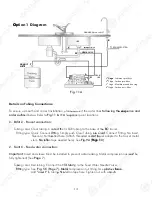
Summary of Contents for Ultimate RO-QUICK90
Page 2: ......


