


User Guide
APconnections, Inc. // 303.997.1300 // www.netequalizer.com
Page 48 of 120
rev. 20170131
© 2014-2017 APconnections, Inc. All Rights Reserved
version 8.4
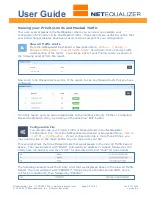
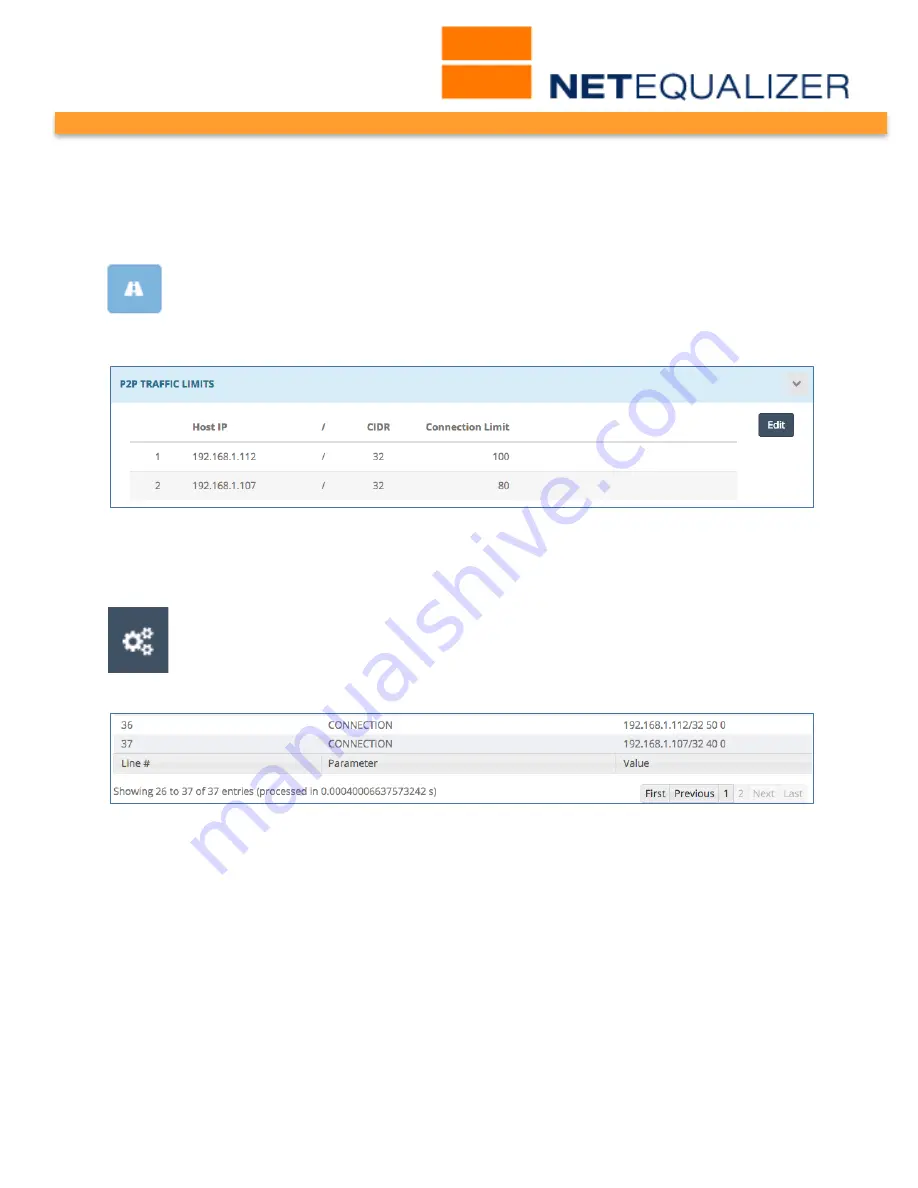
Viewing your Connection Limits
There are two places in the NetEqualizer where you can view your P2P Traffic Limits. We
will discuss both here.
View All Traffic Limits
From the NetEqualizer Dashboard or Navigation Menu,
Click on -> [Setup] ->
Manage Traffic Limits -> View All Traffic Limits
. Scroll down to the P2P Traffic
Limits section of the report. You will see a list of your Connection Limits, as shown
in the following excerpt from the report:
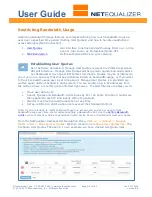
From this report, you can also navigate back to the P2P Traffic Limits batch entry, by
clicking on the dark blue “Edit” button.
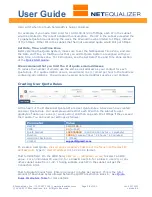
Configuration File
You can also see your Connection Limits in the NetEqualizer Configuration File.
From the NetEqualizer Dashboard or Navigation Menu,
Click on -> [RTR] ->
Configuration
. If your configuration file is more than 25 lines, you may need to
click on the “Last” button to go to the end of your file, as we did in our example below.
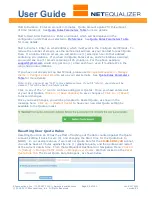
There will be one row for each Connection Limit, encompassing both an inbound and
outbound limit, listing half the value that you selected (i.e. for value=100, you would see
50, as in the 1
st
row above). The rows will start with "CONNECTION" and also show the IP
address or subnet that is being connection limited. In our example, we have two individual
IP (/32) Connection Limits.
Most users typically peak out at 20 to 30 connections per second each for INBOUND and
OUTBOUND traffic, so a Connection Limit of 60 would suffice in most cases. Setting a
Connection Limit = 60
is a good recommendation and excellent at controlling most P2P
traffic.


