


66
OpenBook 1556
4.
See “Removing the Fan Module” on page 65
5.
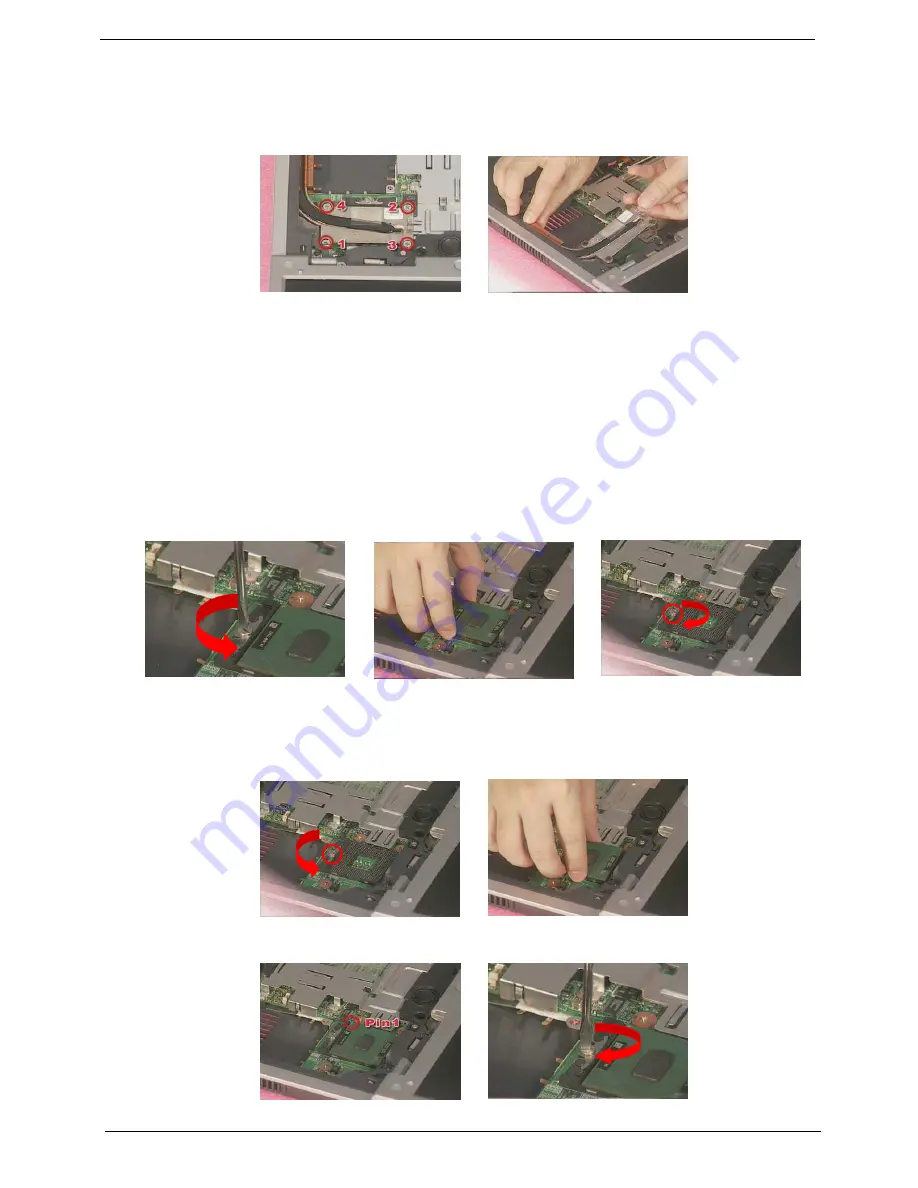
Remove the four screws on the CPU heat sink in the numerical order, and then remove the CPU heat sink
from the main board.
Removing the CPU
1.
See “Removing the Battery” on page 55
2.
See “Removing the Middle Cover” on page 59
3.
See “Removing the Keyboard” on page 60
4.
See “Removing the Fan Module” on page 65
5.
See “Removing the CPU Heat Sink” on page 65
6.
Release the screw counterclockwise by using a flat screwdriver, remove the CPU. The use a flat
screwdriver to lock the CPU socket well by turning clockwise.
NOTE:
To install the CPU, first release the screw counterclockwise, put the CPU back and then secure the
screw clockwise to lock the socket. When you reinstall the CPU back to its socket, please put it back
with the triangle mark this side as shown here.
Summary of Contents for OpenBook 1556
Page 6: ...VI OpenBook 1556 ...
Page 57: ...Chapter 2 49 ...
Page 58: ...50 OpenBook 1556 ...
Page 90: ...82 OpenBook 1556 ...
Page 108: ...100 OpenBook 1556 OpenBook 1556 Exploded Diagram ...
Page 122: ...114 OpenBook 1556 ...
Page 124: ...116 OpenBook 1556 ...
Page 127: ...Chapter 3 119 V Video 22 Resolutions 22 Video controller 24 W Windows XP Environment Test 110 ...
Page 128: ...120 OpenBook 1556 ...


