


11
CONNECTING THE MONITOR
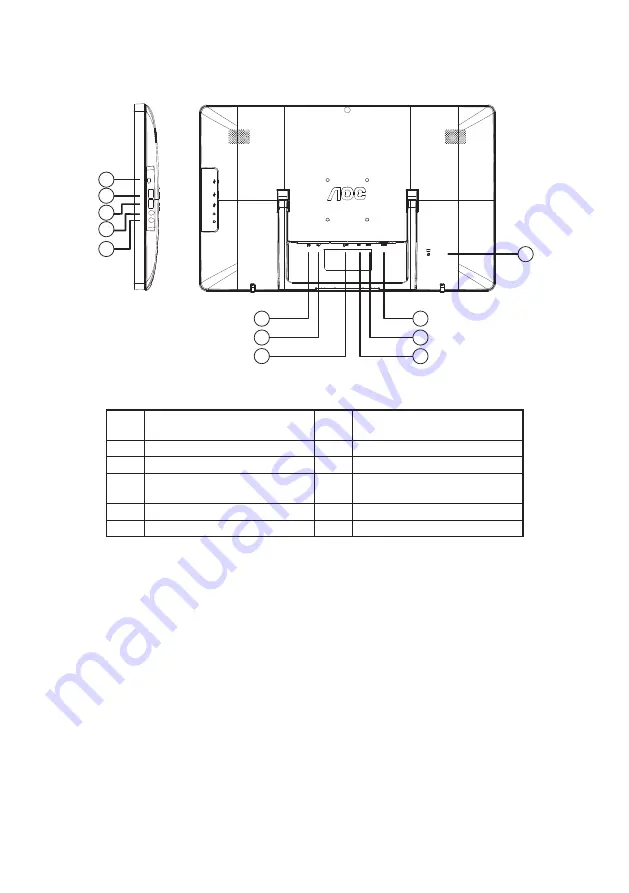
Cable connections at the back of monitor:
1
2
3
6
7
8
12
10
11
5
4
9
1.
D-SUB Signal Input
7.
Micro USB Port (OTG: only
support device function)
2.
HDMI/MHL Signal Input
8.
USB Port
3.
Power Input
9.
USB Port
4.
SD Card Slot (SD/SDHC/SDXC/
MMC/MS/MS-Pro)
10.
Audio In
5.
USB Port
11.
Earphone Out
6.
RJ45 (10/100Mbps)
12.
Kensington Lock
To protect equipment, always turn off the PC and monitor before connecting.
1. Connect the power cable to the AC port on the back of the monitor.
2. Connect one end of the 15-pin D-Sub cable to the back of the monitor and connect the other
end to the computer’s D-Sub port.
3. Optional – (Requires a video card with HDMI port) – Connect one end of the HDMI cable to
the back of the monitor and connect the other end to the computer’s HDMI port.
4. Turn on your monitor and computer.
5. Video content supporting resolution: VGA / HDMI: 1920 x 1080/60Hz (Maximum).
6. If you want to connect monitor and PC by micro USB, please install Android driver in PC
(Android Driver save in CD).
If your monitor displays an image, installation is complete. If it does not display an image, please
refer Troubleshooting on page 51.
Summary of Contents for A2272PW4T
Page 1: ...1 SMART All in One User Manual A2272PW4T A2472PW4T www aoc com 2013 AOC All Rights Reserved...
Page 36: ...36 4 Set the View by to Large icons or Small icons 5 Click on the Display icon...
Page 37: ...37 6 Click on the Change display settings button 7 Click the Advanced Settings button...
Page 38: ...38 8 Click the Monitor tab and then click the Properties button 9 Click the Driver tab...
Page 42: ...42 6 Click the Monitor tab and then click the Properties button 7 Click the Driver tab...
Page 59: ...59 MAC MODEVGA 640x480 75Hz 35 66 667 MAC MODESVGA 832x624 75Hz 49 725 74 551...


