Anzzi 1068280, Install Manual
The Anzzi 1068280 is a sleek and modern faucet designed for easy installation in your home. For detailed instructions, download the free Install Manual from manualshive.com. This manual provides step-by-step guidance on setting up your new faucet, ensuring a hassle-free installation process.
Share
Download


Reviews:
No comments
Related manuals for 1068280
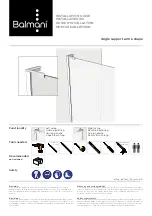
87749
Brand: Balmani Pages: 4

Pfister Sonterra LF-WL8-SNP
Brand: Spectrum Brands Pages: 8

Pfister Ashfield LG49-YP1
Brand: Spectrum Brands Pages: 8

AXOR Citterio E 36104003
Brand: Hans Grohe Pages: 16

Eurodisc SE 36 233
Brand: Grohe Pages: 6

Gita
Brand: Haceka Pages: 4

F3E 2030036177
Brand: Franke Pages: 32

BAGNODESIGN BDA-CUB-UNI-GEN
Brand: Sanipex Pages: 14

Pharo Aquafun 75 M 40
Brand: Hans Grohe Pages: 52

Topaz T80si
Brand: Triton Pages: 24

Stryke T4776-FL
Brand: Delta Pages: 8

EUROSMART COSMOPOLITAN E 36 315
Brand: Grohe Pages: 34

136270
Brand: MAAX Pages: 24

PWS101-D
Brand: PELHAM & WHITE Pages: 8

705D2S1006 Series
Brand: Richelieu Pages: 4

OAKWOOD 508
Brand: Cubro Pages: 8

5011
Brand: Tiger Pages: 12

Eva ACC2501
Brand: Moen Pages: 6


