background image

Important Safety Instructions

Personal Safety During Assembly

Before beginning any fitness program, you should obtain a 
complete physical examination from your physician. When using 
exercise equipment, basic precautions should always be taken, 
including the following:

Instructions

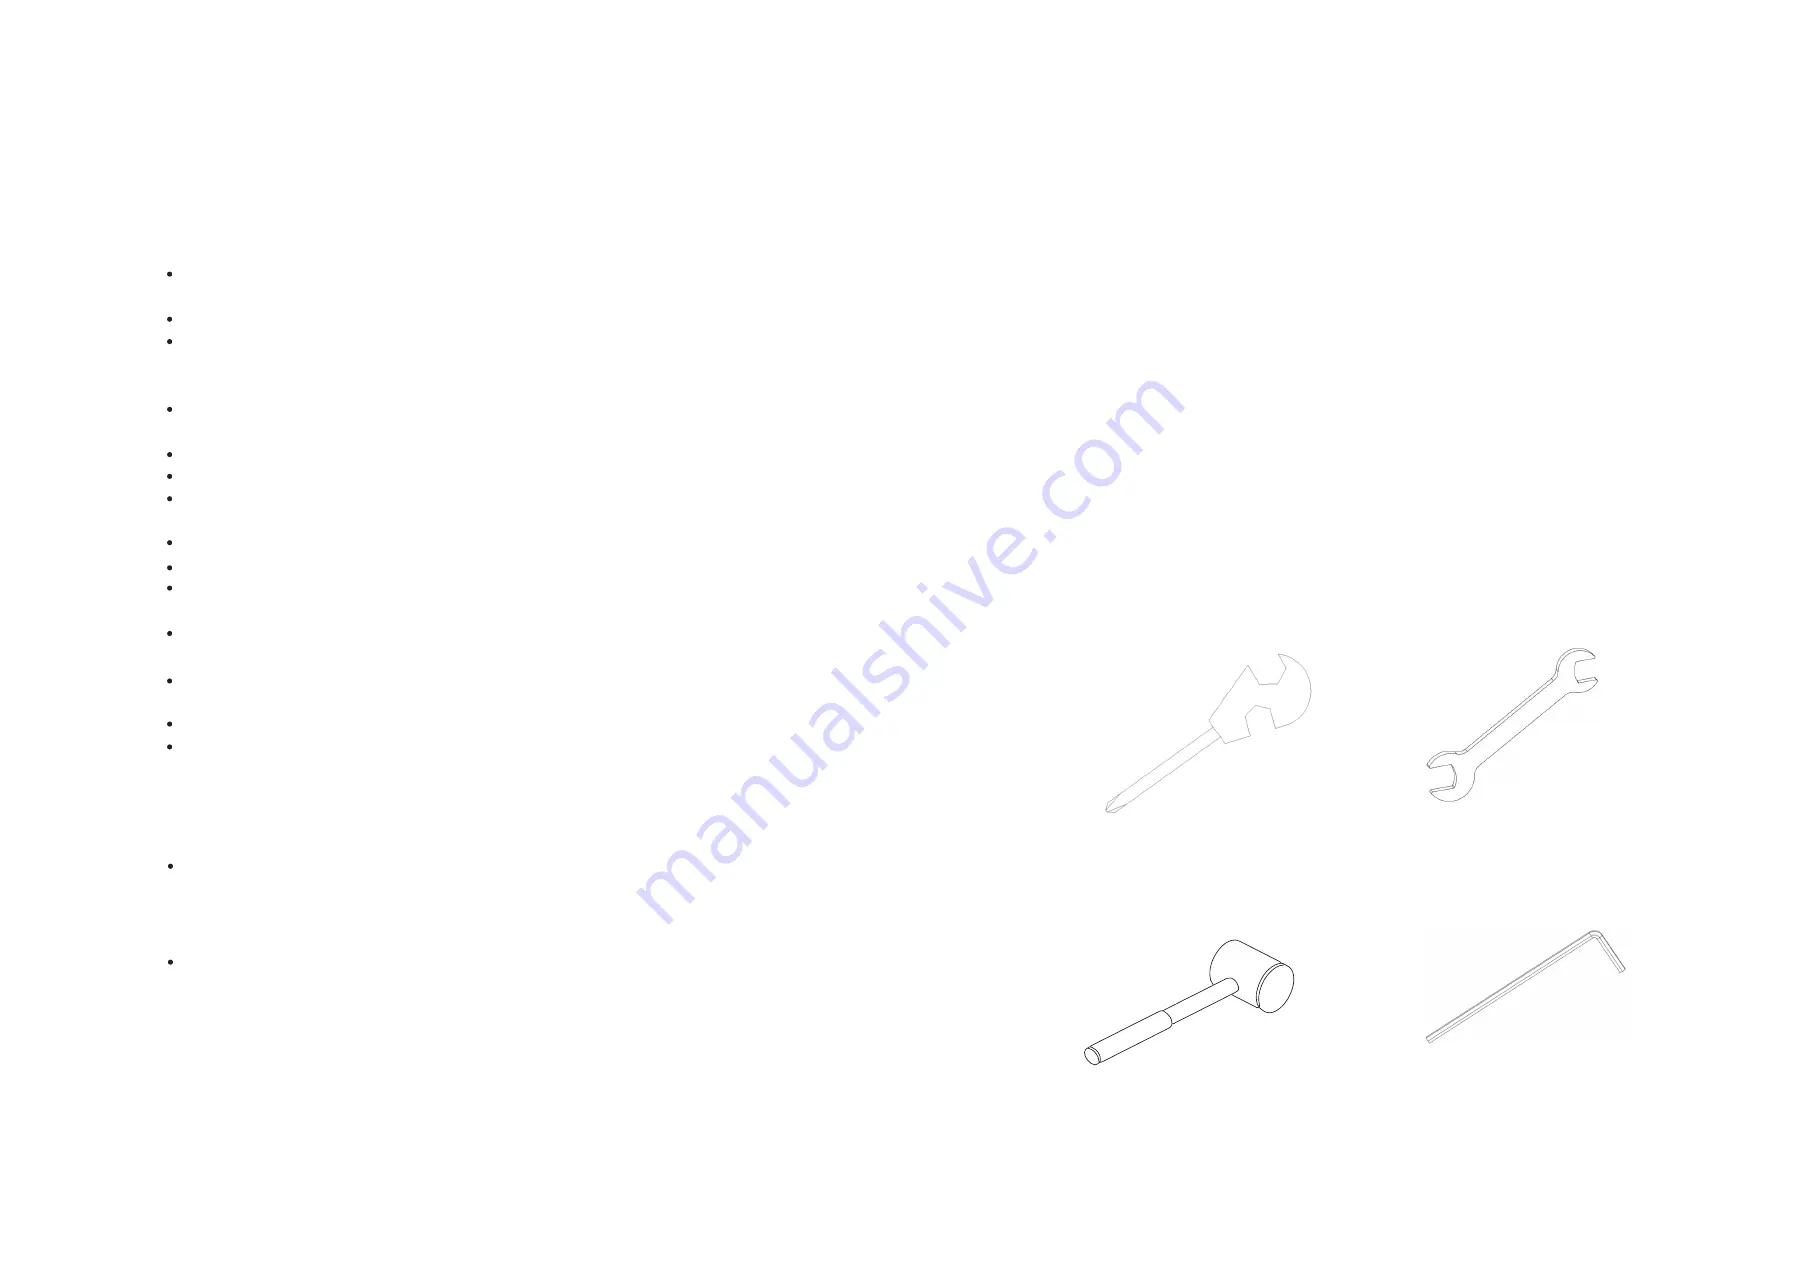
Tools Required

Punch Wrench

Rubber Mallet 

Hex Key Wrench Set

Wrench

Before beginning assembly please take the time to read 
instructions thoroughly. Please use the various lists in this 
manual to make sure that all parts have been included in your 
carton. When ordering, use part number and description from 
the lists. Use only our replacement part when servicing. Failure 
to do so will void your warranty and could result in personal 
injury.

The equipment is designed to provide the smoothest, most 
effective exercise motion possible. After assembly, you should 
check all functions to ensure correct operation. If you experience 
problems, first recheck the assembly instructions to locate any 
possible errors made during assembly. If you are unable to 
correct the problem, call your authorized dealer. Be sure to have 
your serial number and this manual when calling. When all parts 
have been accounted for, continue on.

Read all instructions before using the equipment. These instructions are 
written to ensure your safety and to protect the unit.
Do not allow children on or near the equipment.
Use the equipment only for its intended purpose as described in this 
guide. Do not use accessory attachments that are not recommended 
by the manufacturer: such attachments might cause injuries.
Wear proper exercise clothing and shoes for your workout---no loose 
clothing.
Be careful when getting on or off the equipment.
Do not overexert yourself or work to exhaustion.
If you feel any pain or abnormal symptoms, stop your workout 
immediately and consult your physician.
Never operate the unit when it has been dropped or damaged.
Never drop or insert anything into any opening in the equipment.
Always check the unit and its cables before each use. Make sure that all 
fasteners and cables are secure and in good working condition.
Frayed or worn cables can be dangerous and may cause injury. 
Periodically check these cables for any indication of wear.
Keep hands, limbs, loose clothing and long hair well out of the way of 
moving parts.
Do not attempt to lift more weight than you can control safely.
Do not use the equipment outdoors.

Read each step in the assembly instructions and follow the steps 
in sequence. Do not skip ahead. If you skip ahead, you may learn 
later that you have to disassemble components and that you may 
have damaged the equipment.
Assemble and operate the equipment on a solid, level surface. 
Locate the unit a few feet from walls or furniture to provide easy 
access. The equipment is designed for your enjoyment. By 
following these precautions and using common sense, you will 
have many safe and pleasurable hours of healthful exercise with 
the equipment.

03

04

Summary of Contents for PS04

Page 1: ...HEALTH TECH GMBH international Hanauer Landstr 287 289 60314 Frankfurt am Main DE P 49 0 69 90439168 F 49 0 69 90439169 W www anyfit de Copyright 2018 Anyfit All rights reserved Before use please read through the guide book and keep well ...

Page 2: ...LEG EXTENSION LEG CURL PS04 ...

Page 3: ...ist 5 Exploded View 7 Measurement Guide 9 Assembly Instructions 10 Assembly 11 Maintenance Schedule 17 General Maintenance Information 18 Weight Training Tips 20 Specifications 20 CAUTION Read all precautions and instructions in this manual before using this equipment 01 02 ...

Page 4: ...e the equipment only for its intended purpose as described in this guide Do not use accessory attachments that are not recommended by the manufacturer such attachments might cause injuries Wear proper exercise clothing and shoes for your workout no loose clothing Be careful when getting on or off the equipment Do not overexert yourself or work to exhaustion If you feel any pain or abnormal symptom...

Page 5: ...r Pad Φ60 Φ19 3 5 2 35 Buffer Pad of Weight Plates 2 36 Guiding Rod Cover 2 37 Long Foam 2 39 Cable Cover 1 ITEM NO DESCRIPTION Qty Back Pad 1 40 Seat Pad 1 41 Side Cover Right Front 1 42 Side Cover Left Front 1 43 Side Cover Right Rear 1 44 Side Cover Left Rear 1 45 Top Cover 2 46 Back Cover 1 47 Bottom Cover 1 48 Flat Washer Φ5 5 Φ15 1 8 49 Flat Washer Φ6 5 Φ12 1 2 20 50 Flat Washer Φ8 5 Φ16 1 5...

Page 6: ...19 31 69 36 52 77 16 34 53 71 32 52 63 42 32 70 52 63 22 63 65 53 24 59 60 52 39 51 68 21 76 52 20 62 50 5 12 23 27 27 26 13 40 14 2 6 37 54 7 67 53 41 61 52 26 29 25 30 54 46 64 53 66 53 18 43 72 48 56 49 65 53 57 10 11 74 61 52 71 53 64 75 73 58 29 54 21 78 65 53 ...

Page 7: ...uct in a clean clear uncluttered area This will enable you to move around the product while you are fitting components and reduce the possibility of injury during assembly Note As with any assembled part proper alignment and adjustment is critical While tightening the fasteners be sure to leave room for adjustments Do not fully tighten the fasteners until instructed to do so Be careful to assemble...

Page 8: ...er 21 Pulley Protection Cover 15 Aluminum Pulley φ89 24 Cable Cover 39 Outer End Cap Φ11 Φ65 12 9 28 Bearing Capφ65 29 1XReinforced Fixed Welding 78 to Rotating Plate Support Frame 3 using 1 Flat head Cap Screw M10 30 55 1 Flat head Cap Screw M8 16 54 1 Button Head Cap Screw M10X20 60 1 Flat Washer Φ11XΦ20X2 52 1 Button Head Cap Screw M8X40 59 1 Flat Washer Φ8 5 Φ16 1 5 51 4 Hex Head Bolt M12X35 6...

Page 9: ...ont Cover Left 10 Front Cover Right 11 Side Cover Right Front 42 Side Cover Left Front 43 Bottom Cover 48 to Weight Frame Assembly 1 using 4 Flat Washer Φ5 5 Φ15 1 49 10 Flat Washer Φ6 5 Φ12 1 2 50 4 Flat Washer Φ8 5 Φ16 1 5 51 4 Button Head Cap Screw M5X10 56 10 Button Head Cap Screw M6X20 57 4 Button Head Cap Screw M8X16 58 3 Attach Back Cover 47 Side Cover Right Rear 44 Side Cover Left Rear 45 ...

Page 10: ...ad 41 to Main Frame Assembly 2 using 4 Button Head Cap Screw M10X30 61 4 Flat Washer Φ11XΦ20X2 52 3 Attach 2 Long Foam 37 4 Liner Bushingφ36 75 2 Outer End Capφ80 30 2 Stainless Plate 25 to Curl Foam Frame Assembly 6 and Extension Foam Frame Assembly 12 using 2 Flat head Cap Screw M8 16 54 61 52 40 41 37 75 25 75 30 54 25 12 6 14 2 61 52 ...

Page 11: ...damage or wear Do not use equipment until belts or cables have been replaced Nuts and Bolts Inspect all nuts and bolts for any loosening and tighten if needed Go through a re tightening sequence periodically to ensure that all hardware is tensioned proper Decals Inspect and familiarize yourself with any safety warnings or other user information posted on each decal Anti Skid Surfaces These surface...

Page 12: ...m Always consult your physician before starting any exercise program To be successful in your exercise program it is important to develop an understanding of the basic principles of strength training Now that you have your equipment it is only natural that you want to get started immediately First determine a set of realistic goals and objectives for yourself By deciding on an exercise plan that i...

Reviews: