


* The wiegand output of fingerprint and card are the same.
Operation Guide
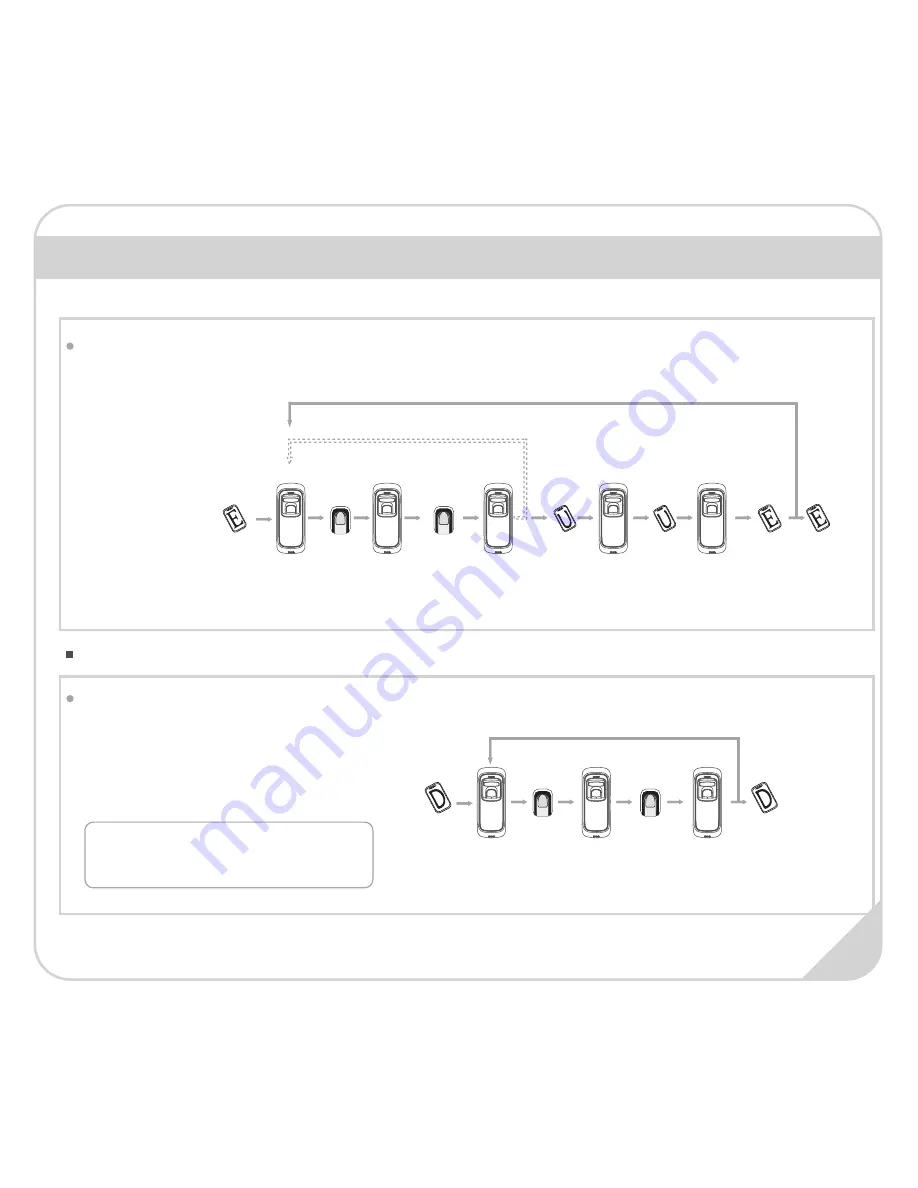
Delete User:
Delete Fingerprint or Fingerprint and Card
Red LED
flashes
4. Continue to delete
After delete one user, you can continue to delete
another user or swipe Delete Card to save and exit.
Blue LED
flashes
10. Continue to register another user
Add Two Fingerprints and Card of one User:
5. Swipe Delete
Card to end
the process
1. Swipe
Delete Card
4. Continue to register the 2nd finger
12
Notice:
When you place finger on M5 Pro, Red LED
flashing with long beeps means the fingerprint
does not exist in the device.
When fingerprints or card belong to one user
ID
,
you can delete either one to delete this
user.
7. Swipe
User Card
8. Swipe User
Card again
2/5. Place finger 3/6. Place finger
again
Note: 1. After finish
enrolling current user,
please swipe enroll card
and then continue register
another user.
1. Swipe
Enroll Card
Exit
Enrollment
11. Swipe
Enroll Card
TWICE to end
the
enrollment
2
Green LED lights up
with 4 short beeps,
registration
successed
Blue LED
flashes fast and
FingerPrint
sensor lights up
9. Swipe
Enroll Card
once
1
Green LED lights up
with 4 short beeps,
registration
successed
Blue LED
flashes fast and
FingerPrint
sensor lights up
2. After finish
enrollment, please
swipe enroll card
TWICE to exit enroll
status.
Green LED lights up
with 4 short beeps,
fingerprint deleted
Red LED flashes
fast and
FingerPrint
sensor lights up
2. Place finger
3. Place finger
again


