background image

UG-1194 

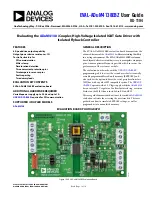
EVAL-ADuM4138EBZ

 User Guide


Rev. 0 | Page 2 of 18 

TABLE OF CONTENTS 

Features .............................................................................................. 1


Evaluation Kit Contents ................................................................... 1


Additional Hardware Required ...................................................... 1


Supported 

i

Coupler Models ............................................................ 1


General Description ......................................................................... 1


Evaluation Board Photograph ......................................................... 1


Revision History ............................................................................... 2


Setting Up the Evaluation Board .................................................... 3


Load ................................................................................................  3


Power Connections ...................................................................... 3


Input/Output Connections ......................................................... 3


Using SPI ....................................................................................... 3


Stock Configuration Fault Overides .......................................... 3


Miller Clamp Activation or Deactivation ................................. 4


GATE_SENSE Pin ........................................................................ 4


Example Propagation Delay Testing .......................................... 4


Register Descriptions ........................................................................5


User Trim Register ........................................................................5


Configuration Trim Register .......................................................5


Control Register ............................................................................6


Evaluation Software Description .....................................................8


Evaluation Software Screenshot ..................................................8


Software Installation Procedure ..................................................8


Evaluation Software Example Operation .................................... 10


When ADuM4138 is not Communicating ............................. 10


Example Read Commands ........................................................ 10


Example EEPROM Write .......................................................... 11


Evaluation Board Schematic ......................................................... 16


Ordering Information .................................................................... 17


Bill of Materials ........................................................................... 17


REVISION HISTORY 

12/2018—Revision 0: Initial Version 


Summary of Contents for EVAL-ADuM4138EBZ

Page 1: ...d demonstrates the advanced features of the ADuM4138 while maintaining flexibility in a testing environment The EVAL ADuM4138EBZ evaluation board layout delivers a circuit that is easy to manipulate via jumper pins A more optimized layout is possible which increases the performance of the system as a whole The evaluation board works with the USB SDP CABLEZ programming cable to access the secondary...

Page 2: ...Fault Overides 3 Miller Clamp Activation or Deactivation 4 GATE_SENSE Pin 4 Example Propagation Delay Testing 4 Register Descriptions 5 User Trim Register 5 Configuration Trim Register 5 Control Register 6 Evaluation Software Description 8 Evaluation Software Screenshot 8 Software Installation Procedure 8 Evaluation Software Example Operation 10 When ADuM4138 is not Communicating 10 Example Read C...

Page 3: ...lator on the primary side USING SPI The ADuM4138 evaluation board interfaces easily with the USB SDP CABLEZ cable When using the SPI bus place jumpers on P18 P19 P20 and P21 Connect the USB SDP CABLEZ to P17 The evaluation board has an indexing hole to ensure proper polarity If the USB SDP CABLEZ system is to be used for SPI communication refer to the Software Installation Procedure section for mo...

Page 4: ...ct and disconnect the GATE_SENSE pin for manipulation testing The left side of this pin is connected directly to the IC and the right side is connected to the available sensing node of an IGBT module It is recommended always to leave the P1 jumper connected unless a specific test is required for example testing the Miller clamp activation voltage EXAMPLE PROPAGATION DELAY TESTING From a stock conf...

Page 5: ... if the TS1 pin detects an overtemperature event OT_Fault_Sel OT_Fault_Sel selects between two overtemperature fault voltage thresholds Selecting 0 sets the falling threshold to 1 64 V typical and the rising threshold to 1 68 V typical Setting the OT_Fault_SELF bit to 1 sets the falling threshold to 1 68 V typical and the rising threshold to 1 72 V typical OC_TIME_OP Set OC_TIME_OP to 1 to disable...

Page 6: ... PWM output frequency is 50 kHz typical CONTROL REGISTER Table 5 Address 10 Control Register Map Field Bits Description Reserved 23 6 Reserved ECC2_DBL_ERR 5 ECC Bank 2 double error detected ECC2_SNG_ERR 4 ECC Bank 2 single error detected ECC1_DBL_ERR 3 ECC Bank 1 double error detected ECC1_SNG_ERR 2 ECC Bank 1 single error detected Prog_Busy 1 Program busy bit Sim_Trim 0 Simulate trim ECC2_DBL_ER...

Page 7: ... detected Prog_Busy Set this bit high in order to program the EEPROM memory When this bit is set to 1 the EEPROM begins to write to memory The hardware sets this bit back to 0 to indicate that programming has occurred The write sequence takes a maximum of 40 ms maximum to perform but may write faster than 40 ms maximum If shorter wait times are desired the Prog_Busy bit can be read back multiple t...

Page 8: ...ead commands This is because of the way that the SPI setup operates The second read command pushes the data loaded by the first read command to the MISO pin The result of the second read appears in the Addr 00 Output field Read Addr 01 Click Read Addr 01 to see what the ADuM4138 has in the EEPROM at Address 01 configuration trim bits Clicking Read Addr 01 sends two read commands This is because of...

Page 9: ...Trim bit at Address 10 is set to 1 the write affects the operation of the ADuM4138 with the new settings written by the user The Sim_Trim bit is set to 0 until the device is powered down or until new settings are written Write Read Addr 10 Click Write Read Addr 10 to perform a single write comprised of the bit pattern set by the user in the Prog Busy field and the Sim Trim field After the single w...

Page 10: ...ADuM4138 is communicating properly as the address bits are displayed on a read command Additionally with default settings the Flyback_V setting is 111 see Figure 9 EXAMPLE READ COMMANDS To perform a read command first power up the ADuM4138 Then click the read button of the desired address to be read If the ADuM4138 EEPROM has never been programmed it is expected that all 0s except the address are ...

Page 11: ...s in the Addr 00 Output field showing that the value was written to the register At this time the GAIN_1 EEPROM register is not yet programmed Note that Sim_Trim is still 1 see Figure 12 To write Address 00 data to EEPROM set the Prog Busy field to 1 and click Write Read Addr 10 see Figure 13 The write read button performs a write and then a read as normal The Prog_Busy green indicator is usually ...

Page 12: ...UG 1194 EVAL ADuM4138EBZ User Guide Rev 0 Page 12 of 18 16245 011 Figure 11 Setting the Sim_Trim Bit 16245 012 Figure 12 Writing Example Register Edit ...

Page 13: ...EVAL ADuM4138EBZ User Guide UG 1194 Rev 0 Page 13 of 18 16245 013 Figure 13 Programming EEPROM 16245 014 Figure 14 ADuM4138 Showing Programming Complete ...

Page 14: ...s easier to see The other read buttons can also be clicked but it is not necessary Figure 15 shows all read buttons clicked while the ADuM4138 is off Now power up the ADuM4138 and click all the read buttons It can then be seen that Bit 0 of GAIN_1 survives a power up indicating that the EEPROM is programmed The same steps can be performed with the GAIN_1 field set to 0 to return the EEPROM to its ...

Page 15: ...EVAL ADuM4138EBZ User Guide UG 1194 Rev 0 Page 15 of 18 16245 016 Figure 16 EEPROM Successfully Written ...

Page 16: ...UG 1194 EVAL ADuM4138EBZ User Guide Rev 0 Page 16 of 18 EVALUATION BOARD SCHEMATIC 16245 017 Figure 17 EVAL ADuM4138EBZ Circuit Schematic ...

Page 17: ... 690367181072 Wurth Electronics Q1 Transistor HEXFET power MOSFET IRLML0060TRPBF Infineon Q2 Transistor N channel HEXFET power MOSFET IRLML2030TRPBF Infineon R1 2 Ω resistor 1206 ERJ 8RQF2R0V Panasonic R10 20 Ω resistor 0603 P0603E20R0BBT Vishay R11 20 kΩ resistor 0603 ERJ 3EKF2002V Panasonic R12 0 1 Ω resistor 0603 ERJ 3RSFR10V Panasonic R13 R19 10 kΩ resistor 0603 ERJ 3EKF1002V Panasonic R14 20 ...

Page 18: ...er party for any reason Upon discontinuation of use of the Evaluation Board or termination of this Agreement Customer agrees to promptly return the Evaluation Board to ADI ADDITIONAL RESTRICTIONS Customer may not disassemble decompile or reverse engineer chips on the Evaluation Board Customer shall inform ADI of any occurred damages or any modifications or alterations it makes to the Evaluation Bo...

Reviews: